Seat
Disassembly
In this manual: Seat
48steps
~288min
4/5difficulty
Done 0 of 48
Caution: Wear protective gloves. Sharp areas on the seatback frame, seat cushion frame and reclining adjuster may injure your hands.



Hint:
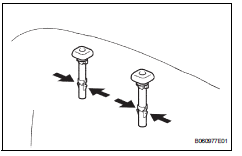
- Remove rear seat headrest assembly
- Remove rear seat center headrest assembly
- Remove center armrest hinge cover rh
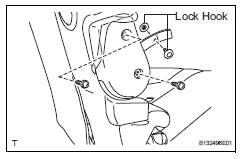
- Return the seatback to the upright position.
- Remove the 2 rear seatback lock hooks.
- Fold back the seatback cover until the screws are visible, and remove the 2 screws.
- Detach the claw and remove the hinge cover.
- Remove center armrest hinge cover lh
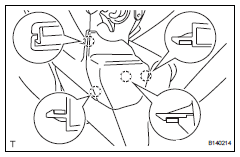
- Using a screwdriver, detach the 4 claws and remove the hinge cover.
Tape the screwdriver tip before use.
- Remove rear seat center armrest assembly
- Remove the 2 nuts and armrest.
- Remove rear seat center armrest cover
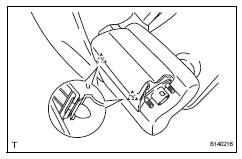
- Detach the 2 clips.
- Pull the armrest cover in the direction indicated by the arrow in the illustration to detach the 2 claws.
- Remove rear no. 1 Seat armrest assembly lh

- Remove the 2 nuts and armrest.
- Remove rear no. 3 Seat cushion hinge cover
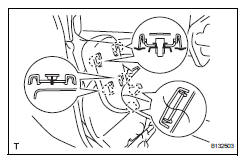
- Using a screwdriver, detach the 6 claws and remove the hinge cover.
Tape the screwdriver tip before use.
- Remove rear seat cushion lower hinge cover lh
- Using a screwdriver, detach the 5 claws and remove the hinge cover.
Tape the screwdriver tip before use.
- Remove rear seat inner belt assembly rh (see page sb-40)
- Remove rear no. 1 Seat cushion assembly lh
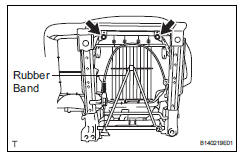
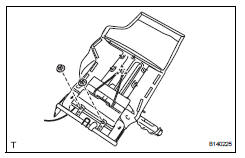
- Disconnect the rubber band of the seatback cover from the seat cushion frame.
- Remove the 2 bolts
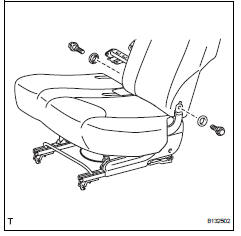
- Remove the 2 bolts, 2 bushes and cushion.
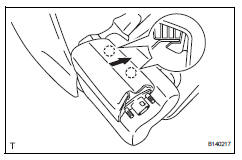
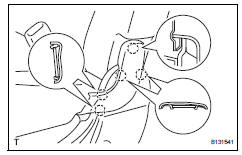
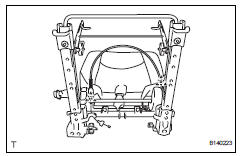
- Remove rear no. 1 Seat cushion cover
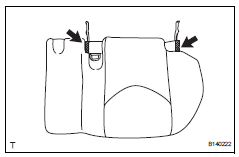
- Detach the 2 hooks.
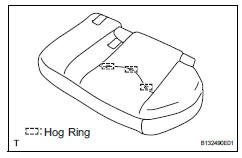
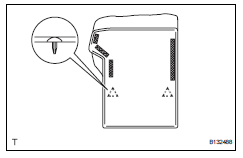
- Remove the 29 hog rings and seat cushion cover (with pad) from the seat cushion frame.
- Remove the 3 hog rings and seat cushion cover from the seat cushion pad.
- Remove rear seat rear bracket cover lh
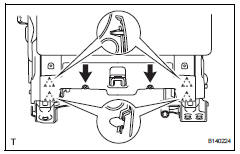
- Open the lower part of the seatback cover. Then remove the 2 screws.
- Using a screwdriver, detach the 4 clips and remove the bracket cover.
Tape the screwdriver tip before use.
- Remove rear seat cushion moulding lh
- Remove the screw.
- Detach the 2 claws and remove the moulding.
- Remove rear seat cushion rear moulding lh
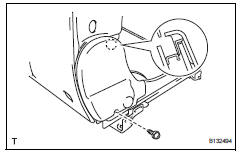
- Remove the screw.
- Detach the claw and remove the moulding.
- Remove rear seat reclining release lever
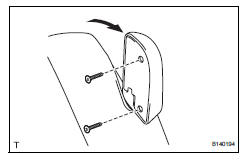
- Pull the reclining control lever to reveal the 2 screws. Then remove the 2 screws and cover.
- Using a screwdriver, detach the claw and remove the release lever.
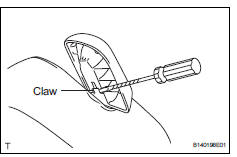
Hint:
Tape the screwdriver tip before use.
- Remove rear seatback lock control lever base lh
- Remove the screw.
- Using a screwdriver, detach the 2 claws and remove the lever base.
Tape the screwdriver tip before use.
- Remove rear no. 1 Seatback assembly lh
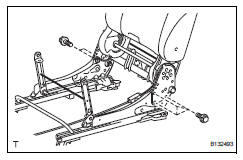
- W/o rear no. 2 Seat: detach the 2 clamps and disconnect the cable from the reclining adjuster.
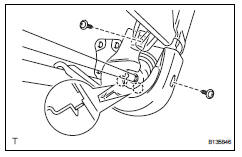
- Remove the 5 bolts and seatback.
- Remove rear seat lap type belt assembly center lh (see page sb-39)
- Remove rear seatback protector
- Using a clip remover, detach the 2 clips and open the fastening tape.
If clips are damaged during removal, replace them.
- Detach the clip.
- Remove the 2 nuts and protector.
- Remove rear no. 1 Seatback cover
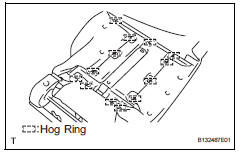
- Lift up the seatback cover and remove the 13 hog rings.
- Detach the 4 claws and remove the 2 headrest supports.
- Remove the seatback cover (with pad) from the seatback frame.
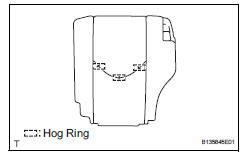
- Remove the 3 hog rings and seatback cover from the seatback pad.
- Remove rear seat cover lh
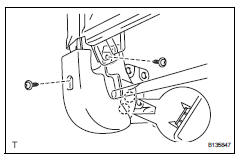
- Remove the 2 screws.
- Using a screwdriver, detach the 2 claws and remove the cover.
Tape the screwdriver tip before use.
- Remove rear seatback cover lh
- Remove the 2 screws.
- Using a screwdriver, detach the 2 claws and remove the cover.
Tape the screwdriver tip before use.
Test yourself
A quick Toyota RAV4 quiz: every answer comes with an explanation and a link to the manual page.
Was this page helpful?