Seat
Installation
In this manual: Seat
34steps
~204min
4/5difficulty
Done 0 of 34
- Install rear no. 1 Seat assembly lh (w/o rear no. 2 Seat)
- Fully tilt the seatback forward.
- Place the seat in the cabin.
Be careful not to damage the vehicle body.
- Connection procedures of seat to lock cable when reusing seat:

- Using a screwdriver, detach the claw and remove the connector case from the seat.
Tape the screwdriver tip before use.
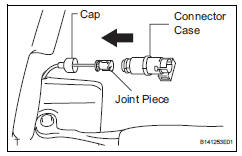
- Install the connector case to the body's cap.
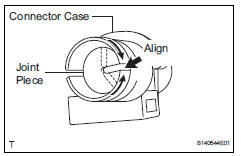
- Pull out the joint piece. Align the slits of the joint piece and connector case.
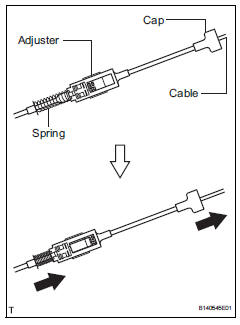
- Compress the spring of the adjuster, and pull out the cable from the seat's cap.
Perform this procedure with the lock of the adjuster released.
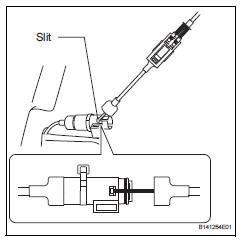
- Install the seat cable's end part to the connector case's slit.
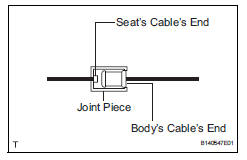
Hint:
Position the joint piece cable's end part as shown in the illustration.
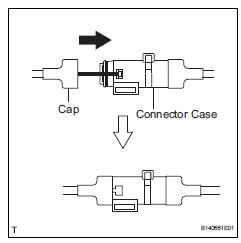
- Install the seat's cap to the connector case.
- Temporarily place the seat into the vehicle where it will be installed.
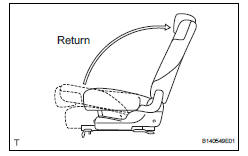
- Return the seatback to the upright position.

- Attach the claws of the connector and adjuster, and install them to the seat.
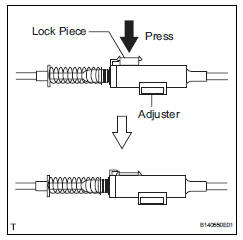
- Press the adjuster's lock piece to lock it.
When pressing the lock piece, make sure the adjuster's spring is not compress.

- Connection procedures of seat to lock cable when replacing seat:
- Cut the joint piece on the lock cable, and remove it.
- A joint piece is included with new seats.
- This procedure is not necessary when the lock cable is replaced with a new one.
- Temporarily place the seat into the vehicle where it will be installed.
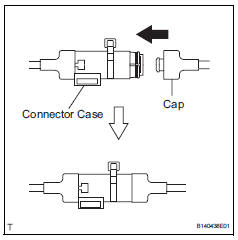
- Install the body's cap to the connector case.
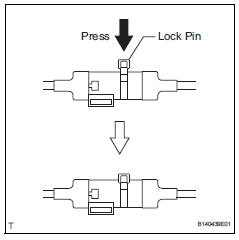
- Press the adjuster's lock pin.
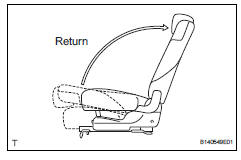
- Return the seatback to the upright position.
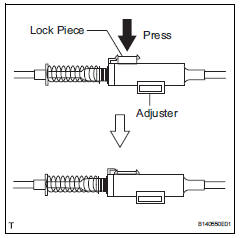
- Press the adjuster's lock piece to lock it.
When pressing the lock piece, make sure the adjuster's spring is not compress.
- Lift up the seat track adjusting handle and move the seat to the foremost position.

- Tighten the 3 bolts on the rear side of the seat.
Tighten the bolts in the order indicated in the illustration.
- Lift up the seat track adjusting handle and move the seat to the rearmost position.
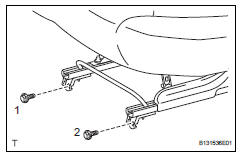
- Tighten the 2 bolts on the front side of the seat.
Tighten the bolts in the order indicated in the illustration.
- Install rear no. 1 Seat assembly lh (w/ rear no. 2 Seat)
- Fully tilt the seatback forward.
- Place the seat in the cabin.
Be careful not to damage the vehicle body.
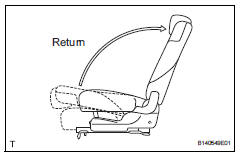
- Return the seatback to the upright position.
- Lift up the seat track adjusting handle and move the seat to the foremost position.
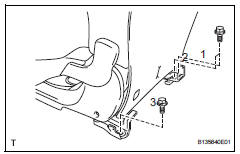
- Tighten the 3 bolts on the rear side of the seat.
Tighten the bolts in the order indicated in the illustration.
- Lift up the seat track adjusting handle and move the seat to the rearmost position.
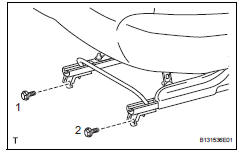
- Tighten the 2 bolts on the front side of the seat.
Tighten the bolts in the order indicated in the illustration.
- Install rear no. 1 Seat lock cable assembly (w/o rear no. 2 Seat)
- Attach the clamps and install the cable to the vehicle body.
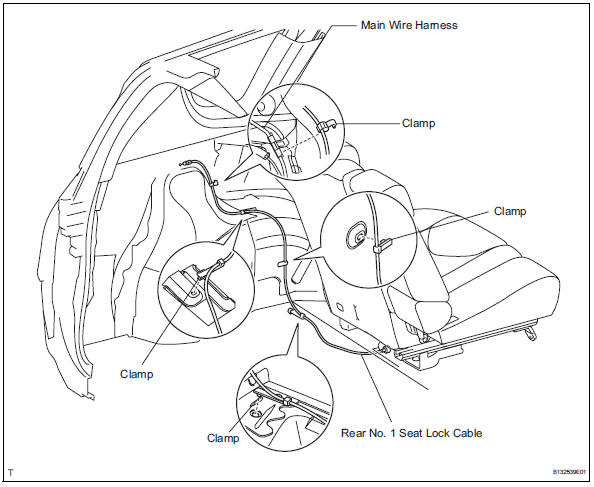
- Install rear seat lap type belt assembly center rh (w/ rear no. 2 Seat) (see page sb-42)
- Install rear seat lap type belt center assembly rh (w/o rear no. 2 Seat) (see page sb- 42)
- Install rear seat leg cover

- Attach the 8 claws to install the 2 leg covers.
- Install rear no. 5 Seat leg side cover
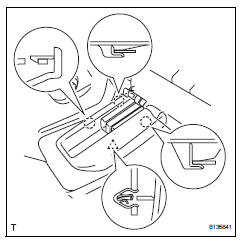
- Attach the 3 claws and clip to install the side cover.
- Install rear no. 4 Seat leg side cover (w/ rear no. 2 Seat)

- Attach the 4 claws to install the side cover.
- Install rear no. 4 Seat leg side cover (w/o rear no. 2 Seat)

- Attach the 4 claws to install the rear no. 4 Seat leg side cover.
- Install rear no. 3 Seat leg side cover (w/ rear no. 2 Seat)
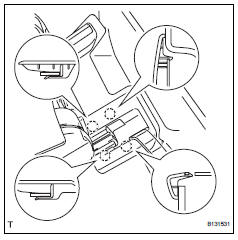
- Attach the 4 claws to install the side cover.
- Install rear no. 3 Seat leg side cover (w/o rear no. 2 Seat)
- Attach the 4 claws to install the side cover.
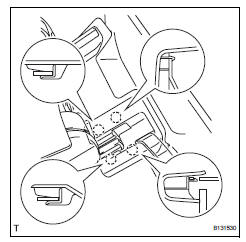
- Install reclining remote control lever sub-assembly lh (w/o rear no. 2 Seat)

- Connect the rear no. 1 Seat lock cable to the lever.

- Install the lever with the 2 bolts.
- Install deck trim side panel assembly lh (w/ o rear no. 2 Seat) (see page ir-52)
- Install tether anchor bracket subassembly (w/o rear no. 2 Seat) (see page ir-54)
- Install reclining remote control lever bezel lh (w/o rear no. 2 Seat)
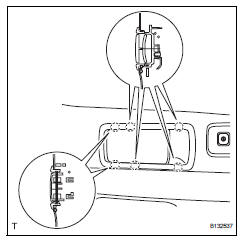
- Attach the 6 claws to install the bezel.
- Install rear floor finish plate (w/o rear no.
Test yourself
A quick Toyota RAV4 quiz: every answer comes with an explanation and a link to the manual page.
Was this page helpful?