Use the same procedures for the rh side and lh side.
The procedures listed below are for the lh side.
When removing the moulding, heat the vehicle body and moulding using a heat light.
Standard heating temperature Notice:
Do not heat the vehicle body and moulding excessively.
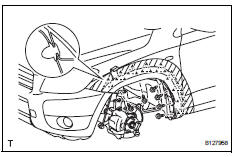
Remove front fender moulding subassembly lh
Put protective tape around the moulding.
Remove the 4 screws and detach the 2 clips.
Using a moulding remover, detach the 9 clips and remove the moulding.
Notice:
If reusing the moulding, take care not to damage the moulding.
Be careful not to damage the vehicle body.
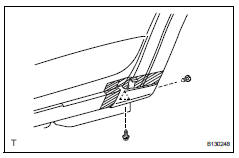
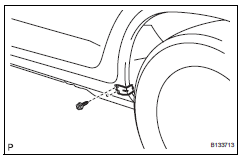
Remove no. 2 Rear wheel opening extension lh
Put protective tape around the moulding.
Remove the screw.
Using a clip remover, detach the 2 clips and remove the extension.
Notice:
If reusing the extension, take care not to damage the extension.
Be careful not to damage the vehicle body.
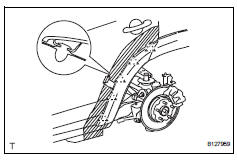
Remove no. 1 Rear wheel opening extension lh
Put protective tape around the extension.
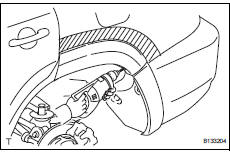
Using a drill bit of less than ö 4 mm (0.16 In.), Drill out the 3 rivet flanges.
Hint:
Wind tape around the drill bit approximately 5 mm (0.20 In.) From the tip of the drill.
Notice:
Do not drill the rivet at an angle as this will cause damage to the drill and drill hole. Line up the drill and rivet, and carefully drill out the rivet head.
Be careful as the cut rivet will be very hot.
Continue drilling and push out the remaining rivet fragments using the drill.
Using a vacuum cleaner, remove the rivet fragments and shavings from the drilled areas.
Using a heat light, heat the extension and vehicle body.
Cut the double-sided tape that holds the moulding to the vehicle body with a knife.
Notice:
If reusing the extension, take care not to damage the extension.
Be careful not to damage the vehicle body.
Using a moulding remover, detach the 5 clips and remove the extension.
Remove rear quarter outside moulding lh
Put protective tape around the moulding.
Using a drill bit of less than ö 4 mm (0.16 In.), Drill out the 3 rivet flanges.
Hint:
Wind tape around the drill bit approximately 5 mm (0.20 In.) From the tip of the drill.
Notice:
Do not drill the rivet at an angle as this will cause damage to the drill and drill hole. Line up the drill and rivet, and carefully drill out the rivet head.
Be careful as the cut rivet will be very hot.
Continue drilling and push out the remaining rivet fragments using the drill.
Using a vacuum cleaner, remove the rivet fragments and shavings from the drilled areas.
Using a heat light, heat the moulding and vehicle body.
Using a moulding remover, detach the 5 clips and remove the moulding.
Notice:
If reusing the moulding, take care not to damage the moulding.
Be careful not to damage the vehicle body.
Remove no. 2 Rocker panel moulding retainer lh
Remove the 2 screws and retainer.
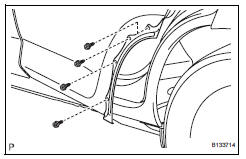
Remove quarter opening retainer lh
Remove the 4 screws and retainer.
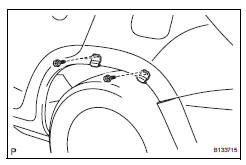
Remove no. 1 Rocker panel moulding retainer lh
Remove the 4 screws and 2 retainers.
?
Test yourself
A quick Toyota RAV4 quiz: every answer comes with an explanation and a link to the manual page.