Instrument panel
Removal
In this manual: Instrument panel
16steps
~96min
4/5difficulty
Done 0 of 16
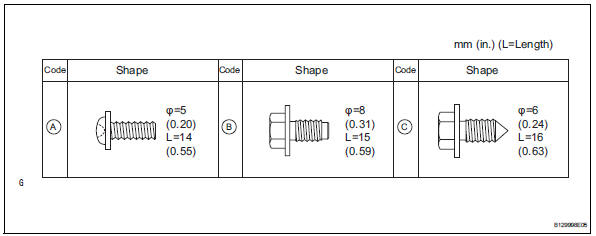
- Table of bolt, screw and nut
All bolts, screws and nuts relevant to installing and removing the instrument panel are shown along with their alphabet codes in the table below.
- Disconnect cable from negative battery terminal
- Remove instrument cluster finish panel sub-assembly
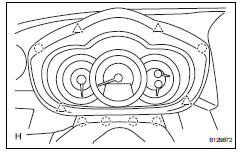
- Using a screwdriver, detach the 4 clips, 6 claws and remove the instrument cluster finish panel.
Tape the screwdriver tip before use.
- Remove combination meter assembly
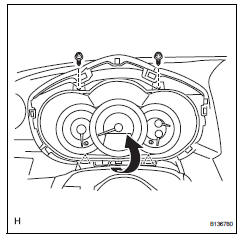
- Remove the 2 screws.
- Pull the combination meter as indicated by the arrow in the illustration to detach the 2 clips.
- Disconnect the connector and remove the combination meter.
- Remove no. 2 Instrument cluster finish panel center
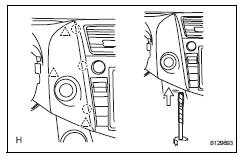
- Using a screwdriver, detach the 3 clips, 3claws and remove the cluster finish panel, then disconnect the connector.
Tape the screwdriver tip before use.
- Remove no. 1 Instrument cluster finish panel center
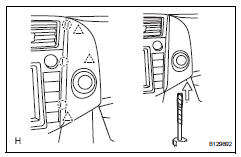
- Using a screwdriver, detach the 3 clips, 3claws and remove the cluster finish panel, then disconnect the connector.
Tape the screwdriver tip before use.
- Remove radio receiver
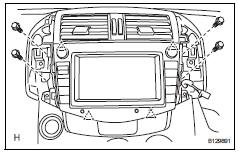
- Remove the 4 bolts.
- Detach the 4 clips, remove the radio receiver and then disconnect the connectors.
- Remove instrument panel register assembly center
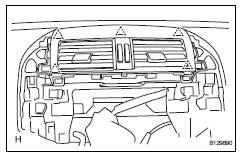
- Using a screwdriver, detach the 5 clips and remove the instrument panel register.
Tape the screwdriver tip before use.
- Remove glove compartment door assembly (see page ip-20)
- Remove front pillar garnish lh (see page ir- 27)
- Remove front pillar garnish rh (see page ir- 28)
- Remove upper instrument panel

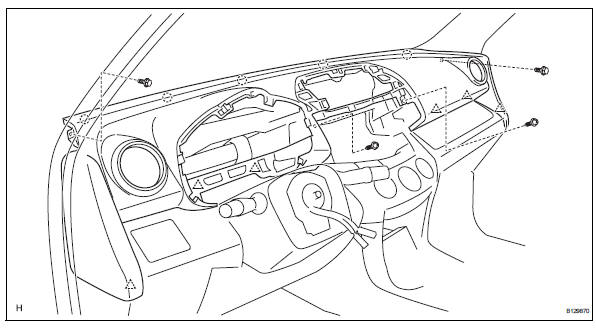
- Remove the 2 bolts from the passenger airbag.
- Disconnect the passenger airbag connector.
- Remove the 2 bolts and 2 screws.
- Disconnect the connectors and clamps.
- Detach the 6 clips and 5 claws and remove the instrument panel.
Test yourself
A quick Toyota RAV4 quiz: every answer comes with an explanation and a link to the manual page.
Was this page helpful?