Adjustment
HINT: If the malfunction does not disappear by following the procedure in ADJUSTMENT and the rear No. 2 seat assembly needs to be replaced, do not disassemble the rear No. 2 seat assembly.
1. ADJUST FRONT LEG
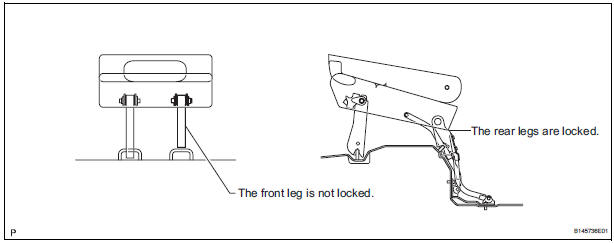
HINT: Perform the following procedure if the inner leg does not lock.
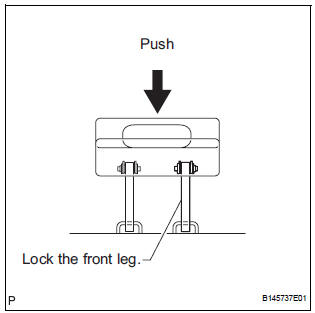
- Push down on the rear No. 2 seat assembly to lock the front leg.
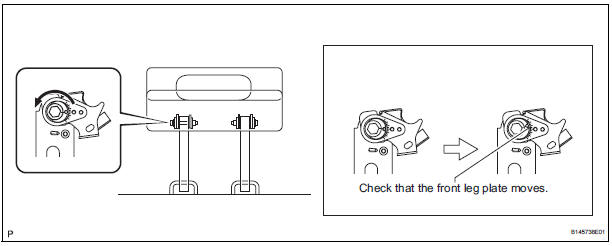
- Loosen the bolt on the front leg that has locked and move the rear No. 2 seat assembly up and down a few times.
NOTICE: Check that the front leg plate moves.
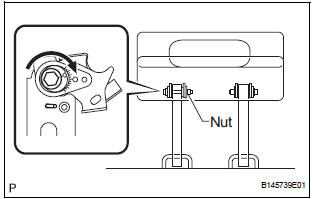
- Tighten the bolt.
Torque: 14.5 N*m (153 kgf*cm, 11 ft.*lbf) NOTICE: Hold the nut to prevent it from turning.
- Check that the rear No. 2 seat assembly operates normally and both front legs lock securely.
2. REINSTALL REAR NO. 2 SEAT ASSEMBLY
HINT: Perform the following procedure if the rear No. 2 seat assembly is removed with any of the 4 legs released or if the rear legs are moved with the rear No. 2 seat assembly removed.
- Remove the following components:
- Rear No. 2 seat leg side garnish sub-assembly
- Rear seat leg garnish sub-assembly
- No. 2 seat hinge cover
- Rear No. 2 seat assembly
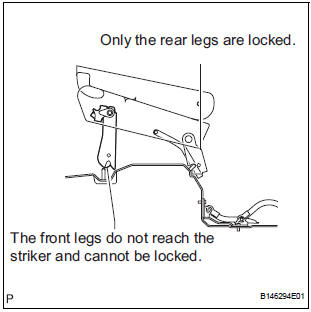
- Lock the rear legs to the striker.
- Lock the front legs to the striker.
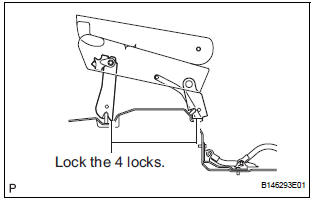
- If any of the front legs do not lock, perform the following procedure:
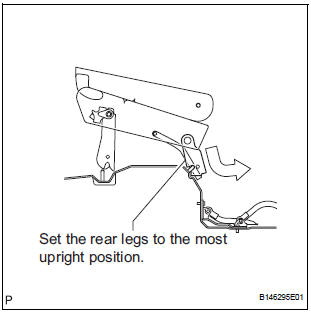
- Connect the connector.
- Operate the stowing/return switch to set the rear legs to the most upright position.
- Lock the front legs to the striker.
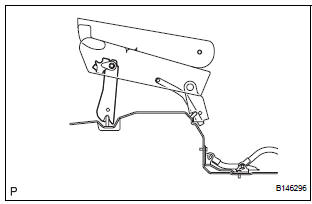
- Align the links of the No. 2 seat leg sub-assembly with the No. 2 seat cushion frame sub-assembly.
- Align the screw holes on the No. 2 cushion frame sub-assembly with the square link holes on the No.
HINT: If the holes do not align, move the No. 2 seat cushion frame sub-assembly horizontally to align the holes.
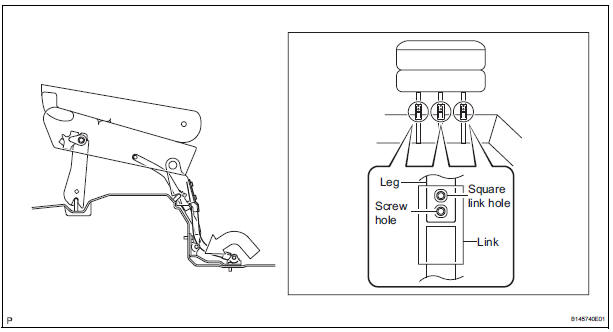
- Operate the stowing/return switch to adjust the rear legs so that the rear legs fit to the links of the No. 2 seat leg sub-assembly as shown in the illustration.
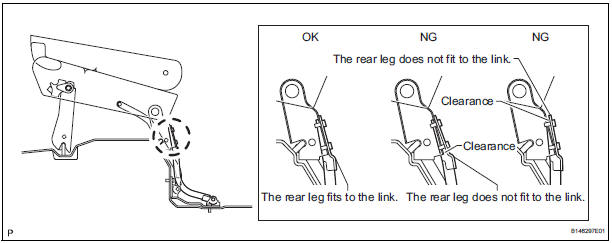
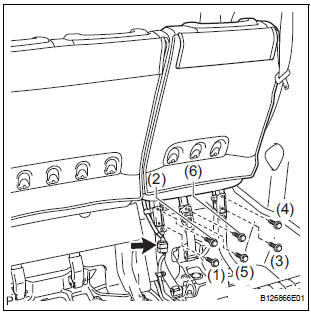
- Install the 6 bolts.
Torque: 19 N*m (194 kgf*cm, 14 ft.*lbf) NOTICE: Tighten the bolts in the order shown in the illustration.
- Install the following components:
- No. 2 seat hinge cover
- Rear seat leg garnish sub-assembly
- Rear No. 2 seat leg side garnish sub-assembly
- Check that the rear No. 2 seat assembly operates normally and the rear legs lock securely.
NOTICE: If any of the front legs do not lock normally, perform the procedure in "1. ADJUST FRONT LEG".
Test yourself
A quick Toyota Sienna quiz: every answer comes with an explanation and a link to the manual page.