Lighting
Back-up light assembly
In this manual: Lighting
4steps
~24min
2/5difficulty
Done 0 of 4
COMPONENTS

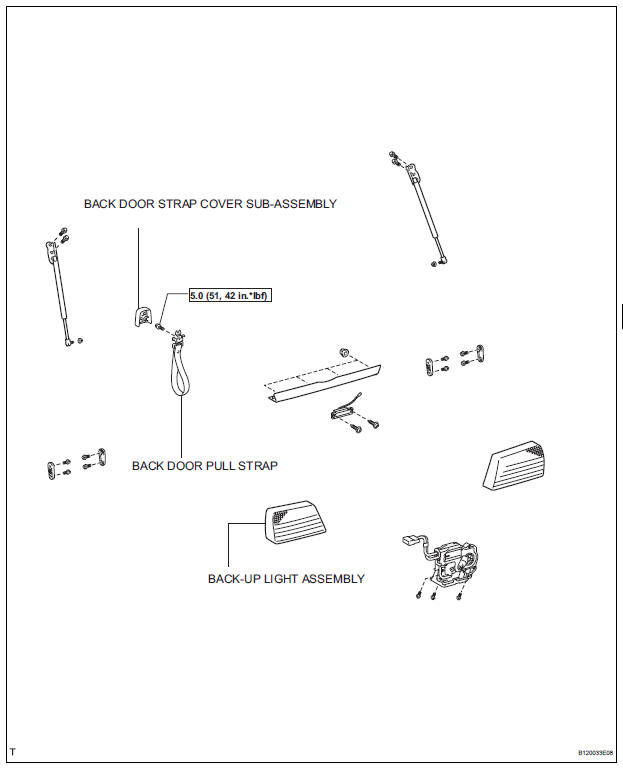
REMOVAL
1. REMOVE BACK DOOR GARNISH CENTER
2. REMOVE BACK DOOR SIDE GARNISH LH
3. REMOVE BACK DOOR SIDE GARNISH RH
4. REMOVE BACK DOOR STRAP COVER SUBASSEMBLY
5. REMOVE BACK DOOR PULL STRAP
6. REMOVE BACK DOOR TRIM BOARD ASSEMBLY
7. REMOVE BACK-UP LIGHT ASSEMBLY
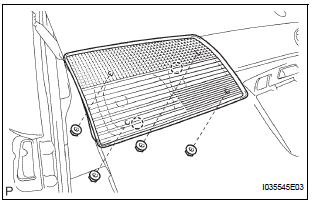
- Disconnect the connector.
- Release the 2 claw fittings and remove the 4 nuts and the back-up light assembly.
DISASSEMBLY
1. REMOVE BACK-UP LIGHT BULB
- Remove the back-up light bulb.
2. REMOVE BACK-UP LIGHT BULB
- Remove the back-up light bulb.
REASSEMBLY
1. INSTALL BACK-UP LIGHT BULB
- Install the back-up light bulb.
2. INSTALL BACK-UP LIGHT BULB
- Install the back-up light bulb.
INSTALLATION
1. INSTALL BACK-UP LIGHT ASSEMBLY
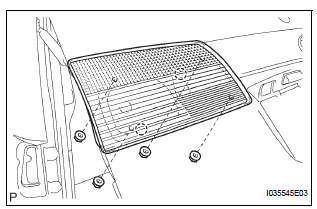
- Connect the connector.
- Install the back-up light assembly with the 4 nuts and 2 claws.
2. INSTALL BACK DOOR TRIM BOARD ASSEMBLY
3. INSTALL BACK DOOR PULL STRAP
4. INSTALL BACK DOOR STRAP COVER
5. INSTALL BACK DOOR SIDE GARNISH RH
6. INSTALL BACK DOOR SIDE GARNISH LH
7. INSTALL BACK DOOR GARNISH CENTER
Test yourself
A quick Toyota Sienna quiz: every answer comes with an explanation and a link to the manual page.
Was this page helpful?