Navigation
DTC check / clear
In this manual: Navigation
25steps
~150min
4/5difficulty
Done 0 of 25
HINT:
- Illustrations may differ from the actual vehicle depending on the device settings and options. Therefore, some detailed areas may not be shown exactly the same as on the actual vehicle.
- If the system cannot enter the diagnostic mode, inspect all AVC-LAN communication components and repair or replace problem parts.
- After the ignition switch is turned ON, check that the map is displayed before starting the diagnostic mode.
1. START DIAGNOSTIC MODE
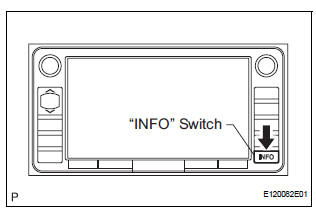
- There are 2 methods to start diagnostic mode. Start the mode by using one of them.
- Method 1
- Start the engine.
- While pressing and holding the "INFO" switch, operate the light control switch: OFF
 Turn ON
 Turn OFF
 Turn ON
 Turn OFF
 Turn ON
 Turn OFF.
- The diagnostic mode starts and the "System Check Mode" screen will be displayed. Service inspection starts automatically and the result will be displayed.

- Method 2
- Start the engine.
- Switch to the "Display Check" screen.
- From the display quality adjustment screen, touch the corners of the screen in the following order: upper left
 lower left
 upper left
 lower left
 upper left
 lower left.
- The diagnostic mode starts and the "System Check Mode" screen will be displayed. Service inspection starts automatically and the result will be displayed.
2. FINISH DIAGNOSTIC MODE
- There are 2 methods to end diagnostic mode. Use one of them.
- Turn the ignition switch off.
3. DIAGNOSIS MENU
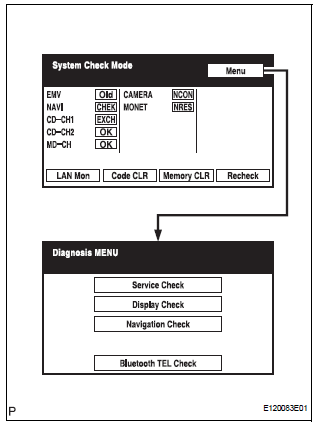
- The "Diagnosis MENU" screen will be displayed by pressing the menu switch on the "System Check Mode" screen
4. CHECK DTC
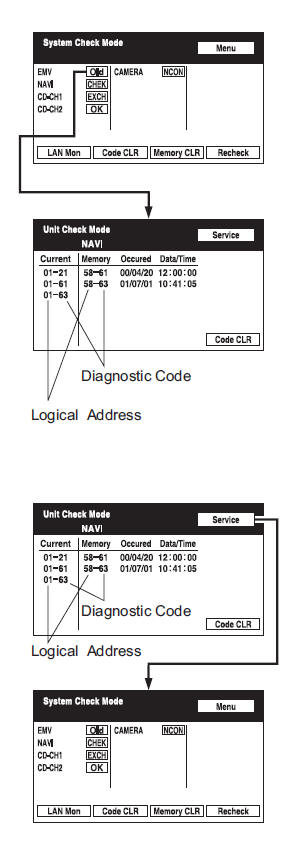
- Read the system check result.
- If the check result is "EXCH", "CHEK" or "Old", touch the displayed check result to view the results on the "Unit Check Mode" screen and record them.
HINT:
- If all check results are "OK", go to communication DTC check.
- If a device name is not known, its physical address is displayed.
HINT: When proceeding to view the results of another device, press the service switch to return to the "System Check Mode" screen. Repeat this step.
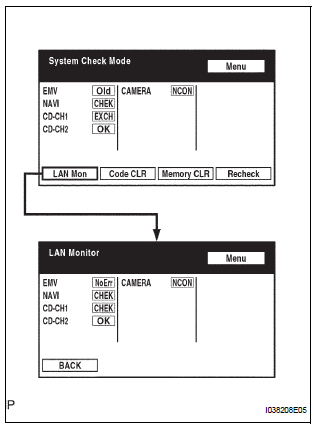
- Read the communication diagnostic check result.
- Return to the "System Check Mode" screen, and press the "LAN Mon" switch to enter the "LAN Monitor" screen.
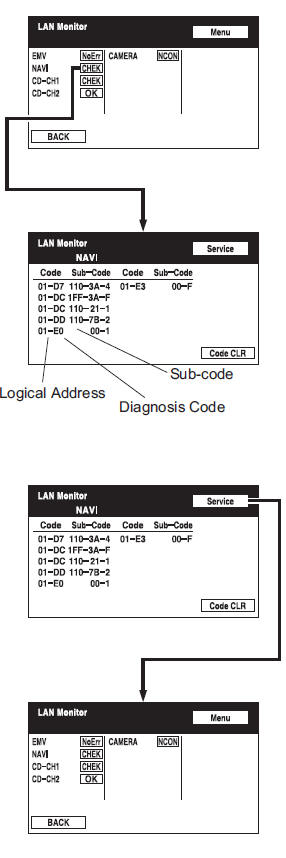
- If the check result is "CHEK" or "Old", touch the displayed check result to view the results on the individual communication diagnostic screen and record them.
HINT:
- If all check results are "No Err", the system judges that no DTC exists.
- The sub-code (relevant device) will be indicated by its physical address.
- When proceeding to view the results of another device, press the "Service" switch to return to the original "LAN Monitor" screen.
5. DTC CLEAR/RECHECK
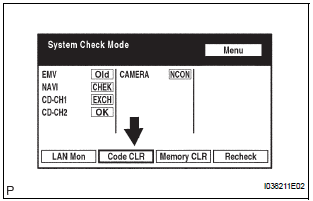
- Clear DTC
- Press the "Code CLR" switch for 3 seconds.
- The check results are cleared
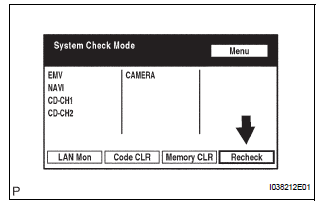
- Recheck
- Press the "Recheck" switch.
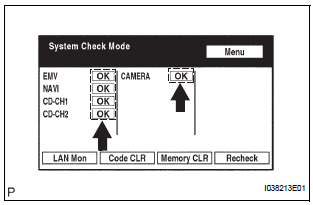
- Confirm that all diagnostic codes are "OK" when the check results are displayed. If a code other than "OK" is displayed, troubleshoot again.
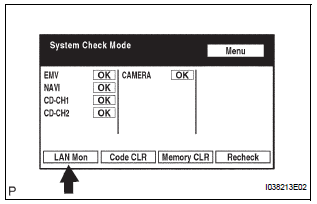
- Press the "LAN Mon" switch to change to the "LAN Monitor" screen.
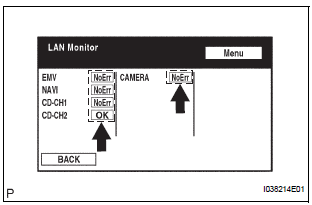
- Confirm that all diagnostic codes are "No Err". If a code other than "No Err" is displayed, troubleshoot again.
Test yourself
A quick Toyota Sienna quiz: every answer comes with an explanation and a link to the manual page.
Was this page helpful?