Engine rear oil seal
Components
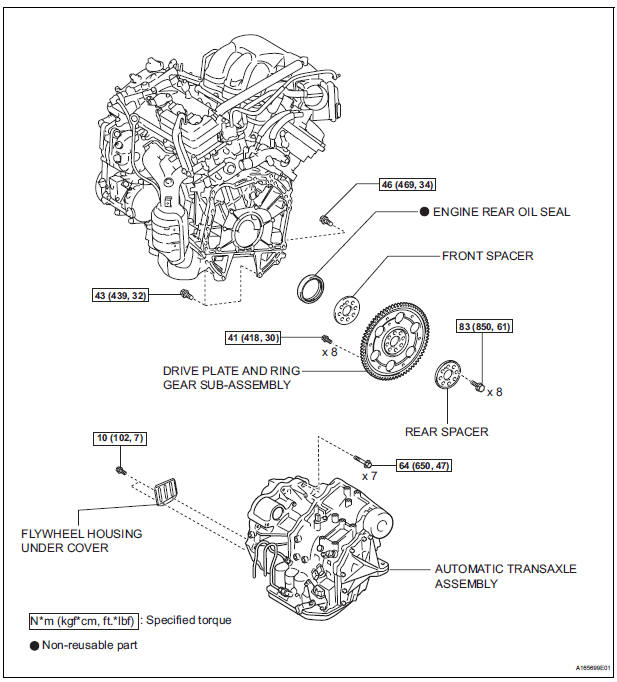
Removal
1. REMOVE AUTOMATIC TRANSAXLE ASSEMBLY (for 2WD)
HINT:
See page AX-163.
2. REMOVE AUTOMATIC TRANSAXLE ASSEMBLY (for 4WD)
HINT: See page AX-167.
3. REMOVE DRIVE PLATE AND RING GEAR SUBASSEMBLY
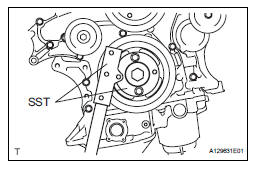
(a) Using SST, hold the crankshaft.
SST 09213-70011 (09213-70020), 09330-00021
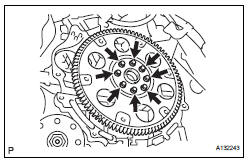
(b) Remove the 8 bolts, front spacer, drive plate and rear spacer.
4. REMOVE ENGINE REAR OIL SEAL
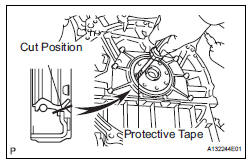
(a) Using a knife, cut off the oil seal lip.
(b) Using a screwdriver, pry out the oil seal.
NOTICE:
Be careful not to damage the crankshaft. Tape the screwdriver tip before use.
INSTALLATION
1. INSTALL ENGINE REAR OIL SEAL
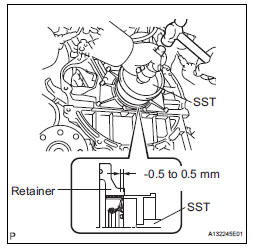
(a) Apply MP grease to a new oil seal lip.
(b) Using SST and a hammer, tap in the oil seal.
SST 09223-15030, 09950-70010 (09951-07150) Oil seal tap in depth: -0.5 to 0.5 mm (-0.020 to 0.020 in.)
2. INSTALL DRIVE PLATE AND RING GEAR SUBASSEMBLY

(a) Using SST, hold the crankshaft.
SST 09213-70011 (09213-70020), 09330-00021
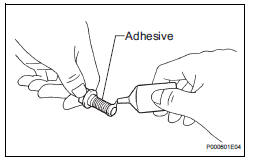
(b) Apply adhesive to 2 or 3 threads of the mounting bolt end.
Adhesive: Part No. 08833-00070, THREE BOND 1324 or equivalent
(1) Install the front spacer, drive plate and rear spacer on the crankshaft.
(2) Install and tighten the 8 mounting bolts uniformly in several steps.
Torque: 83 N*m (850 kgf*cm, 61 ft.*lbf)

3. INSTALL AUTOMATIC TRANSAXLE ASSEMBLY (for 2WD)
HINT:
See page AX-166.
4. INSTALL AUTOMATIC TRANSAXLE ASSEMBLY (for 4WD)
HINT:
See page AX-167.
Test yourself
A quick Toyota Sienna quiz: every answer comes with an explanation and a link to the manual page.