Suspension
Removal
In this manual: Suspension
~1min read
2special tools
1. REMOVE FRONT WHEELS
2. REMOVE FRONT STABILIZER LINK ASSEMBLY LH
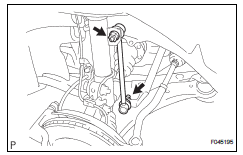
(a) Remove the 2 nuts and front stabilizer link assembly LH.
HINT: If the ball joint turns together with the nut, use a hexagon (6 mm) wrench to hold the stud.
3. REMOVE FRONT STABILIZER LINK ASSEMBLY RH
HINT: Remove the RH side by the same procedures as the LH side.
4. REMOVE FRONT STABILIZER BRACKET NO.1 LH
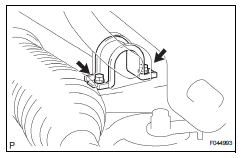
(a) Remove the 2 bolts and the front stabilizer bracket No.1 LH.
5. REMOVE FRONT STABILIZER BRACKET NO.1 RH
HINT: Remove the RH side by the same procedures as the LH side.
6. SEPARATE TIE ROD ASSEMBLY LH
HINT: (See page AH-4) SST 09628-62011
7. SEPARATE TIE ROD ASSEMBLY RH
SST 09628-62011
HINT: Separate the RH side by the same procedures as the LH side.
8. DISCONNECT PRESSURE FEED TUBE ASSEMBLY
HINT: (See page PS-21) SST 09023-12701
9. SEPARATE STEERING INTERMEDIATE SHAFT ASSEMBLY
HINT: (See page PS-21)
10. REMOVE RACK & PINION POWER STEERING GEAR ASSEMBLY
HINT: (See page PS-21)
11. REMOVE FRONT STABILIZER BAR BUSH NO.1
12. REMOVE STABILIZER BAR FRONT
Test yourself
A quick Toyota Sienna quiz: every answer comes with an explanation and a link to the manual page.
Was this page helpful?