If you have a flat tire
| Your vehicle is equipped with a spare tire. The flat tire can be replaced with the spare tire. WARNING ■If you have a flat tire Do not continue driving with a flat tire. Driving even a short distance with a flat tire can damage the tire and the wheel beyond repair, which could result in an accident. Before jacking up the vehicle
Location of the spare tire, jack and tools■ Spare tire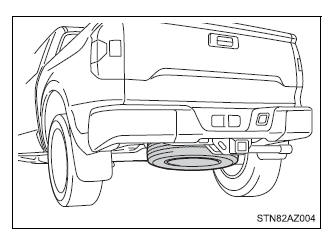 ■ Jack and tools
Double Cab models without storage box 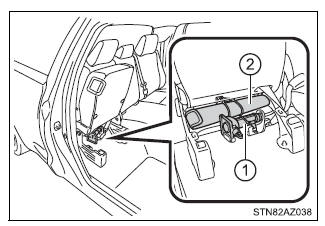 Double Cab models with storage box 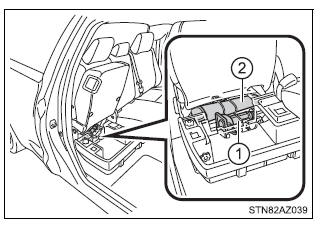 CrewMax models  ■Using the tire jack Observe the following precautions. Improper use of the tire jack may cause the vehicle to suddenly fall off the jack, leading to death or serious injury.
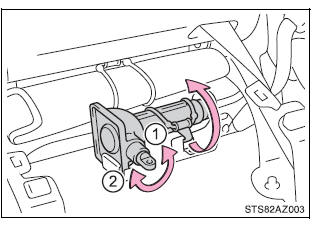
■Using the jack handle Insert the square head securely until you hear a click to prevent the extension parts from coming apart unexpectedly. Taking out the jack and tool bag (Double Cab models)1. Pull up the lever and raise the bottom cushion up. 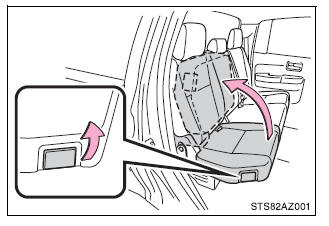 2. On vehicles with storage box, turn the knob to the "OPEN" direction and remove the lid. 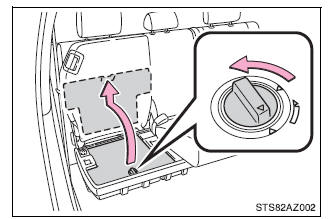 3. On vehicles with storage box, remove the jack cover panel. 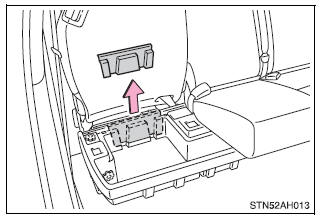 4. Unhook the rubber band and take out the jack.
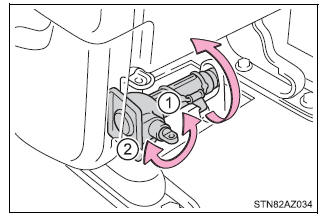
5. Unhook the rubber band and remove the tool bag. 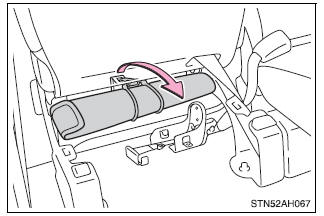 Taking out the jack and tool bag (CrewMax models)1. Pull the lever and raise the bottom cushion up.  2. Unhook the rubber band and take out the jack.
3. Unhook the rubber band and remove the tool bag. 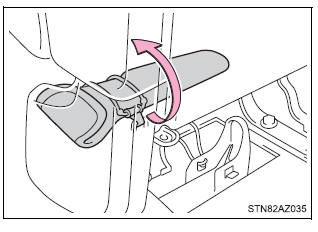 Taking out the spare tire1. Assemble the jack handle extension as shown. 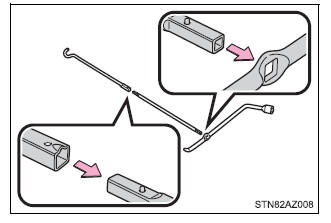 2. Insert the end of the jack handle extension into the lowering screw and turn it counterclockwise.  3. After the tire is lowered completely to the ground, remove the holding bracket. 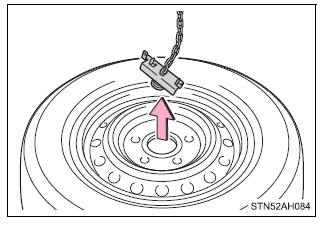 Replacing a flat tire1. Chock the tires. 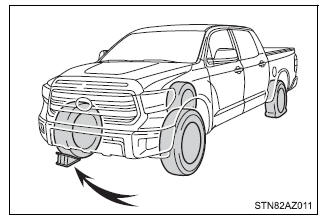
2. On some models, remove the wheel ornament using the wheel nut wrench as shown. To protect the wheel and wheel ornament, place a rag between the wrench and the wheel ornament, as shown in the illustration. 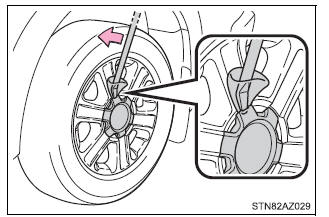 3. Slightly loosen the wheel nuts (one turn). 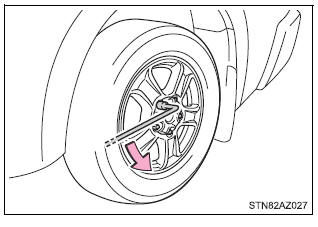 4. Assemble the jack handle extension as shown. 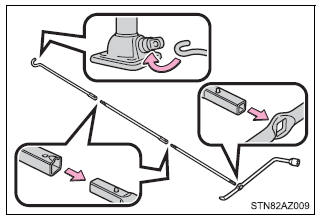 5. Position the jack at the correct jack point as shown.
Make sure the jack is positioned on a level and solid place. 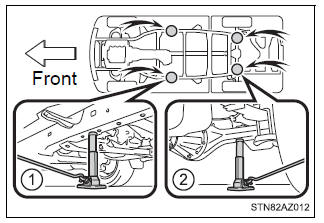 6. Raise the vehicle until the tire is slightly raised off the ground. When positioning the jack under the rear axle housing, make sure the groove on the top of the jack fits with the rear axle housing. 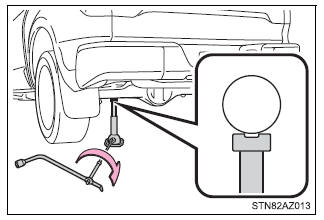 7. Remove all the wheel nuts and the tire. When resting the tire on the ground, place the tire so that the wheel design faces up to avoid scratching the wheel surface. 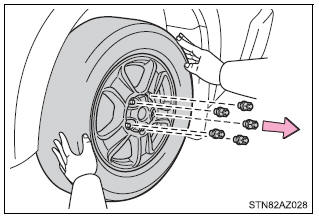 ■Replacing a flat tire
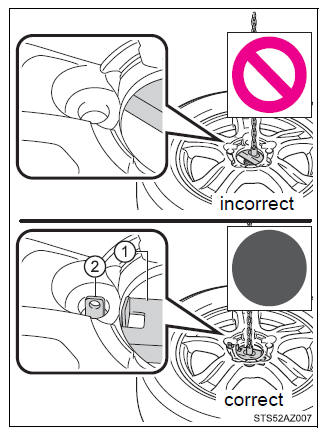
Installing the spare tire1. Remove any dirt or foreign matter from the wheel contact surface. If foreign matter is on the wheel contact surface, the wheel nuts may loosen while the vehicle is in motion, causing the tire to come off. 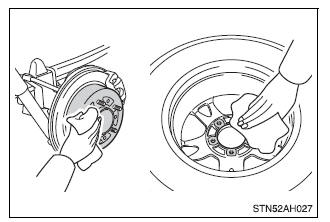 2. Install the spare tire and loosely tighten each wheel nut by hand by approximately the same amount. Tighten the nuts until the tapered portion comes into loose contact with the disc wheel seat. Replacing a steel wheel with a steel wheel 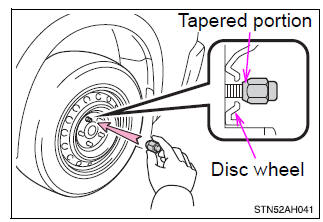 Replacing an aluminum wheel with a steel wheel 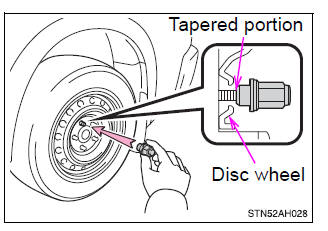 3. Lower the vehicle. 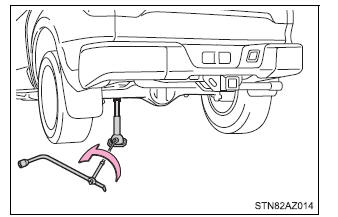 4. Firmly tighten each nut two or three times in the order shown in the illustration. Tightening torque: 154 ft*lbf (209 N*m, 21.3 kgf*m) 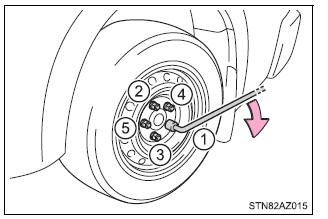 ■Stowing the flat tire Failure to follow steps listed under stowing the tire may result in damage to the spare tire carrier and loss of the tire, which could result in serious injury or death. Stowing the flat tire, jack and all tools1. Vehicles with aluminum wheels: Remove the center wheel ornament by pushing from the reverse side. 2. Lay down the tire with the valve stem facing up and install the holding bracket, inserting the claw into the wheel lug nut hole. Turn the jack handle extension clockwise to take up slack in the chain. Then, check to ensure the claw is in the wheel lug nut hole and the holding bracket is centered in the wheel hub.
While raising, secure the tire, taking care that the tire goes straight up without catching on any surrounding part, to prevent it from flying forward during a collision or sudden braking. Tightening torque: 34.7 ft*lbf (46.6 N*m, 4.8 kgf*m) 3. Confirm it is not loose after tightening:
Visually check to ensure tire is not hung on surrounding parts.  If looseness or misassembly exists, repeat step 2 and step 3. 4. Repeat step 3, any time the tire is lowered or disturbed. 5. Stow the tools and jack securely. ■The temporary spare tire
■When using the temporary spare tire As the temporary spare tire is not equipped with the tire pressure warning valve and transmitter, low inflation pressure of the spare tire will not be indicated by the tire pressure warning system. Also, if you replace the temporary spare tire after the tire pressure warning light comes on, the light remains on. ■If you have a flat rear tire on a road covered with snow or ice Install the temporary spare tire on one of the front wheels of the vehicle. Perform the following steps and fit tire chains to the rear tires: 1. Replace a front tire with the temporary spare tire. 2. Replace the flat rear tire with the tire removed from the front of the vehicle. 3. Fit tire chains to the rear tires. WARNING■When using the temporary spare tire
■When the spare tire is attached The vehicle speed may not be correctly detected, and the following systems may not operate correctly:
*: If equipped Also, not only can the following system not be utilized fully, but it may even negatively affect the drive-train components:
■Speed limit when using the temporary spare tire Do not drive at speeds in excess of 80 km/h when a temporary spare tire is installed on the vehicle. The temporary spare tire is not designed for driving at high speeds. Failure to observe this precaution may lead to an accident causing death or serious injury. NOTICE■Do not drive the vehicle with a flat tire Do not continue driving with a flat tire. Driving even a short distance with a flat tire can damage the tire and the wheel beyond repair. ■Driving with tire chains and the temporary spare tire Do not fit tire chains to the temporary spare tire. Tire chains may damage the vehicle body and adversely affect driving performance. ■When replacing the tires When removing or fitting the wheels, tires or the tire pressure warning valve and transmitter, contact your Toyota dealer as the tire pressure warning valve and transmitter may be damaged if not handled correctly. ■To avoid damage to the tire pressure warning valves and transmitters When a tire is repaired with liquid sealants, the tire pressure warning valve and transmitter may not operate properly. If a liquid sealant is used, contact your Toyota dealer or other qualified service shop as soon as possible. Make sure to replace the tire pressure warning valve and transmitter when replacing the tire. | |||||||||||||