Disassembly
1. REMOVE GENERATOR PULLEY CAP
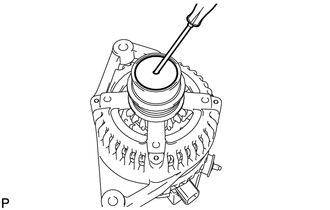
(a) Using a screwdriver, puncture the center of the generator pulley cap and pry it off. NOTICE: Do not reuse the generator pulley cap. |
 |
2. REMOVE GENERATOR PULLEY WITH CLUTCH
(a) Mount the generator in a vise. Text in Illustration
|
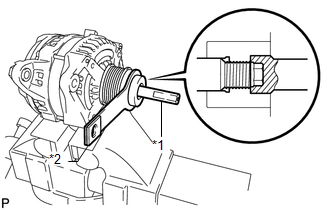 |
(b) Install SST (A) and (B) to the pulley as shown in the illustration.
SST: 09820-63021
(c) Use a wrench to hold SST (A), and turn SST (B) counterclockwise to loosen the generator pulley. Text in Illustration
NOTICE:
|
 |
(d) Remove the generator pulley.
3. REMOVE GENERATOR REAR END COVER
(a) Place the generator on the generator pulley.
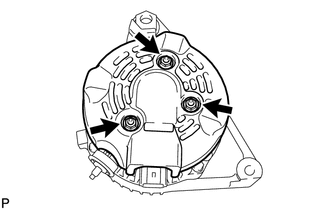
(b) Remove the 3 nuts and generator rear end cover. |
 |
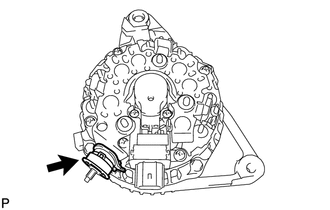
(c) Remove the terminal insulator. |
 |
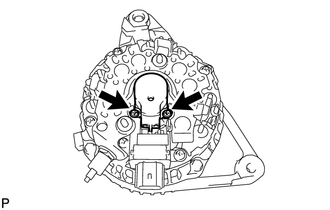
4. REMOVE GENERATOR BRUSH HOLDER ASSEMBLY
(a) Remove the 2 screws and generator brush holder. |
 |
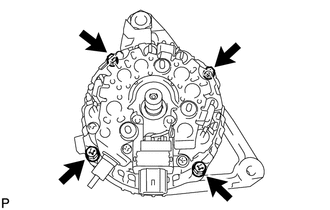
5. REMOVE GENERATOR COIL ASSEMBLY
(a) Remove the 4 bolts. |
 |
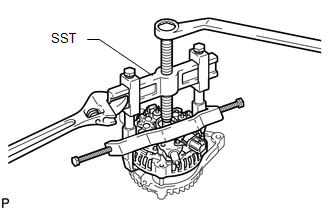
(b) Using SST, remove the generator coil. SST: 09950-40011 09951-04020 09952-04010 09953-04020 09954-04010 09955-04071 09957-04010 |
 |
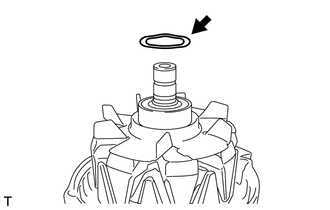
6. REMOVE GENERATOR ROTOR ASSEMBLY
(a) Remove the generator washer. |
 |
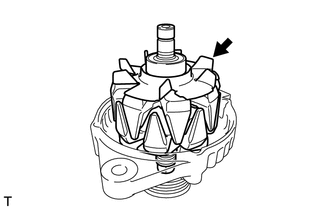
(b) Remove the generator rotor assembly. |
 |
Test yourself
A quick Toyota Venza quiz: every answer comes with an explanation and a link to the manual page.