Installation
HINT:
Perform "Inspection After Repair" after replacing the engine assembly (See page  ).
PROCEDURE
1. INSTALL IGNITION COIL ASSEMBLY
2. INSTALL FUEL DELIVERY PIPE SUB-ASSEMBLY
3. INSTALL ENGINE COOLANT TEMPERATURE SENSOR
4. INSTALL ENGINE OIL PRESSURE SWITCH ASSEMBLY
5. INSTALL KNOCK CONTROL SENSOR
6. INSTALL SENSOR WIRE
(a) Install the sensor wire with the bolt. Torque: 21 N·m {214 kgf·cm, 15 ft·lbf} |
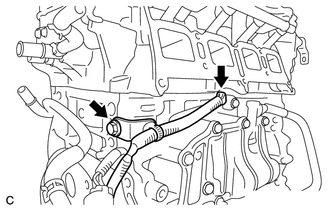 |
(b) Connect the knock control sensor connector.
7. INSTALL INTAKE MANIFOLD
8. CONNECT NO. 2 VENTILATION HOSE
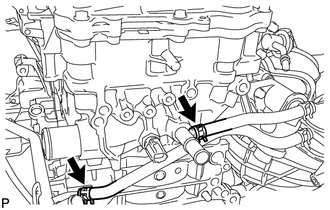
9. INSTALL WATER BY-PASS HOSE
(a) Install the No. 1 and No. 2 water by-pass hoses. |
 |
10. INSTALL THROTTLE BODY ASSEMBLY
11. INSTALL NO. 1 COMPRESSOR MOUNTING BRACKET
(a) Install the bracket with the 4 bolts. Torque: 21 N·m {214 kgf·cm, 15 ft·lbf} |
 |
12. INSTALL EXHAUST MANIFOLD CONVERTER SUB-ASSEMBLY
13. INSTALL NO. 2 MANIFOLD STAY
14. INSTALL MANIFOLD STAY
15. INSTALL NO. 1 EXHAUST MANIFOLD HEAT INSULATOR
16. INSTALL ENGINE OIL LEVEL DIPSTICK GUIDE
(a) Apply a light coat of engine oil to a new O-ring. |
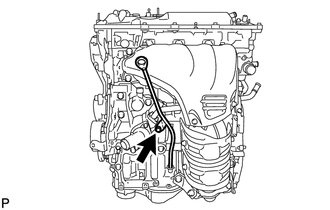 |
(b) Install the O-ring to the engine oil level dipstick guide.
(c) Install the engine oil level dipstick guide with the bolt.
Torque:
10 N·m {102 kgf·cm, 7 ft·lbf}
(d) Install the engine oil level dipstick.
Test yourself
A quick Toyota Venza quiz: every answer comes with an explanation and a link to the manual page.