Installation
1. INSTALL REAR SEAT ASSEMBLY LH
(a) Place the rear seat assembly LH in the cabin.
NOTICE:
Be careful not to damage the vehicle body.
(b) Temporarily install the 2 bolts on the front side of the seat. |
 |
(c) Temporarily install the 2 bolts on the rear side of the seat. |
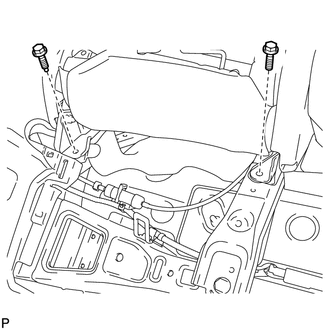 |
(d) Install the rear seat assembly LH with the 4 bolts.
Torque:
37 N·m {377 kgf·cm, 27 ft·lbf}
2. CONNECT REAR SEAT NO. 2 RECLINING CONTROL CABLE SUB-ASSEMBLY
(a) Remove the rear seat No. 2 reclining control cable from the carpet hole.
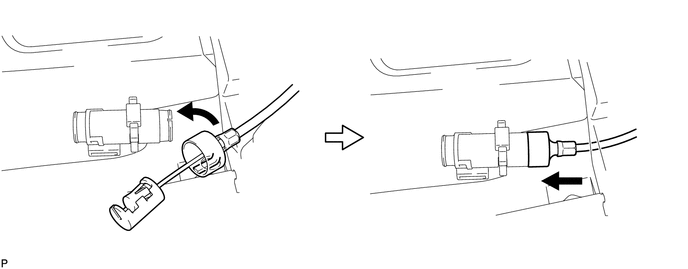
(b) Connect the rear seat No. 2 reclining control cable sub-assembly as shown in the illustration.
 Text in Illustration
*1 |
Protective Tape |
*2 |
Seat Track Adjusting Handle |
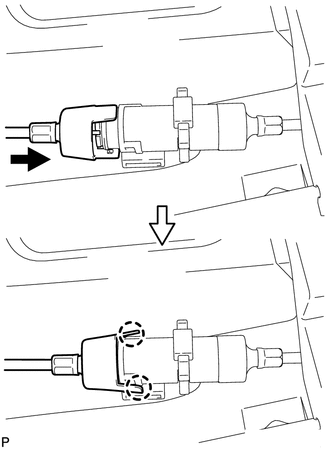
(c) Engage the 2 claws and connect the rear seat No. 2 reclining control cable sub-assembly as shown in the illustration. |
 |
(d) Return the seatback to the upright position.
(e) Pull up the adjuster's lock piece to lock it as shown in the illustration.
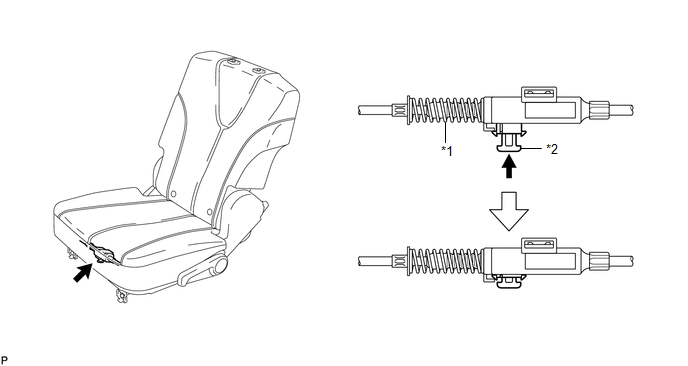 Text in Illustration
*1 |
Adjuster Spring |
*2 |
Lock Piece |
NOTICE:
When pressing the lock piece, make sure the adjuster's spring is not compressed.
3. INSTALL REAR SEAT OUTER TRACK BRACKET COVER
(a) Engage the guide and 3 claws and install the rear seat outer track bracket cover as shown in the illustration. |
 |
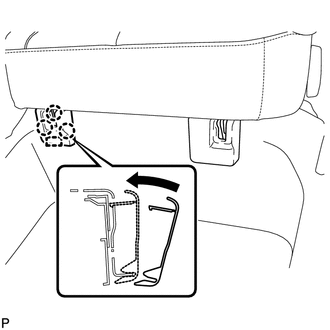
4. INSTALL REAR SEAT INNER TRACK BRACKET COVER
(a) Engage the guide and 3 claws and install the rear seat inner track bracket cover as shown in the illustration. |
 |
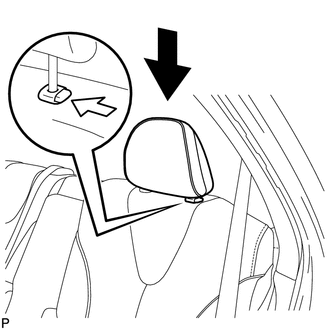
5. INSTALL REAR SEAT HEADREST ASSEMBLY
(a) Install the rear seat headrest assembly as shown in the illustration. |
 |
Test yourself
A quick Toyota Venza quiz: every answer comes with an explanation and a link to the manual page.