Removal
1. REMOVE BACK DOOR PANEL TRIM ASSEMBLY

2. REMOVE REAR WIPER ARM HEAD CAP
3. REMOVE REAR WIPER ARM AND BLADE ASSEMBLY
4. REMOVE REAR WIPER MOTOR GROMMET
5. REMOVE REAR WIPER MOTOR AND BRACKET ASSEMBLY
6. REMOVE REAR LIGHT ASSEMBLY LH
7. REMOVE REAR LIGHT ASSEMBLY RH
HINT:
Use the same procedure for the RH side and LH side.
8. REMOVE BACK DOOR OUTSIDE GARNISH SUB-ASSEMBLY
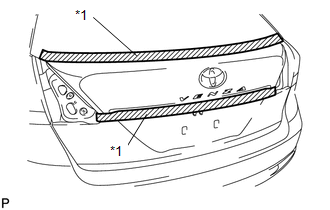
(a) Put protective tape around the back door outside garnish sub-assembly. Text in Illustration
|
 |
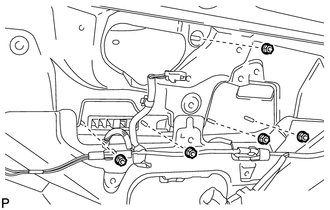
(b) Disconnect each connector.
(c) Remove the 5 nuts. |
 |
(d) Disengage the 16 clips and remove the back door outside garnish sub-assembly. |
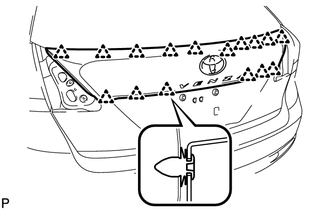 |
(e) Remove the 16 clips (back door moulding clip) from the back door outside garnish sub-assembly.
(f) Remove the 5 gaskets and 5 stud bolts from the back door outside garnish sub-assembly.
9. REMOVE NO. 1 BACK DOOR EMBLEM
10. REMOVE NO. 2 BACK DOOR NAME PLATE
11. REMOVE BACK DOOR OPENER SWITCH ASSEMBLY
12. REMOVE TELEVISION CAMERA ASSEMBLY (w/ Rear View Monitor System)
Test yourself
A quick Toyota Venza quiz: every answer comes with an explanation and a link to the manual page.