Stereo Component Amplifier
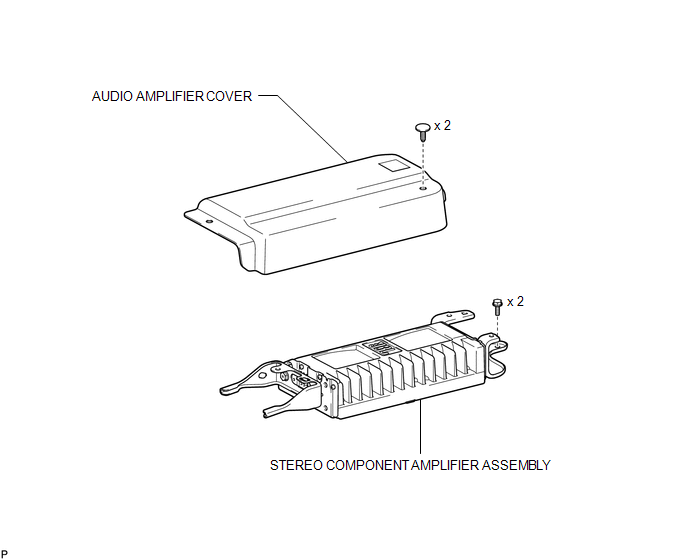
Removal REMOVAL PROCEDURE
1. REMOVE FRONT SEAT ASSEMBLY RH (for Manual Seat)
HINT:
Use the same procedure for the RH side and the LH side (See page  ).
2. REMOVE FRONT SEAT ASSEMBLY RH (for Power Seat)
HINT:
Use the same procedure for the RH side and the LH side (See page ).
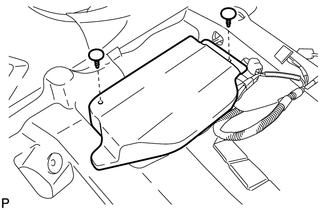
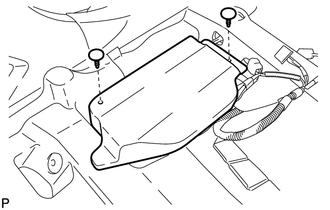
3. REMOVE AUDIO AMPLIFIER COVER
(a) Using a clip remover, remove the 2 clips and audio amplifier cover. |
 |
4. REMOVE STEREO COMPONENT AMPLIFIER ASSEMBLY
(a) Disconnect the 4 connectors. |
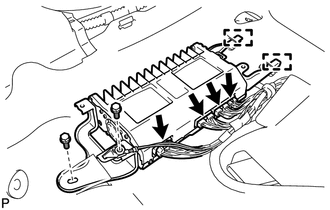 |
(b) Remove the 2 bolts.
(c) Disengage the 2 guides and remove the stereo component amplifier assembly.
Installation INSTALLATION PROCEDURE1. INSTALL STEREO COMPONENT AMPLIFIER ASSEMBLY
(a) Engage the 2 guides. |
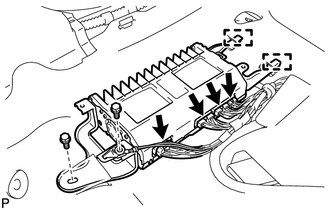 |
(b) Install the stereo component amplifier assembly with the 2 bolts.
(c) Connect the 4 connectors.
2. INSTALL AUDIO AMPLIFIER COVER
(a) Install the audio amplifier cover with the 2 clips. |
 |
3. INSTALL FRONT SEAT ASSEMBLY RH (for Manual Seat)
HINT:
Use the same procedure for the RH side and the LH side (See page  ).
4. INSTALL FRONT SEAT ASSEMBLY RH (for Power Seat)
HINT:
Use the same procedure for the RH side and the LH side (See page ).
Test yourself
A quick Toyota Venza quiz: every answer comes with an explanation and a link to the manual page.