Tire Pressure Warning Receiver
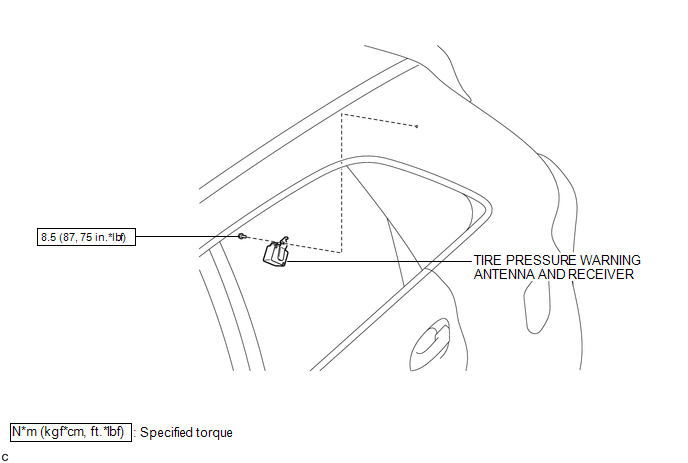
Removal REMOVAL PROCEDURE
1. DISCONNECT CABLE FROM NEGATIVE BATTERY TERMINAL
NOTICE:
When disconnecting the cable, some systems need to be initialized after the cable is reconnected (See page  ).
2. REMOVE ROOF SIDE INNER GARNISH ASSEMBLY LH
HINT:
- Refer to the procedures up to "Remove roof side inner garnish assembly" (See page ).
- Removal should be performed only for the left side.
3. REMOVE TIRE PRESSURE WARNING ANTENNA AND RECEIVER
(a) Remove the bolt. |
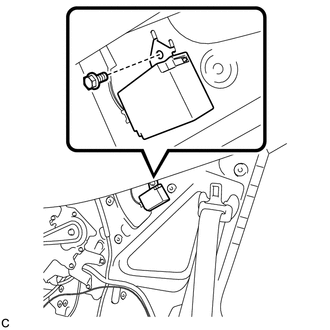 |
(b) Disconnect the connector to remove the tire pressure warning antenna and receiver. |
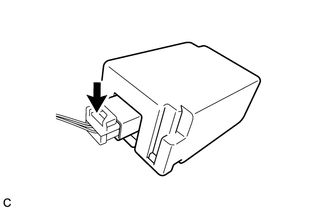 |
1. INSTALL TIRE PRESSURE WARNING ANTENNA AND RECEIVER
(a) Connect the connector. |
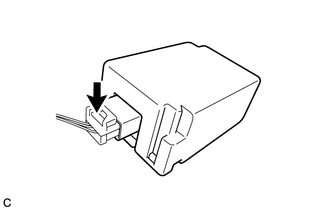 |
(b) Engage the 2 tabs into the holes as shown in the illustration to install the tire pressure warning antenna and receiver. |
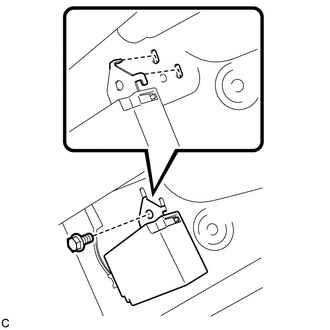 |
(c) Install the bolt.
Torque:
8,5 N·m {87 kgf·cm, 75 in·lbf}
2. INSTALL ROOF SIDE INNER GARNISH ASSEMBLY LH
HINT:
- Refer to the procedures from "Install roof side inner garnish assembly" (See page
 ).
- Installation should be performed only for the left side.
3. CONNECT CABLE TO NEGATIVE BATTERY TERMINAL
NOTICE:
When disconnecting the cable, some systems need to be initialized after the cable is reconnected (See page ).
4. INSPECT TIRE PRESSURE WARNING SYSTEM
(a) Inspect the tire pressure warning system (See page ).
Test yourself
A quick Toyota Venza quiz: every answer comes with an explanation and a link to the manual page.