Running gear, axles, steering

Renewing front bonded rubber bush for lower suspension link

~1min read
Renewing front bonded rubber bush for lower suspension link

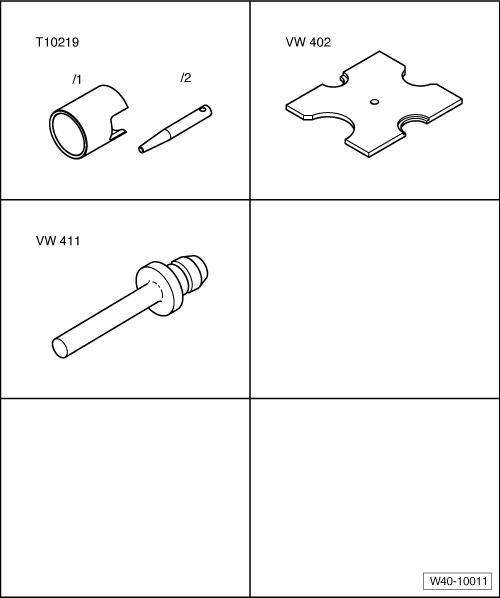
Special tools and workshop equipment required

Assembly tool -T10219-

Thrust plate -VW 402-

Press tool -VW 411-


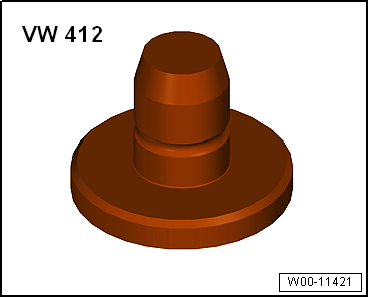
Press tool -VW 412-

  • Remove lower suspension link → Chapter.

Pressing out bonded rubber bush

Renewing front bonded rubber bush for lower suspension link
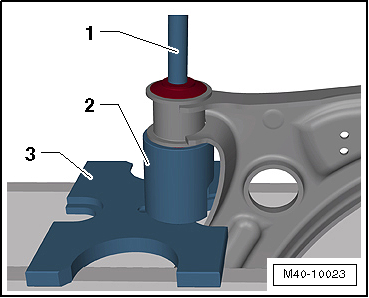
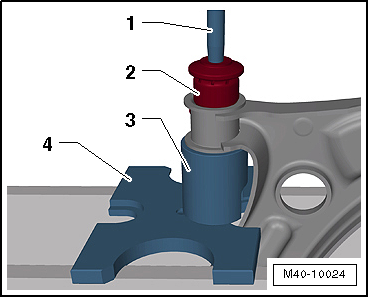
  • Press out bonded rubber bush as illustrated.
1 - Press tool -VW 411-
2 - Tube -T10219/1- (the cut-out must face the suspension link)
3 - Thrust plate -VW 402-

Pressing in bonded rubber bush

Renewing front bonded rubber bush for lower suspension link
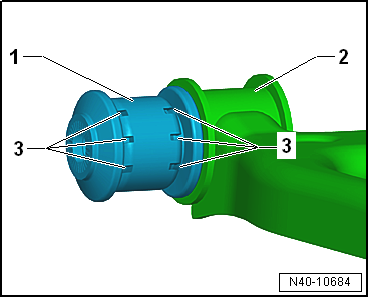
  • Align bonded rubber bushes -1- to suspension link -2-.

The grooves -3- must face towards suspension link -2- as shown in illustration.

  • Moisten outer surface of bonded rubber bush with assembly oil -G 294 421 A1-.
Renewing front bonded rubber bush for lower suspension link
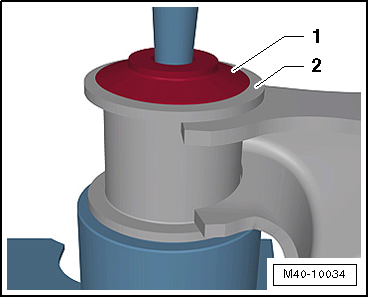
  • Press in bonded rubber bush as illustrated.
1 - Drift -T10219/2-
2 - Bonded rubber bush
3 - Tube -T10219/1- (the cut-out must face the suspension link)
4 - Thrust plate -VW 402-
Note At start of pressing-in process, bonded rubber bush is temporarily slanted. During further procedure, it then straightens. It does not have to be pushed further.
Renewing front bonded rubber bush for lower suspension link
  • Press in bonded rubber bush until core of bush -1- and hole in suspension link -2- are flush.
Renewing front bonded rubber bush for lower suspension link
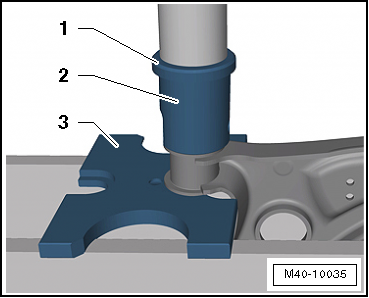
  • Press bush back slightly in the suspension link.
1 - Press tool -VW 412-
2 - Tube -T10219/1-
3 - Thrust plate -VW 402-
Renewing front bonded rubber bush for lower suspension link

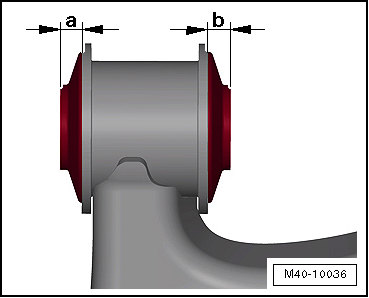
The dimensions -a- and -b- must be the same.

  • Install lower suspension link → Chapter.
Renewing front bonded rubber bush for lower suspension link

Test yourself

A quick Volkswagen Golf quiz: every answer comes with an explanation and a link to the manual page.