Brake System
Brake Lamp Switch -F-, Removing and Installing
In this manual: Brake System
~2min read
Removing
- On vehicles with a coded radio, note the code and if necessary retrieve it.
- Disconnect the battery.
- Remove the intake hose, air filter housing and battery.
- Remove the battery carrier.
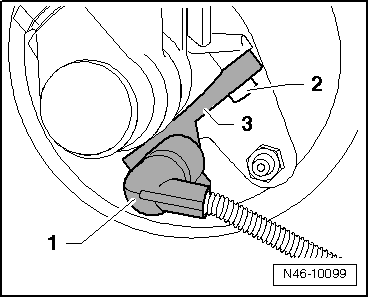
- Disconnect the connector -1- from Brake Light Switch -F-.
- Remove the bolt -2- from the brake master cylinder.
- Pull the Brake Light Switch -F--3- upward and off from the brake master cylinder and remove it from the retaining tab at the bottom.
Installing
- Install in reverse order of removal.
Tightening specification
TORX bolt to master brake cylinder 8 N·m
Brake Master Cylinder, Removing and Installing
Removing and Installing
Special tools and workshop equipment required
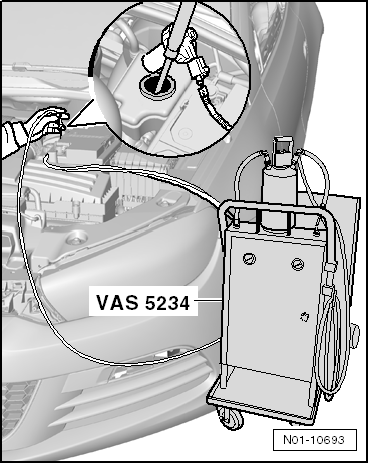
- Brake Charger/Bleeder Unit -VAS5234-
- Torque Wrench 1331 5-50Nm -VAG1331-
Removing
- On vehicles with a coded radio, note the code and if necessary retrieve it.
- Disconnect the battery.
- Remove the entire air filter housing.
- Remove battery and the battery carrier.
- Place enough lint-free cloths near the engine and transmission.
- Extract as much brake fluid as possible from the brake fluid reservoir using the Brake Charger/Bleeder Unit -VAS5234-.
For Vehicles with Manual Transmission
- Disconnect the clutch master cylinder return hose -B- and secure it out of the way or clamp it off with a commercially available tool such as the Hazet 4590 and then remove it.
Continuation for All Vehicles
- Remove the connector -A- from the Brake Fluid Level Warning Switch -F34-.
- Remove the connector -C- from the Brake Lamp Switch -F-.
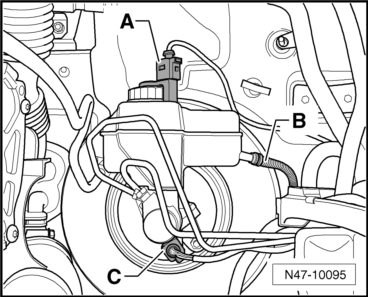
- Remove the brake fluid reservoir, press the engagement straps toward outside at the container and simultaneously pull the brake fluid reservoir out of the sealing plugs.
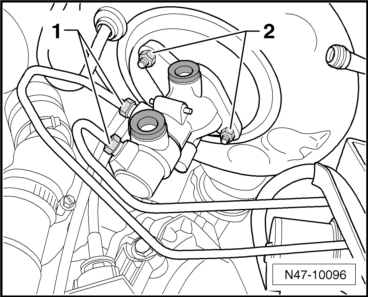
- Disconnect the brake lines -1- at the brake master cylinder and seal the lines with sealing plugs from the Repair Kit -1H0 698 311 A-.
- Remove the nuts -2- from master brake cylinder.
- If present, remove the heat shield.
- Carefully take the brake master cylinder out of the brake booster.
- Remove the Brake Lamp Switch -F- from the brake master cylinder.
Installing
- Install in reverse order of removal.
Note the following points when installing:
- When assembling the brake master cylinder with the brake booster, make sure that the push rod is correctly seated in the brake master cylinder.
- Bleed the brake system.
- Vehicles with a manual transmission: bleed the clutch system.
Tightening Specifications
Brake master cylinder to brake booster 25 N·m
- Use new nuts!
Brake lamp switch to brake master cylinder 8 N·m
Brake lines to brake master cylinder 14 N·m
Test yourself
A quick Volkswagen Tiguan quiz: every answer comes with an explanation and a link to the manual page.
Was this page helpful?