Do it yourself
Changing the light bulb in the license plate lamp
In this manual: Do it yourself
~1min read
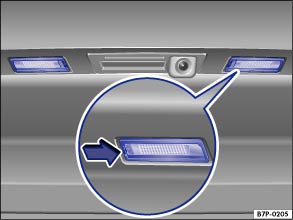
Fig. 209 In the rear hatch: Clamped license plate lamp.
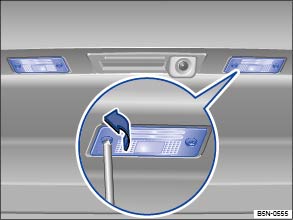
Fig. 210 In the rear hatch: Screwed license plate lamp.
 Read and follow the introductory information and safety information first⇒
 Introduction to the subject
| Please carry out each step only in the order specified: | ||
|---|---|---|
| Clamped license plate lamp | Screwed license plate lamp | |
| 1. | Please review and follow the checklist ⇒ Information on light bulb replacement . | |
| 2. | Press the flat blade of the screwdriver from the vehicle tool kit in the direction of the arrow in the notch in the license plate lamp ⇒ Fig. 209 . | Remove the screws of the license plate lamp with the screwdriver from the vehicle tool kit. |
| 3. | Pull out the license plate lamp slightly. The connector must not be separated for this. | |
| 4. | Replace the burned out light bulb with a new bulb of the same type. | |
| 5. | Carefully insert the license plate lamp into the opening in the bumper. Ensure that the license plate lamp is installed in the correct direction. | Carefully insert the license plate lamp into the opening in the bumper. Make sure that the adhesive anti-glare strip faces forward. |
| 6. | Press the license plate lamp into the bumper until it audibly latches. | Tighten the securing screws of the license plate lamp with the screwdriver. |
Test yourself
A quick Volkswagen Tiguan quiz: every answer comes with an explanation and a link to the manual page.
Was this page helpful?