Electrical system
Checking the condition of the bulbs
In this manual: Electrical system
~1min read
The following procedure applies to all of the bulbs.
1. Remove:
- Bulb
Since the headlight bulbs get extremely hot, keep flammable products and your hands away from them until they have cooled down.
CAUTION:- Be sure to hold the socket firmly when removing the bulb. Never pull the lead, otherwise it may be pulled out of the terminal in the coupler.
- Avoid touching the glass part of a headlight bulb to keep it free from oil, otherwise the transparency of the glass, the life of the bulb, and the luminous flux will be adversely affected. If the headlight bulb gets soiled, thoroughly clean it with a cloth moistened with alcohol or lacquer thinner.
2. Check:
- Bulb (for continuity) (with the pocket tester) No continuity
 Replace.
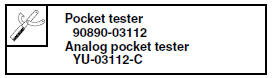
NOTE:
Before checking for continuity, set the pocket tester to "0" and to the " × 1" range.
a. Connect the positive tester probe to terminal "1" and the negative tester probe to terminal "2", and check the continuity.
b. Connect the positive tester probe to terminal "1" and the negative tester probe to terminal "3", and check the continuity.
c. If either of the readings indicate no continuity, replace the bulb.
Test yourself
A quick Yamaha YZF-R125 quiz: every answer comes with an explanation and a link to the manual page.
Was this page helpful?