Checking the switches

1. Clutch switch
2. Main switch
3. Front brake light switch
4. Sidestand switch
5. Rear brake light switch
6. Neutral switch
7. Turn signal switch
8. Horn switch
9. Dimmer switch
10.Pass switch
11.Engine stop switch
12.Start switch
Check each switch for continuity with the pocket tester. If the continuity reading is incorrect, check the wiring connections and, if necessary, replace the switch.
CAUTION:Never insert the tester probes into the coupler terminal slots "a". Always insert the probes from the opposite end of the coupler, taking care not to loosen or damage the leads.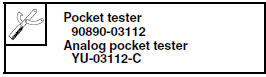
NOTE:
- Before checking for continuity, set the pocket tester to "0" and to the " × 1" range.
- When checking for continuity, switch back and forth between the switch positions a few times.

The switches and their terminal connections are illustrated as in the following example of the main switch.
The switch positions "a" are shown in the far left column and the switch lead colors "b" are shown in the top row.
The continuity (i. e., a closed circuit) between switch terminals at a given switch position is indicated by "  ". There is continuity between
red and brown/blue, and blue/yellow and blue/black when the switch is set to "ON".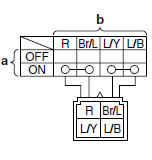
Test yourself
A quick Yamaha YZF-R125 quiz: every answer comes with an explanation and a link to the manual page.