Chevrolet Cruze Repair Manual
Installation Procedure
In this manual: Chevrolet Cruze Repair Manual
22steps
~132min
4/5difficulty
Done 0 of 22
- Install the following components on the drivetrain and front suspension frame if removed:
- The radiator support brackets.
- The stabilizer shaft--Refer to Stabilizer Shaft Replacement.
- The lower control arms--Refer to Lower Control Arm Replacement.
- The steering gear--Refer to Steering Gear Replacement
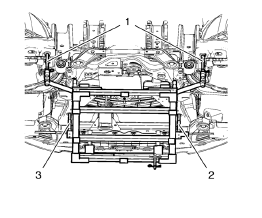
Note: Positioning pins (1) of CH 49289 adapter MUST be extended in order to guide into underbody holes.
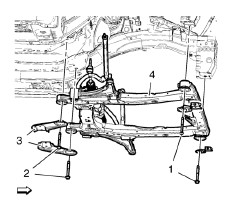
- Raise the frame (4) carefully, 2. using CH 49289 adapter .
- Install the frame reinforcements (3).
Caution: Refer to Fastener Caution in the Preface section.
Note: Do NOT reuse old bolts.
- Install the NEW frame rear bolts (2) and tighten to 160 N·m.
Note: Do NOT reuse old bolts.
- Install the NEW frame front bolts (1) and tighten to 160 N·m.
- Remove the support of the power steering gear
- Install the front bumper energy absorber bracket bolt. Refer to Front Bumper Energy Absorber Bracket Replacement.
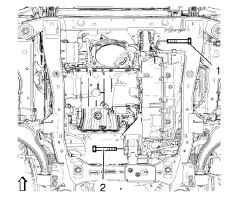
- Install the front transmission mount bolt (1) and tighten to 100 N·m.
- Install the rear transmission mount bracket bolt (2) and tighten to 100 N·m.
- Install the outer tie rods and tie rod nuts to the steering knuckles. Refer to Steering Linkage Outer Tie Rod Replacement.
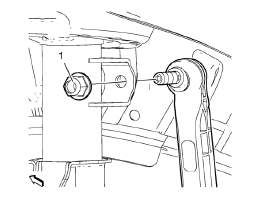
- Install the steering linkage tie rod. Tighten the steering linkage tie rod nut to 35 N·m.
- Install the lower ball joints to the steering knuckles. Refer to Lower Control Arm Replacement.
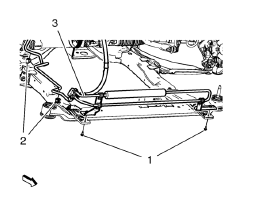
- Install the power steering fluid cooling pipe (3) to the frame, install the power steering fluid cooling pipe bolt (1) and clip in (2).
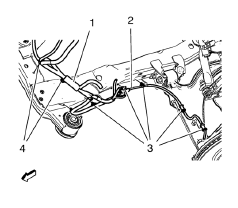
- Install the wheel speed sensor wiring harness (2) to the frame on both sides.
Install the wiring harness retainers (3) to the frame and the lower control arm.
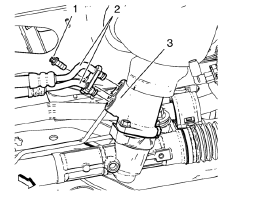
- Install the inlet and outlet hose (2) to the steering gear (3).
- Install power steering gear inlet and outlet hose bolts (1) and tighten to 11 N·m.
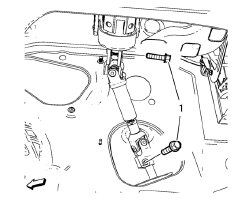
- Install the lower steering intermediate shaft (1) bolt and tighten to 34 N·m.
- Remove the support of the radiator and condenser.
- Lower the vehicle on a hoist. Refer to Lifting and Jacking the Vehicle.
- Install the tire and wheel assemblies. Refer to Tire and Wheel Removal and Installation.
- Install the exhaust flexible pipe. Refer to Exhaust Flexible Pipe Replacement.
- Install the front bumper fascia opening lower cover. Refer to Front Bumper Fascia Opening Lower Cover Replacement.
- Install the engine splash shields. Refer to Front Compartment Splash Shield Replacement.
- Install the front compartment insulator, if equipped. Refer to Front Compartment Insulator Replacement.
- If replacing the frame, check the wheel alignment. Refer to Wheel Alignment Measurement.
Test yourself
A quick Chevrolet Cruze quiz: every answer comes with an explanation and a link to the manual page.
Was this page helpful?