Body and Paint
Instrument Panel. Removal and Installation
In this manual: Body and Paint
52steps
~312min
5/5difficulty
Done 0 of 52
Special Service Tools / General Equipment
| Clamps) | |
| Interior trim removal tool |
Removal
All vehicles
- Refer to: Health and Safety Precautions (100-00 General Information, Description and Operation).
- If an SRS fault is present, go to Step 3. Otherwise, turn the ignition off, wait at least one minute and go to Step 4.
- Disable the SRS.
Refer to: Disabling and Enabling the Supplemental Restraint System (SRS) (501-20B Supplemental Restraint System, General Procedures). - Recover the refrigerant.
Refer to: Refrigerant Recovery, Evacuation and Charging (A/C) - Vehicles With: R1234YF Refrigerant (412-00 Climate Control System - General Information, General Procedures).
Vehicles with 2.7 L engine.
- Remove the air cleaner.
Refer to: Air Cleaner (303-12D Intake Air Distribution and Filtration - 2.7 L EcoBoost (238 kW/324 L hp), Removal and Installation).
All vehicles
- Remove the bolts and position the cabin heater aside.
Torque: 53 lb-in (6 N·m)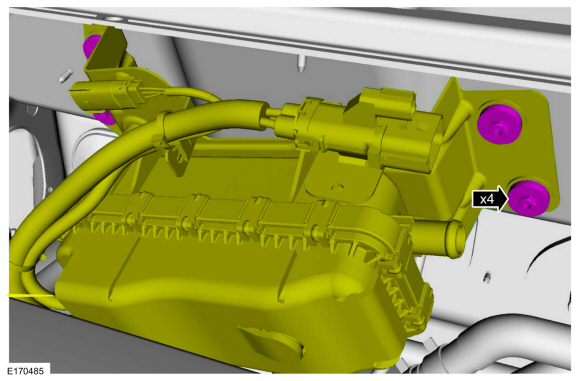
- Remove the evaporator tube nut, position the flange and tube aside.
Torque: 97 lb-in (11 N·m)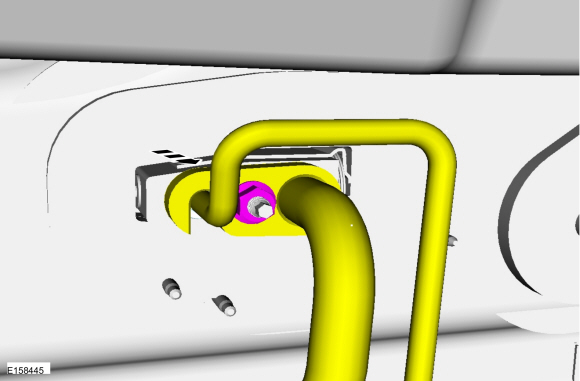


Slowly release the cooling system pressure. Turn the surge tank cap 2-3 turns and remove the surge tank cap.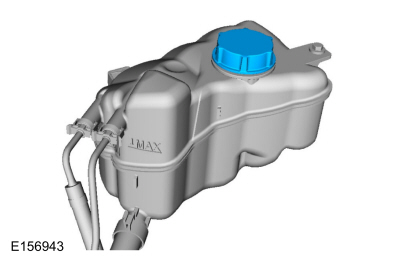
- Install the hose clamp pliers on the coolant hoses, loosen the hose clamps and disconnect the coolant hoses.
Use common equipment: Hose clamp(s)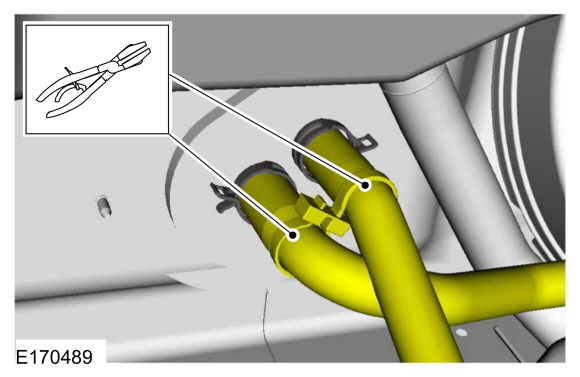
- Remove the front door on both sides.
Refer to: Front Door (501-03 Body Latches and Locks, Removal and Installation).
Police Vehicles
- Remove the bolts and nuts, release the harness clips and remove the bracket.
Torque: 55 lb-in (6.2 N·m)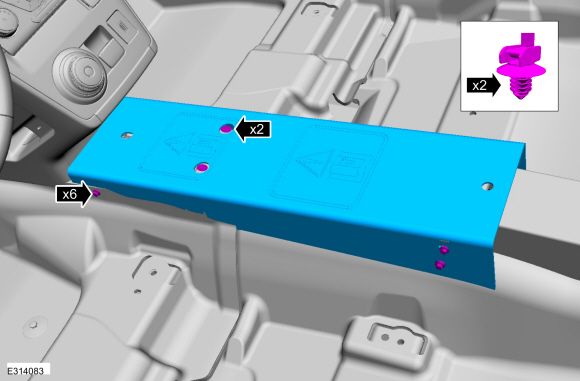
Release the retainers and remove the LH lower trim panel.- Disconnect the electrical connectors.
Use general equipment: interior trim removal tool.
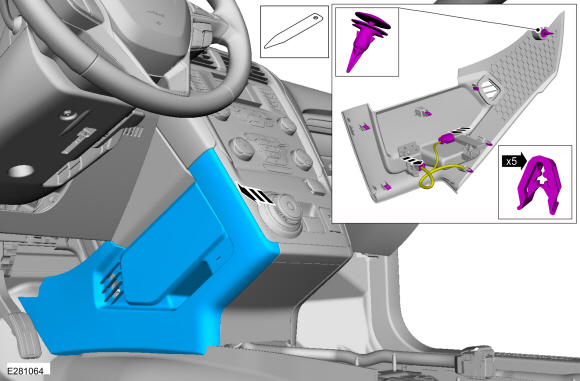
- Disconnect the electrical connectors.
- Release the retainers and remove the RH lower trim panel.
Use common equipment: Interior trim removal tool.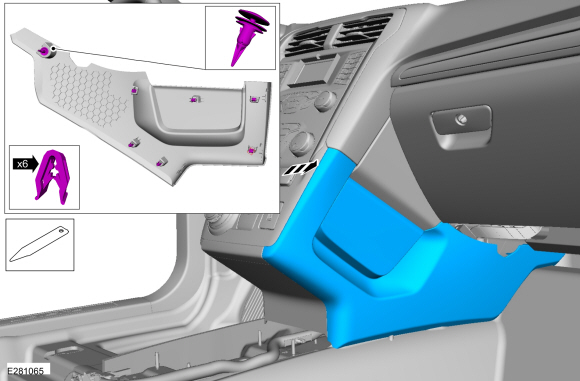
- Release the clips and remove the center lower trim panel.
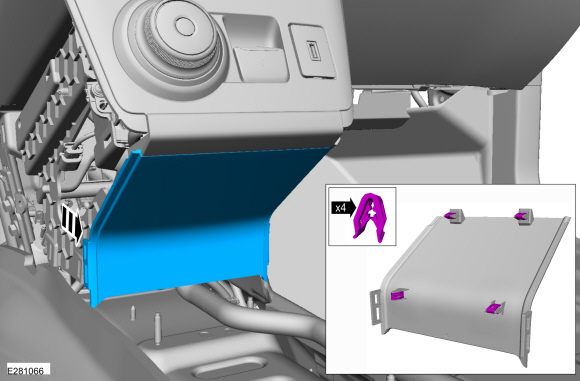
- Release the clips and remove the center pillar trim panel.
Use common equipment: Interior trim removal tool.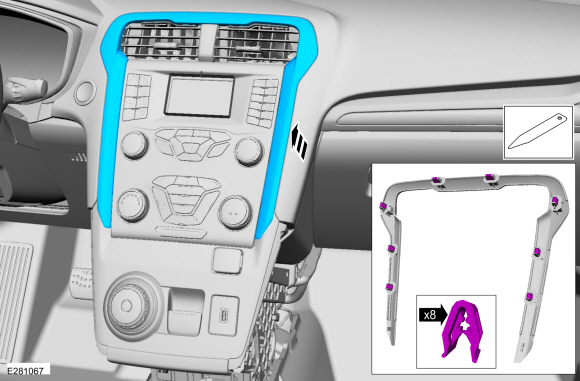
Release the clips and remove the selector trim panel.- Disconnect the electrical connectors.
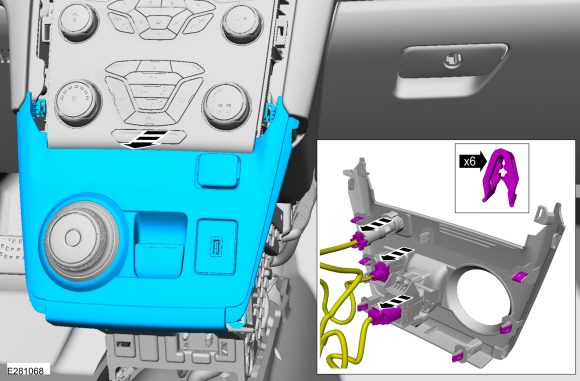
Remove the bolts, disconnect the electrical connectors, release the harness retainers and remove the selector mounting bracket.- Remove the bolts.
Torque: 55 lb-in (6.2 N·m)
- Remove the bolts.
Torque: 18 lb-in (2 N·m)

- Remove the bolts.
- Remove the bolts, disconnect the harness push pins, bracket push pins and remove the bracket.
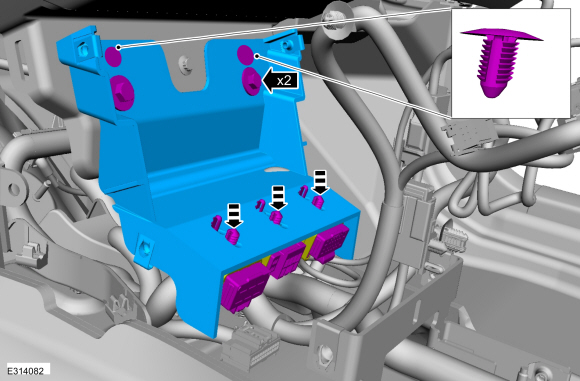
All vehicles except police
- Remove the floor console.
Refer to: Floor Console (501-12 Instrument Panel and Console, Removal and Installation). - If equipped, remove the selector lever assembly.
- If equipped, remove the gear shift lever.
All vehicles
- On both sides.
Position the front door seal aside.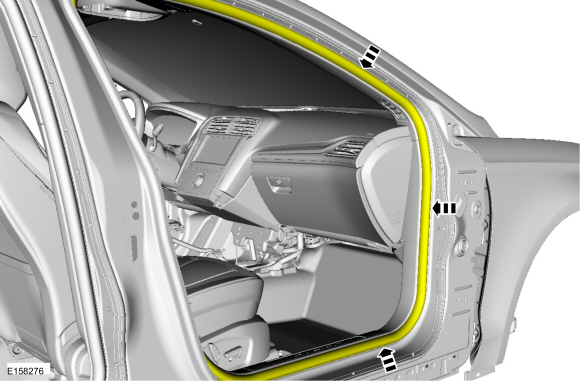
- On both sides.
Release the clips and remove the instrument panel side trim.
Use common equipment: Interior trim removal tool.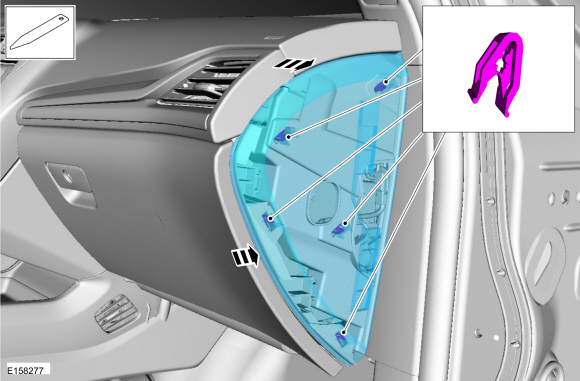
- On both sides.
Remove the hood side trim panel.
Use common equipment: Interior trim removal tool.
- On both sides.
Release the retainers and remove the sill trim.
Use common equipment: Interior trim removal tool.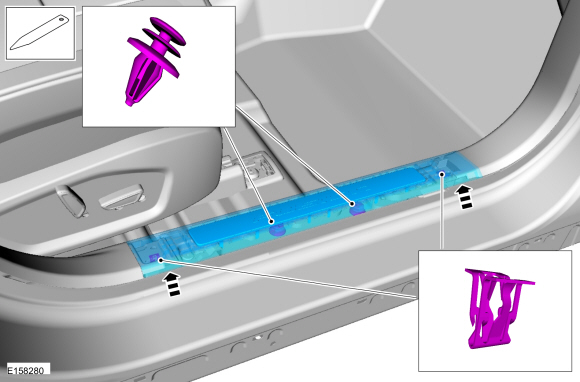
- On both sides.
Release the retainers and remove the lower hood trim panel.
Use common equipment: Interior trim removal tool.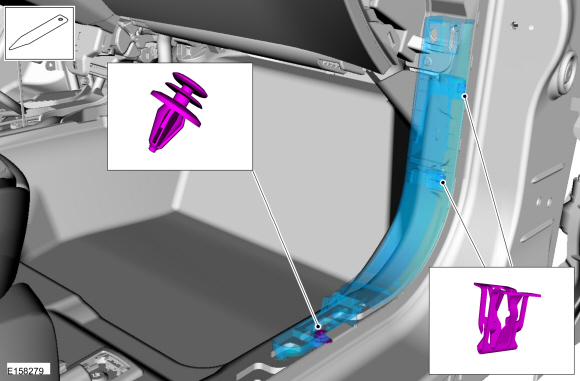
- Both sides, remove the front pillar trim panel.
Refer to: Front Pillar Trim Panel (501-05 Interior Trim and Ornamentation, Removal and Installation). - Remove the push pins and the RH insulator panel.
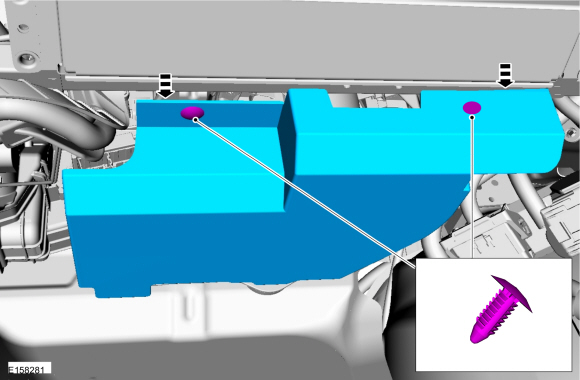
NOTICE: Do not allow the steering wheel to rotate while the steering shaft is disconnected, or the clockspring may be damaged.
Remove and discard the steering column shaft-to-steering gear bolt and disconnect the steering column shaft from the steering gear.
Torque: 21 lb-ft (28 N·m)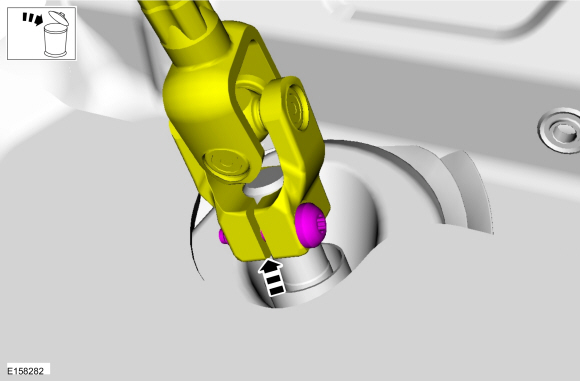
- Position the RH carpet aside.
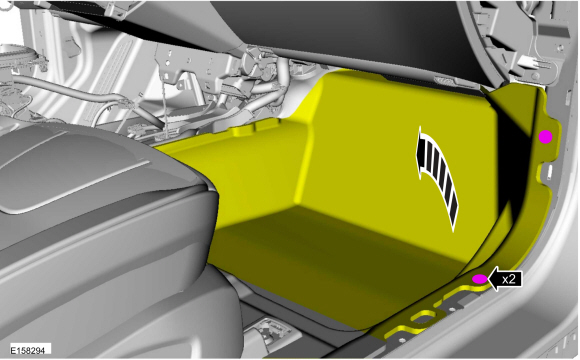
- Remove the hood latch release handle.
Refer to: Hood Latch Release Handle (501-14 Handles, Locks, Latches and Entry Systems, Removal and Installation). - Remove the push pins and position the LH carpet aside.
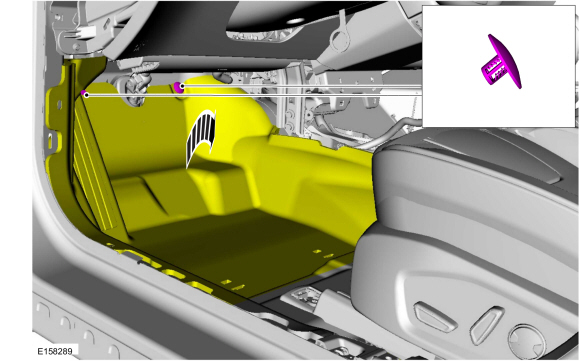
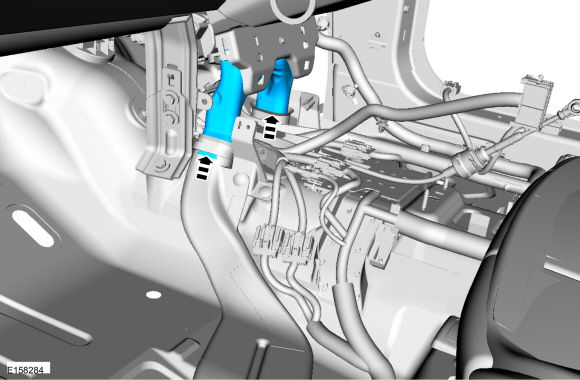
- Remove the bolt and the HVAC duct.
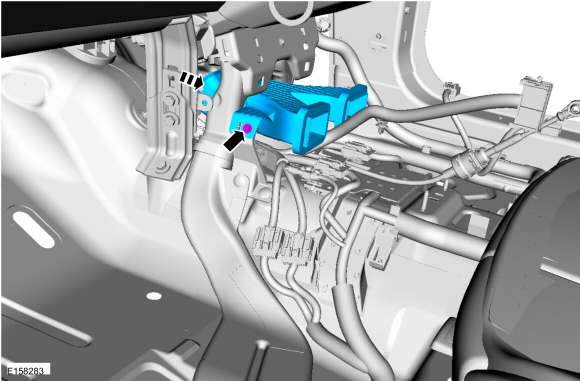
- Remove the HVAC duct.
- Remove the bolts and the instrument panel center brace.
Torque: 133 lb-in (15 N·m)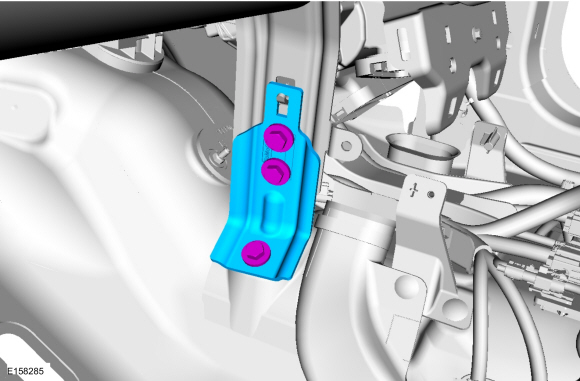
- Turn the ignition off, wait at least one minute.
- Disconnect the electrical connector.
- Disconnect the electrical connectors.
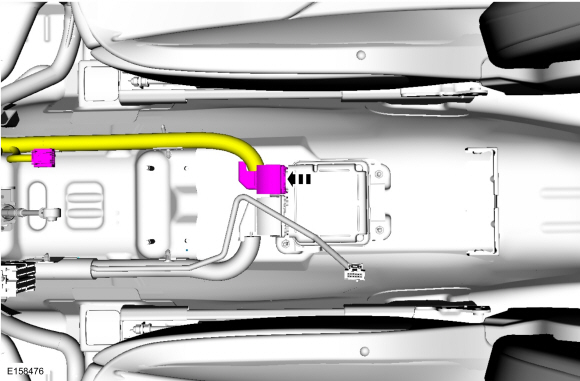
- Disconnect the electrical connectors and position the wiring tray aside.
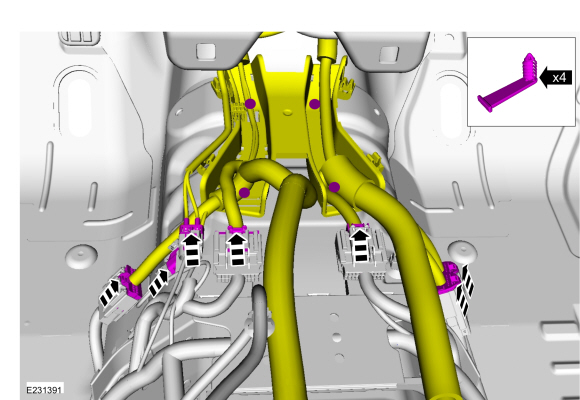
- Release the retainers and position the instrument panel trim aside.
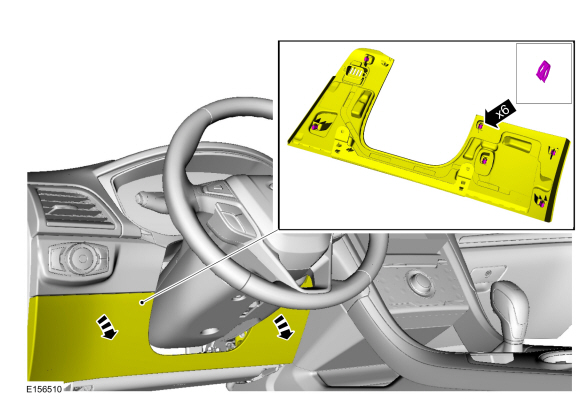
- Through the opening, disconnect the BCM electrical connectors.
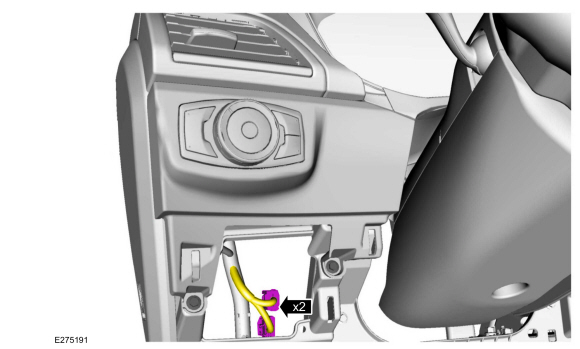
- Disconnect the BCM electrical connectors.
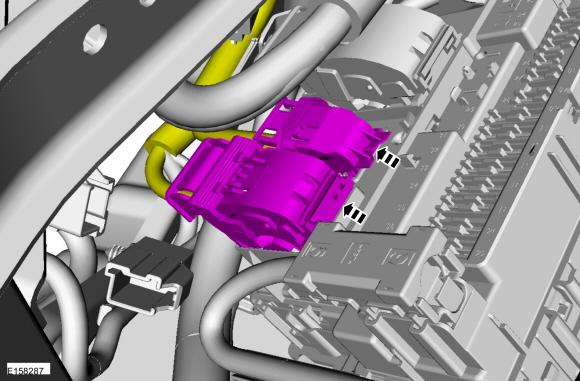
- Disconnect the electrical connector.
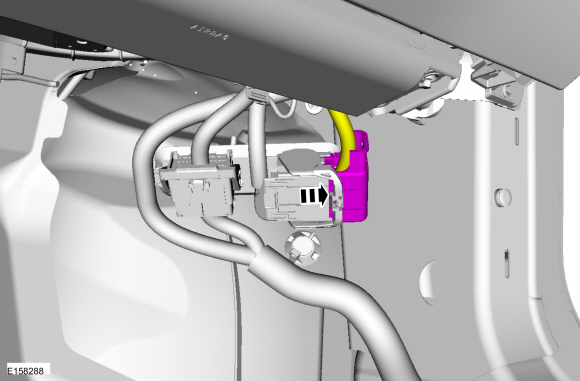
- Disconnect the electrical connectors and release the harness retainer. Release the tabs and remove the APIM.
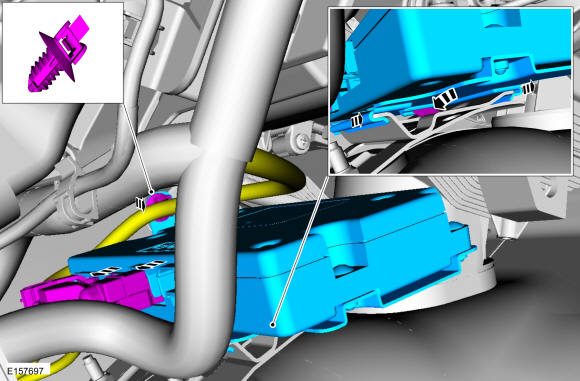
- Remove the hood panel grille.
Refer to Hood Panel Grille (501-02 Front End Body Panels, Removal and Installation). - Remove the bolts.
Torque: 18 lb-ft (25 N·m)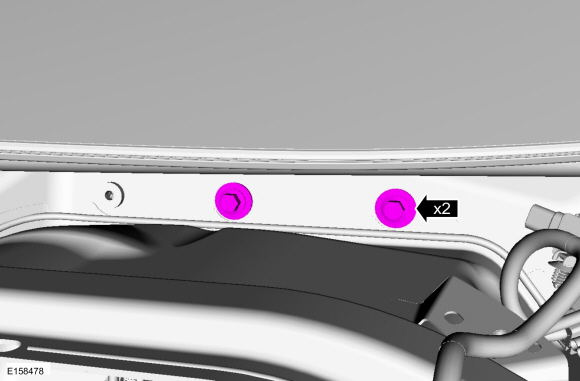
- On both sides.
Remove the A-pillar to inner cross member bolt cover.
Use common equipment: Interior trim removal tool.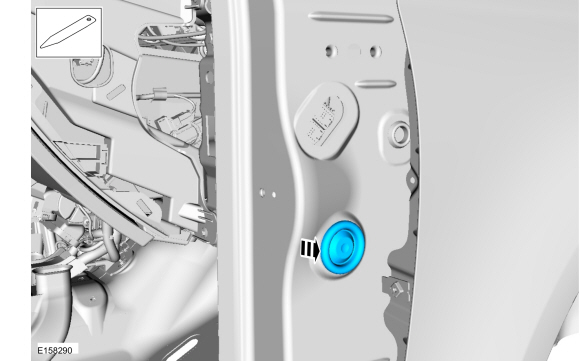
- On both sides.
Remove the A-pillar to vehicle cross member bolt.
Torque: 26 lb-ft (35 N·m)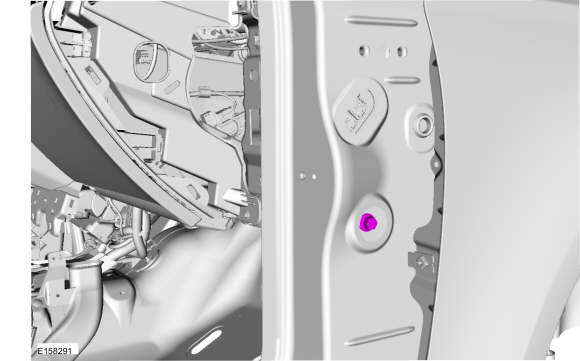
- Remove the HVAC nut.
Torque: 133 lb-in (15 N·m)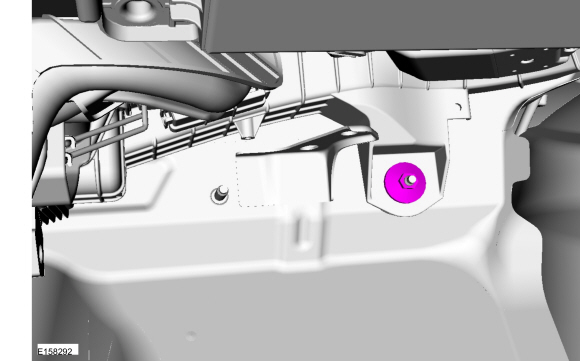
- On both sides.
Remove the instrument panel mounting bolts.
Torque: 17 lb-ft (22 N·m)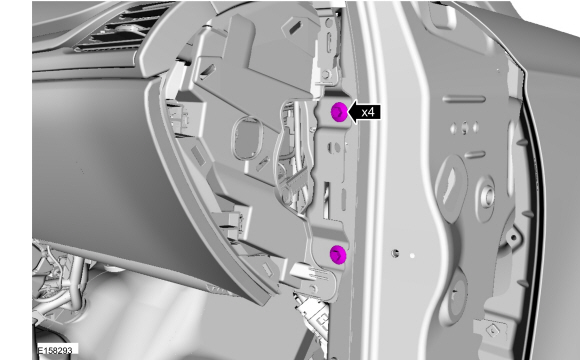
- Turn the instrument panel face down and remove it through the LH front door opening.

Installation
- To install, reverse the removal procedure.
- If the SRS was disabled, enable the SRS.
Refer to: Disabling and Enabling the Supplemental Restraint System (SRS) (501-20B Supplemental Restraint System, General Procedures). - Fill and bleed the cooling system.
Refer to: Engine Cooling System Draining, Vacuum Filling and Air Bleeding (303-03D Engine Cooling - 2.7 L EcoBoost (238 kW/324 L hp), General Procedures).
Refer to: Engine Cooling System Draining, Vacuum Filling and Air Bleeding (303-03C Engine Cooling - 2.5 L Duratec (125 kW/170 L hp), General Procedures).
Refer to: Engine Cooling System Draining, Vacuum Filling and Air Bleeding (303-03B Engine Cooling - 2 L EcoBoost (184 kW/250 L hp) - MI4, General Procedures).
Refer to: Engine Cooling System Draining, Vacuum Filling and Air Bleeding (303-03A Engine Cooling - 1.5 L EcoBoost (118 kW/160 L hp) - I4, General Procedures).
Refer to: Engine Cooling System Draining, Vacuum Filling and Air Bleeding (303-03D Engine Cooling - 2.7 L EcoBoost (238 kW/324 L hp), General Procedures).
Refer to: Engine Cooling System Draining, Vacuum Filling and Air Bleeding (303-03A Engine Cooling - 1.5 L EcoBoost (118 kW/160 L hp) - I4, General Procedures).
Refer to: Engine Cooling System Draining, Vacuum Filling and Air Bleeding (303-03B Engine Cooling - 2 L EcoBoost (184 kW/250 L hp) - MI4, General Procedures).
Refer to: Engine Cooling System Draining, Vacuum Filling and Air Bleeding (303-03C Engine Cooling - 2.5 L Duratec (125 kW/170 L hp), General Procedures).
Test yourself
A quick Ford Fusion quiz: every answer comes with an explanation and a link to the manual page.
Was this page helpful?