Body and Paint
Rear Bumper Cover. Removal and Installation
In this manual: Body and Paint
15steps
~90min
4/5difficulty
Done 0 of 15
Special Service Tools / General Equipment
Interior trim removal tool
Removal
- Remove the rear wheels and tires.
REFER TO: Wheels and Tires (204-04A Wheels and Tires, Removal and Installation). - Both sides.
Remove the inner fender liner with the rear bumper cover pin retainers and bolts.
Torque: 13 lb-in (1.5 N·m)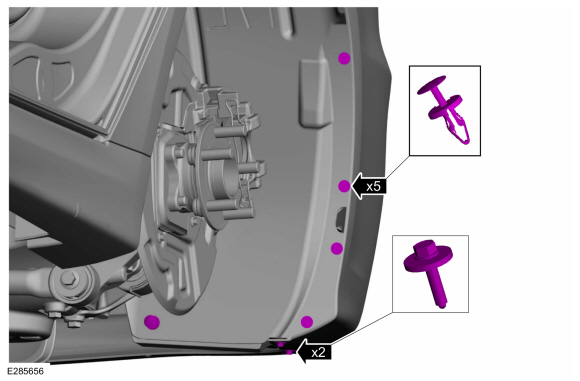
- Both sides.
Remove the nut and spring clip, then set the wheel arch liner aside.
Torque: 13 lb-in (1.5 N·m)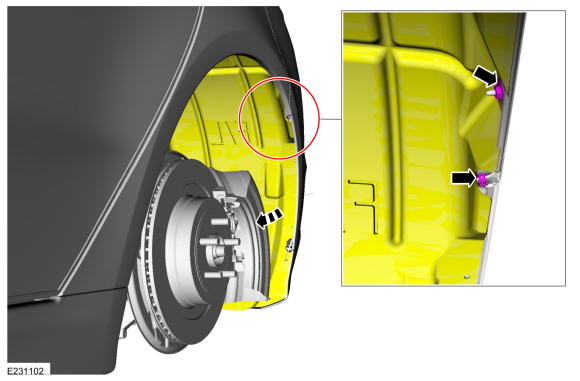
- Remove the lower rear bumper cover screws to the body.
Torque: 13 lb-in (1.5 N·m)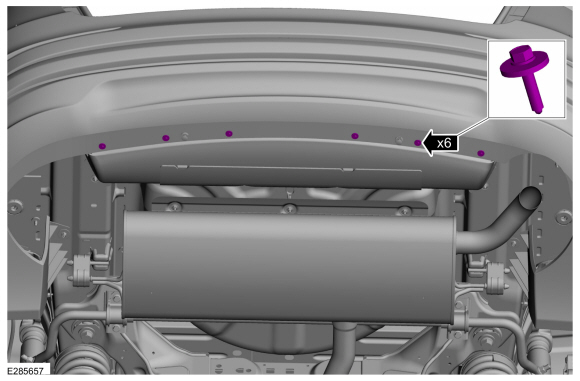
- Remove the rear lamp assemblies.
Refer to: Rear Lamp Assembly - 4-Door (417-01 Exterior Lighting, Removal and Installation). - Both sides.
Remove the pin-type retainer.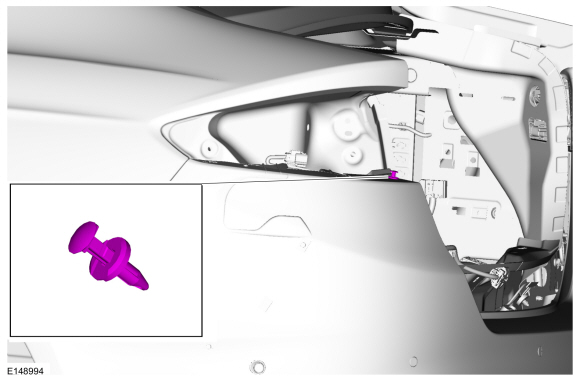
- Both sides.
Release the rear bumper cover from the rear bumper cover brackets and set the rear bumper cover aside.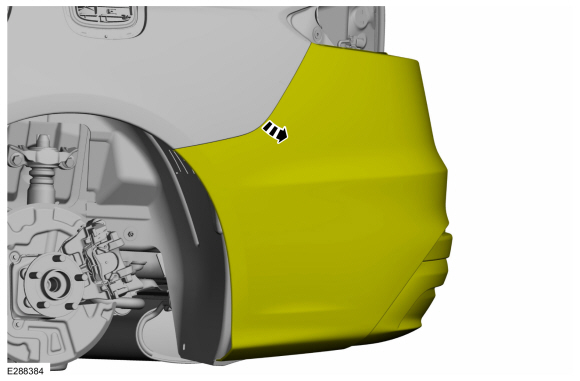
- Disconnect the rear bumper cover wiring harness electrical connector.
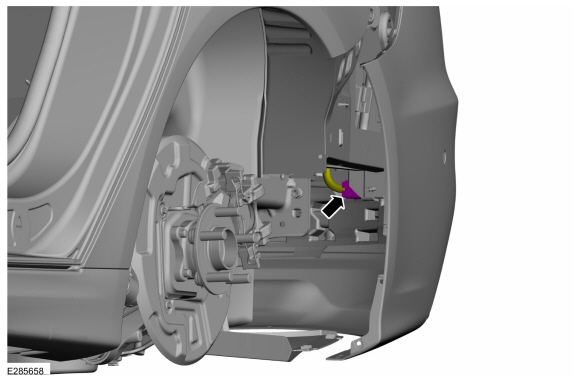
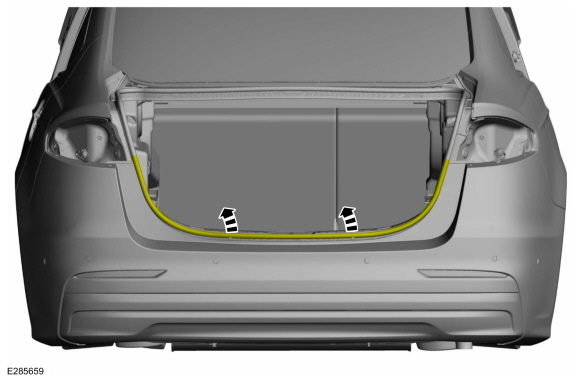
- Set the seal aside.
- Using a non-marring tool, release the retaining tabs and pull outward to disengage them.
Use common equipment: interior trim removal tool.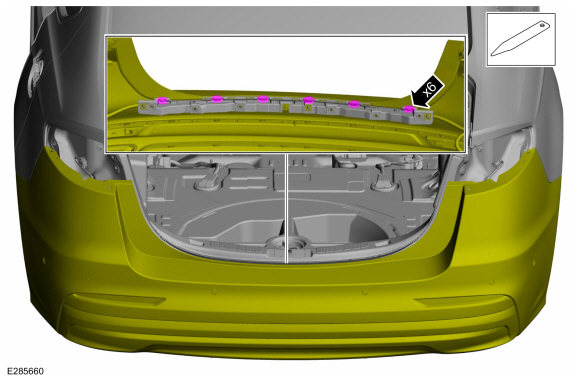
- With the help of an assistant.
Remove the rear bumper cover.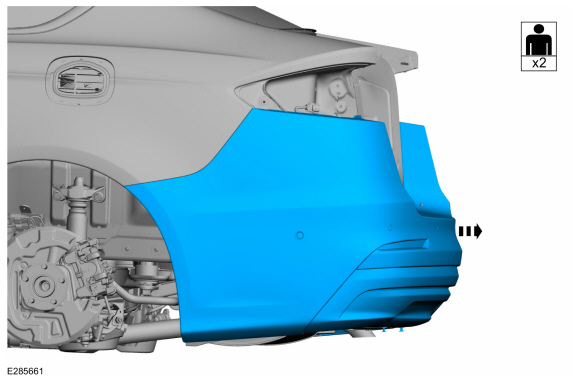
- Both sides.
Inspect the bumper reinforcement for damage to the bumper cover lugs.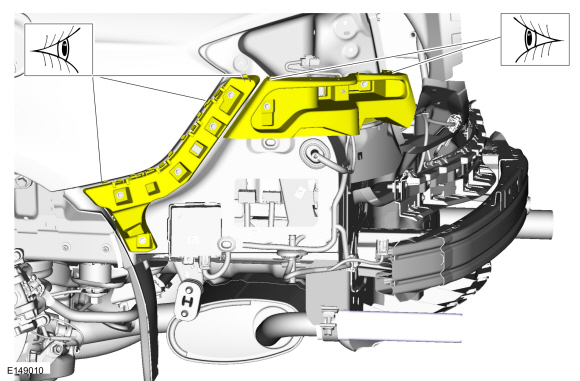
- Both sides, if required.
Remove the screws, release the tab and remove the side rear bumper trim brackets.
Torque: 13 lb-in (1.5 N·m)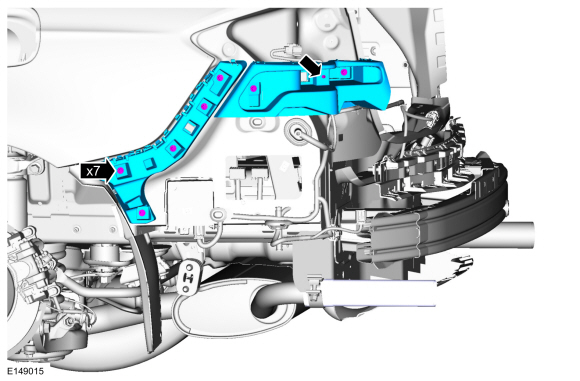
- Inspect the bumper reinforcement for damage to the bumper cover gripping surfaces.
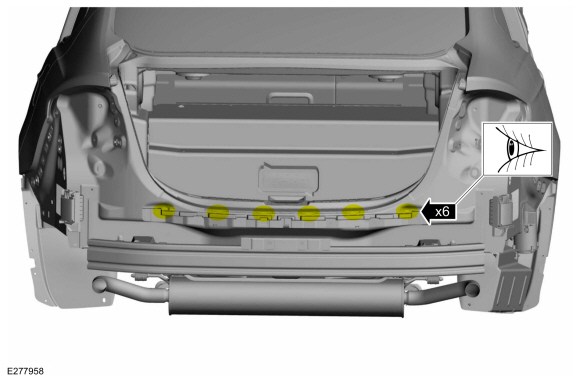
- If necessary.
Remove the screws, trim pin and damaged rear bracket.
Torque: 13 lb-in (1.5 N·m)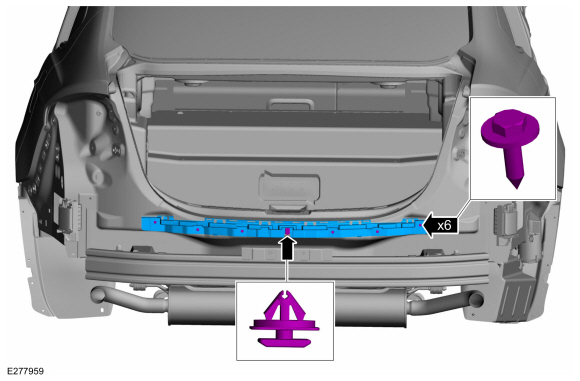
Installation
- To install, reverse the removal procedure.
Test yourself
A quick Ford Fusion quiz: every answer comes with an explanation and a link to the manual page.
Was this page helpful?