Engine Electrical System
Ignition Coil Repair Procedures
In this manual: Engine Electrical System
24steps
~144min
4/5difficulty
Done 0 of 24
Removal
Ignition Coil No. 1- Turn the ignition switch OFF and disconnect the negative (-) battery cable.
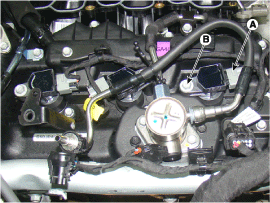
- Remove the engine wire harness protector (A) after loosening the bolt.
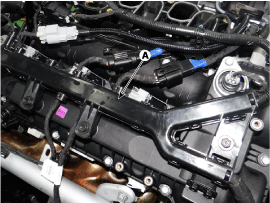
- Disconnect the ignition coil connector (A).
- Remove the ignition coil from the engine by removing the mounting bolt (B).

- Turn the ignition switch OFF and disconnect the negative (-) battery cable.
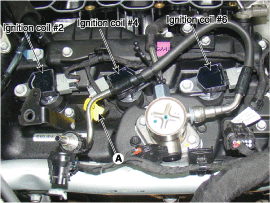
- Remove the coolant reservoir assembly. (Refer to Engine Mechanical System - "Coolant Reservoir")
- Disconnect the ignition connector (A).
- Remove the ignition coil from the engine by removing the mounting bolt (B).
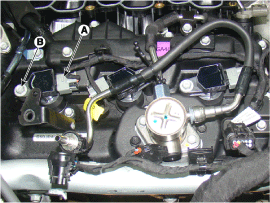
- Turn the ignition switch OFF and disconnect the negative (-) battery cable.
- Remove the engine wire harness protector (A) after loosening the bolt.
- Disconnect the ignition coil connector (A).
- Remove the ignition coil from the engine by removing the mounting bolt (B).
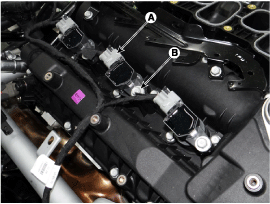
- Turn the ignition switch OFF and disconnect the negative (-) battery cable.
- Remove the coolant reservoir assembly. (Refer to Engine Mechanical System - "Coolant Reservoir")
- Disconnect the ignition coil connector (A).
- Remove the ignition coil from the engine by removing the mounting bolt (B).
- Turn the ignition switch OFF and disconnect the negative (-) battery cable.
- Remove the engine wire harness protector (A) after loosening the bolt.
- Disconnect the ignition coil connector (A).
- Remove the ignition coil from the engine by removing the mounting bolt (B).
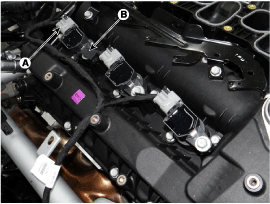
- Turn the ignition switch OFF and disconnect the negative (-) battery cable.
- Remove the coolant reservoir assembly. (Refer to Engine Mechanical System - "Coolant Reservoir")
- Disconnect the ignition coil connector (A).
- Remove the ignition coil from the engine by removing the mounting bolt (B).
Installation
 |

- Install in the reverse order of removal. Ignition coil bolts: 9.8 ~ 11.8 N·m
Inspection
- Measure the primary coil resistance between terminals (+) and (-).
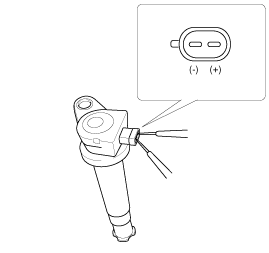
Standard value: 0.62 Ω ± 10%
Test yourself
A quick Hyundai Genesis DH quiz: every answer comes with an explanation and a link to the manual page.
Was this page helpful?