Body Electrical System
Speaker Repair Procedures
In this manual: Body Electrical System
37steps
~222min
4/5difficulty
Done 0 of 37
Inspection
Speaker Troubleshooting
|
- Basic inspection: Loosen the screws to eliminate interference from the trim and surrounding parts, then remove the speaker. After removing the speaker, check the speaker sound quality with the connector connected.
- Check by each cause
- Abnormal vibration
A. Before replacing the speaker, make sure the mounting screws are properly tightened. B. Reinstall the speaker and check that the problem is resolved. C. If the symptom persists, replace the speaker with a new one. - Noise
A. Make sure the speaker connector is properly connected, and reinstall the connector if necessary. B. If noise occurs in radio mode, switch to CD player mode. C. If noise occurs in both modes, replace the speaker with a new one.
If noise occurs only in radio mode, the cause is poor radio reception, so do not replace the speaker.
- Poor Performance
A. Check the positive (+) and negative (-) speaker terminals with an ohmmeter. B. If the measured resistance is at the specified value shown below, the speaker is operating normally. C. If the measured resistance differs from the specified value, replace the speaker. 
- Abnormal vibration
Removal
Speakers in Front Doors- Disconnect the negative (-) battery terminal.
- Remove the front door trim panel.
- Remove the front speaker (A) after loosening the screws. (Refer to Body - Front Door Trim Panel)
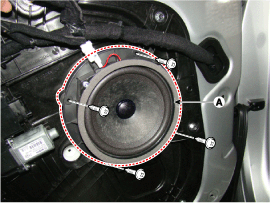
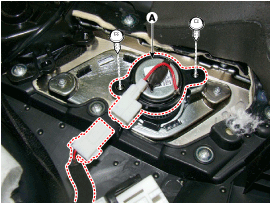
- Remove the tweeter speakers (A) after loosening the screws.
- Disconnect the negative (-) battery terminal.
- Remove the rear door trim panel. (Refer to Body - "Rear Door Trim")
- Remove the rear speakers (A), (B) after loosening the screws.
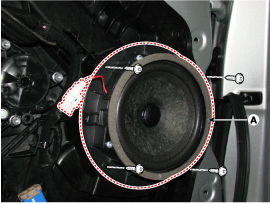
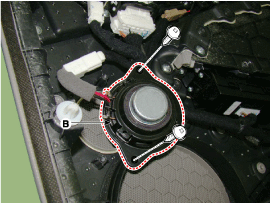
- Remove the tweeter speakers (A) after loosening the screws.
|
- Disconnect the negative (-) battery terminal.
- Using a plastic scraper or remover, remove the center speaker garnish cover.
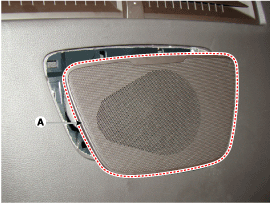
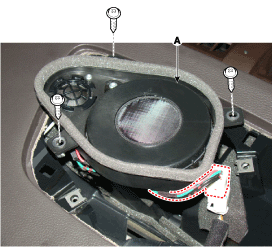
- After disconnecting the connector and loosening the screws, remove the center speaker (A).
- Disconnect the negative (-) battery terminal.
- Remove the rear seat. (Refer to Body - "Rear Seat")
- Remove the rear parcel tray (A). (Refer to Body - Rear Seat)
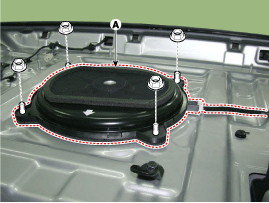
- Remove the subwoofer speaker (A) after removing the bolts (4EA).
- Disconnect the negative (-) battery terminal.
- Remove the rear seat. (Refer to Body - "Rear Seat")
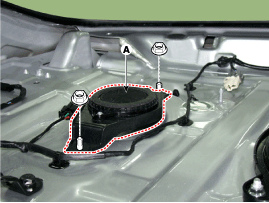
- Remove the rear parcel tray (A). (Refer to Body - Rear Seat)

- Remove the surround speaker (A) after removing the screws (2EA).
- Disconnect the negative (-) battery terminal.
- Remove the left/right airbag side speaker grille (A).
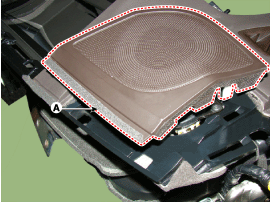
Be careful not to scratch the airbag and related parts. - Remove the mid-range speaker (A) after disconnecting the connector and removing the screws.
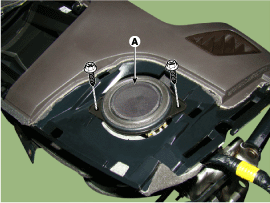
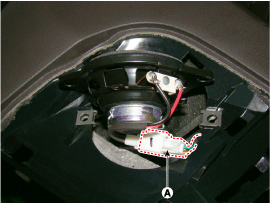
Installation
Front Door Speaker- Install the front door speaker.
- Install the front door trim panel.
- Install the mid-range speaker.
- Install the side speaker grille on the airbag.
- Connect the negative (-) battery terminal.
- Install the rear door speaker.
- Install the rear door trim panel.
- Install the center speaker.
- Install the center speaker grille.
- Install the subwoofer speaker.
- Install the rear parcel shelf and rear seat.
- Install the surround speaker.
- Install the rear parcel shelf and rear seat.
|

Test yourself
A quick Hyundai Genesis DH quiz: every answer comes with an explanation and a link to the manual page.
Was this page helpful?