Body Electrical System
FRONT WIPER MOTOR Repair Procedures
In this manual: Body Electrical System
25steps
~150min
5/5difficulty
Done 0 of 25
DEPOSIT
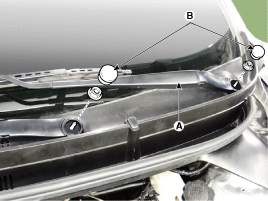
- Remove the cap (B) and nuts, then remove the wiper arm (A).
Tightening torque: 22.6 ~ 26 N·m
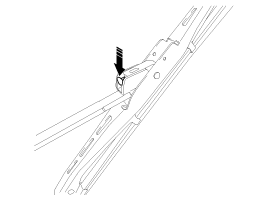
- If necessary, loosen the wiper blade retainer. Pull up and remove the wiper blade from the radius inside the wiper arm.
- Remove the cowl and the cowl top cover (A) after removing the 4 clips.
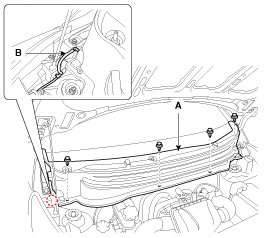
- Disconnect the washer hose (B).
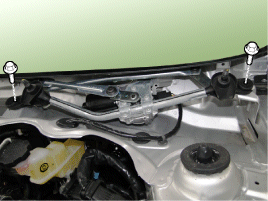
- Remove the wiper motor and linkage assembly (A) after removing the 2 bolts.
- Disconnect the wiper motor connector (A) from the linkage and wiper motor assembly.
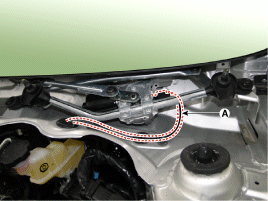
- Remove the upper link (A) from the wiper motor arm.
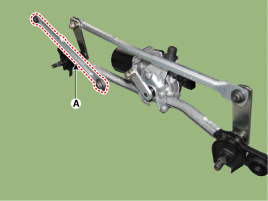
- While holding the wiper motor crank arm, disconnect the wiper motor crank upper link (A) from the wiper motor crank.
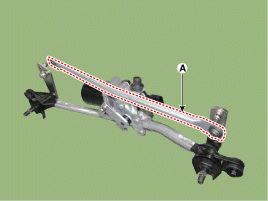
- Remove the front wiper motor (A) and the wiper motor cover. Wiper arm (B).
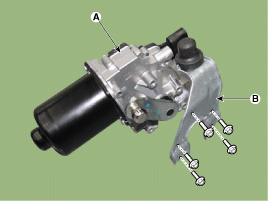
REMEDY
- Install the wiper motor.
- Install the wiper arm onto the wiper motor cover with the bolts (5 pcs).
Tightening torque: 6.4 ~ 6.6 N·m N·m (0.65 ~ 0.67 kgf·m, 4.7 ~ 4.8 lbf·ft)
- Install the wiper motor to the vehicle body.
Tightening torque: 6.9 ~ 10.8 N·m
- Before installing the wiper arm ball joint onto the wiper motor crank arm, connect the motor power connector.
- Turn the switch on to operate the wiper motor, then turn it off at the intermediate position.
- Position the ball socket and secure the ball socket on the wiper link ball stud of the wiper motor crank.
- Turn the ignition key on and set the wiper switch to OFF during normal operation. (Park position)
- Install the windshield wiper cowl.
- Install the windshield wiper arm and blade.
Tightening torque: 22.6 ~ 26 N·m
- Set the wiper blade and shaft to the auto stop position. A: Auto stop position (blade)
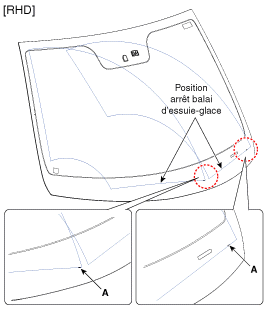
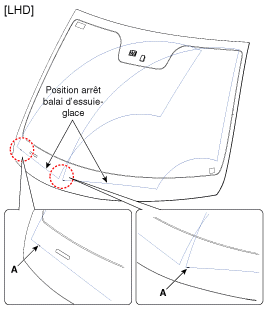
Inspection
TRANSMISSION OPERATION CHECK- Disconnect the connector (A) from the wiper motor.
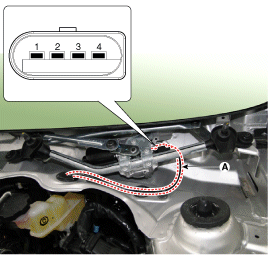
NO Description LEFT-HAND DRIVE 1 MASS 2 PARK 3 Low speed 4 High speed - Disconnect the positive (+) battery cable from terminal 3, then disconnect the negative (-) cable from terminal 1.
- Make sure the motor operates at low speed.
- Connect the positive (+) battery cable to terminal 4, then connect the negative (-) cable to terminal 2.
- Make sure the motor operates at high speed.
- Check the washing quality.
Test yourself
A quick Hyundai i20 quiz: every answer comes with an explanation and a link to the manual page.
Was this page helpful?