Heating, Ventilation and Air Conditioning
Heater Core Repair Procedures
In this manual: Heating, Ventilation and Air Conditioning
6steps
~36min
2/5difficulty
Done 0 of 6
REPLACEMENT
- Disconnect the negative (-) battery terminal.
- After loosening the bolts, remove the protective gasket of the main and cowl vent at the same time. (Refer to Heater - "Heater Unit")
- After loosening the screws, separate the blower unit (B) from the heater unit (A).
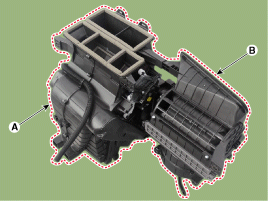
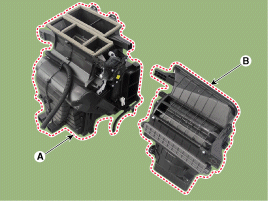
- After loosening the retaining screws, remove the heater core cover (A).
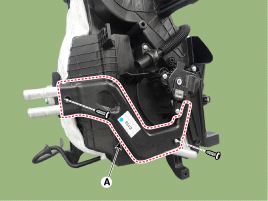
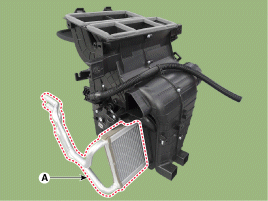
- Pull out the heater core (A) from the heater unit.
- To install, perform the removal procedure in reverse order.
- When installing a new evaporator, add refrigerant oil (PAG oil).
- Replace the O-rings on each fitting with new ones and coat them with a thin layer of refrigerant oil before installation. To prevent leaks, make sure to use O-rings designed for R-134a refrigerant.
- Immediately after using the oil, replace the container cap, then tightly close the container to prevent moisture absorption.
- Be careful not to spill refrigerant oil on the vehicle, as it may damage the paint. If refrigerant oil contacts the paint, wash it off immediately.
- Apply sealant to the bushings.
- Make sure there are no air leaks.
- Charge the system, then check it for proper operation.
- Do not reverse the heater inlet and outlet hoses, then firmly install the hose clamp.
Test yourself
A quick Hyundai i20 quiz: every answer comes with an explanation and a link to the manual page.
Was this page helpful?