Engine Electrical System
Starter Repair Procedures
In this manual: Engine Electrical System
32steps
~192min
4/5difficulty
Done 0 of 32
Removal
- Disconnect the negative battery cable.
- Remove the under cover. (Refer to Engine Mechanical System - "Engine Room Under Cover")
- Remove the vacuum pump. (Refer to Brake System — "Vacuum Pump")
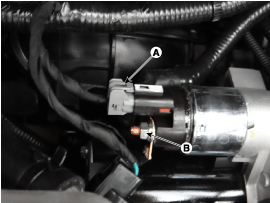
- Disconnect the starter cable (B) from the B terminal on the solenoid, then disconnect the connector (A) from the S terminal. Starter B terminal nut tightening torque: 9.8–11.8 N·m
- Remove the starter (A).
Starter mounting bolt: 49.0–64 N·m
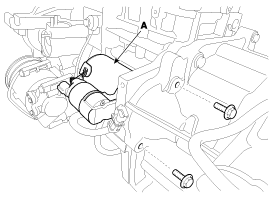
- Remove the starter motor.
Installation
- Install in the reverse order of removal.
Disassembly
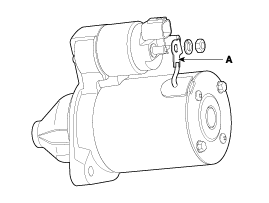
- Disconnect the M terminal (A) on the magnetic switch assembly.
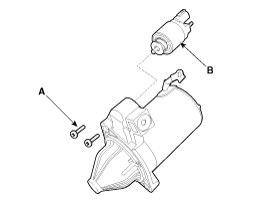
- Loosen the 2 screws (A), then remove the magnetic switch assembly (B).
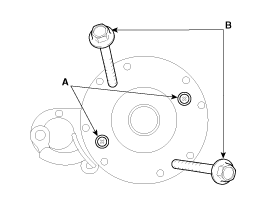
- Loosen the brush holder mounting screws (A) and the through bolts (B).
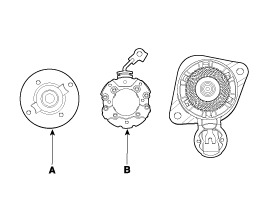
- Remove the rear bracket assembly (A) and the brush holder assembly (B).
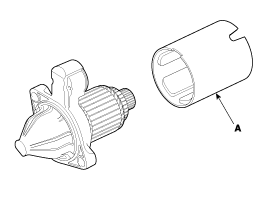
- Remove the fork assembly (A).
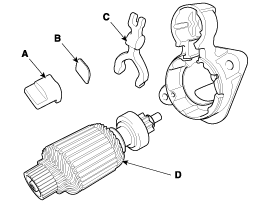
- Remove the seal (A), lever plate (B), lever (C), and armature assembly (D).
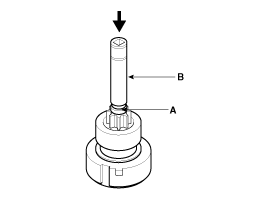
- Press the stopper (A) using a socket (B).
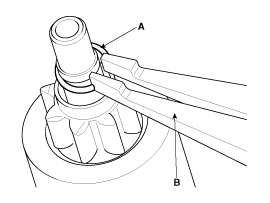
- After removing the snap ring (A) using pliers (B).
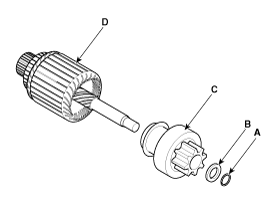
- Remove the snap ring (B), stopper (A), overrunning clutch (C) and armature (D).
Installation
- Assemble in the reverse order of disassembly.
Inspection
Armature- Remove the starter motor.
- Disassemble the starter as shown at the beginning of this procedure.
- Inspect the armature for wear or damage from contact with the permanent magnet. If there is wear or damage, replace the armature.
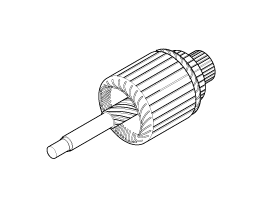
- Inspect the commutator surface (A). If the surface is dirty or burnt, resurface it with sandpaper or on a lathe according to the following specifications, or polish with #500 or #600 sandpaper (B).
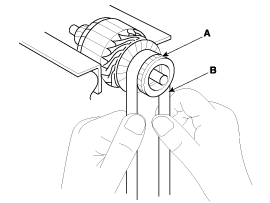
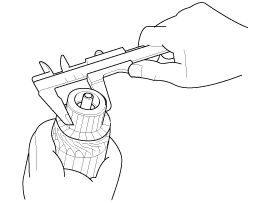
- Check the commutator diameter. If the diameter is below the service limit, replace the armature. Commutator diameter Standard (new): 29.4 mm (1.1575 in) Service limit: 28.8 mm (1.1339 in)
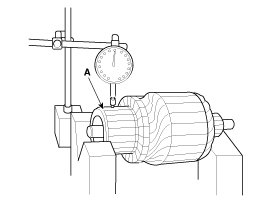
- Measure the commutator runout (A).
- If the commutator runout is within the service limit, check the commutator for carbon dust or brass chips between the segments.
- If the commutator runout exceeds the service limit, replace the armature.
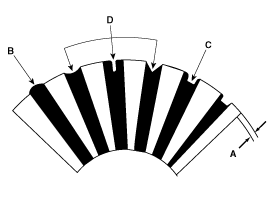
- Check the undercut depth (A). If the mica is too high (B), undercut the mica with a hacksaw blade to the correct depth. Cut away all of the mica (C) between the commutator segments. The undercut must not be too shallow, too narrow, or V-shaped (D). Commutator mica undercut depth: Standard (new): 0.5 mm (0.0197 in.) Limit: 0.2 mm (0.0079 in.)
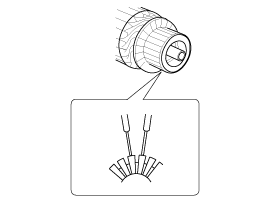
- Check for continuity between the commutator segments. If there is an open circuit between any segments, replace the armature.
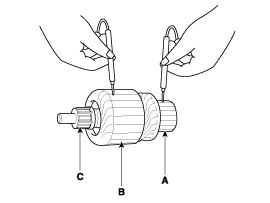
- Using an ohmmeter, check that there is no continuity between the commutator (A) and the armature coil core (B), and between the commutator and the armature shaft (C). If there is continuity, replace the armature.
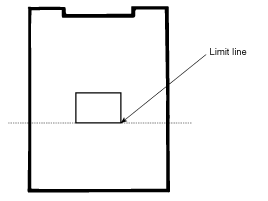
- Replace brushes that are worn or contaminated with oil. Brush length Standard: 12.3 mm (0.4843 in.) Service limit: 5.5 mm (0.2165 in.)
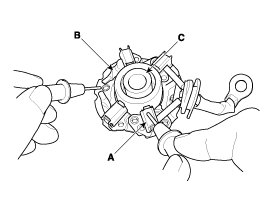
- Make sure there is no continuity between the (+) brush holder (A) and the (-) plate (B). If there is continuity, replace the brush holder assembly.
- Slide the overrunning clutch along the shaft. Replace it if it does not slide smoothly.
- Turn the overrunning clutch in both directions. It should lock in one direction and rotate smoothly in the other. If it locks in neither direction or locks in both directions, replace it.
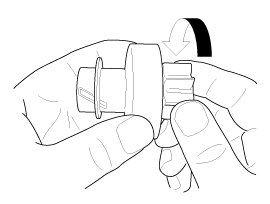
- If the starter pinion gear is worn or damaged, replace the overrunning clutch assembly (the pinion gear is not sold separately). Check the condition of the flywheel or torque converter ring gear if the starter pinion teeth are damaged.
Cleaning
- Do not immerse parts in cleaning solvent. Immersing the yoke assembly and/or armature may damage the insulation. Wipe these parts only with a cloth.
- Do not immerse the drive in cleaning solvent. The overrunning clutch is pre-lubricated at the factory, and the solvent will wash the lubricant out of the clutch.
- The drive may be cleaned with a brush moistened with cleaning solvent, and then wiped dry with a cloth.
Test yourself
A quick Hyundai Kona quiz: every answer comes with an explanation and a link to the manual page.
Was this page helpful?