Engine Mechanical System
cylinder head cover
In this manual: Engine Mechanical System
14steps
~84min
3/5difficulty
Done 0 of 14
Components and Component Location
COMPONENTS
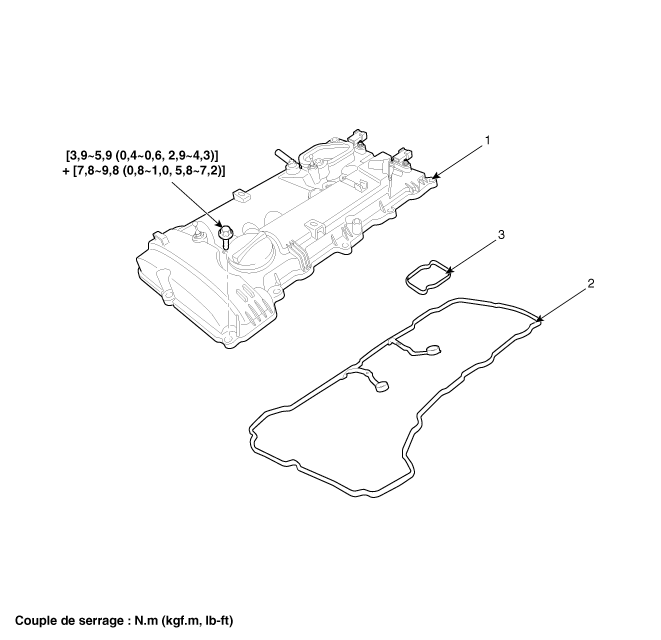
| 1. Cylinder head cover 2. Cylinder head cover gasket |
3. Fuel pump bracket gasket |
Repair Procedures
DEPOSIT
- Remove the engine cover. (Refer to Engine and Transaxle - "Engine Cover")
- Disconnect the negative battery cable.
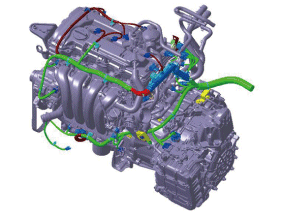
- Disconnect the wiring connectors and wiring harness clips, then remove the connector brackets around the cylinder head cover.
- Remove the air cleaner assembly. (Refer to Intake and Exhaust System - "Air Cleaner")
- Disconnect the hose from the PCV (Positive Crankcase Ventilation) valve (B).
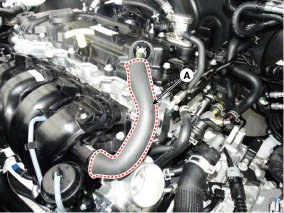
- Disconnect the fuel hose (A) and the PCSV (Purge Control Solenoid Valve) hose (B).
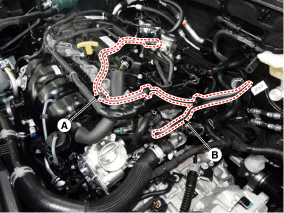
- Remove the vacuum hose (A).
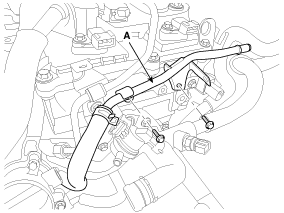
- Remove the high-pressure fuel line (A) and the PCSV (Purge Control Solenoid Valve) bracket (B). (Refer to Engine Control and Fuel System - "High Pressure Fuel Pump")
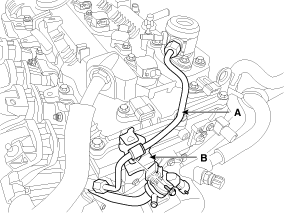
- Remove the high pressure fuel pump. (Refer to Engine Control and Fuel System - "High Pressure Fuel Pump")
- Remove the ignition coils. (Refer to Engine Electrical System - Ignition Coil.)
- Remove the oil level gauge. (Refer to Lubrication System - "Oil Level Gauge and Tube")
- Remove the cylinder head cover (A).
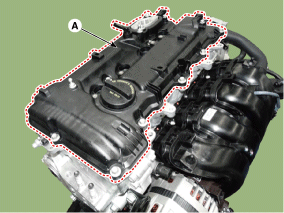
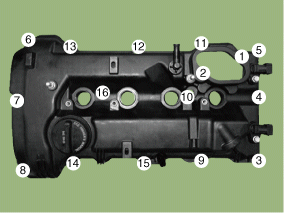
REMEDY
- Install the cylinder head cover.
- Remove the hardened sealant from the cylinder head cover and the gap between the timing chain cover and the camshaft bracket before installing the cylinder head cover.
- Apply engine oil to the lip of the seal. Apply oil to the cover and the outer surface of the spark plug tubes.
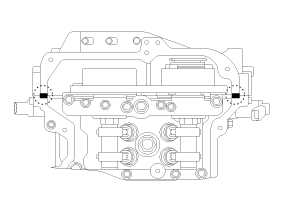
- After applying sealant to the gap between the timing chain cover and the camshaft bracket, wait 5 minutes. Bead width: 2.0 ~ 3.0 mm (0.08 ~ 0.12 in). Sealant: Threebond 1217H or equivalent.
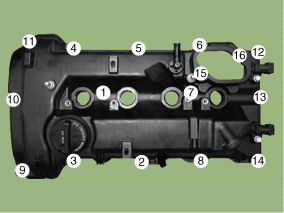
- Install the cylinder head cover and tighten the bolts in several passes in the sequence shown. Tightening torque: Step 1: 3.9 ~ 5.9 N·m Step 2: 7.8 ~ 9.8 N·m
- Install the remaining parts in the reverse order of removal.
Test yourself
A quick Hyundai Tucson quiz: every answer comes with an explanation and a link to the manual page.
Was this page helpful?