Manual Transmission
Control Cable Repair Procedures
In this manual: Manual Transmission
18steps
~108min
4/5difficulty
Done 0 of 18
Inspection
- Check the select cable for proper operation and damage.
- Check the shift cable for proper operation and damage.
- Check the boots for damage.
- Check the boots for signs of wear, sticking, restricted movement, or damage.
- Check for a weak or damaged spring.
- Body-side control lever: After assembly, check the operation of the T/M side lever.
Removal
- Remove the center console. (Refer to "Console" in Group BD)
- Remove the lock pin (A) and clip (B).
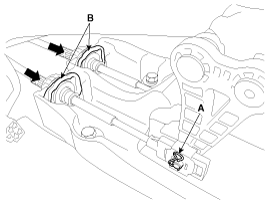
- Remove the clip (A), then remove the shift cable assembly.
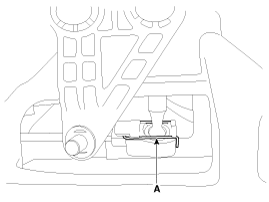
- Remove the clip (A) and nuts (B).
Tightening torque: 7.8 ~ 11.8 N·m
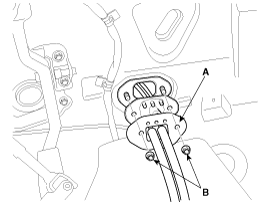
- Remove the following items:
A. Air cleaner assembly and air duct. (Refer to Intake and Exhaust System in Group EM.) B. Battery and battery tray. (Refer to Charging System in Group EE.) - Remove the shift cable and select cable (A).
- Remove the pin (B) and washer (C).
- Release the locking clip (D), then remove the shift and select cable (A) and clip (D) from the bracket.
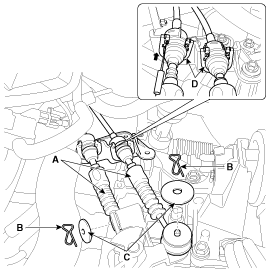
When installing, do not reuse the clip (D).
- Remove the shift cable from the passenger compartment.
- Installation is the reverse of removal.
- When installing, set the passenger compartment shift lever and the side shift lever of the T/M to the N position.
- When installing, adjust the select cable. (Refer to Control Cable Adjustment Procedure in this group.)
Adjustment
Select cable adjustment
- Move the shift lever to 3rd gear.
- Move the sliding clip (B) of the guide element (A) in the direction shown in the illustration.
Adjust the position of the sliding latch on the select lever by moving the sliding latch in direction (C).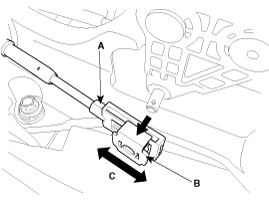
- Install the guide element (A) of the select cable (B).
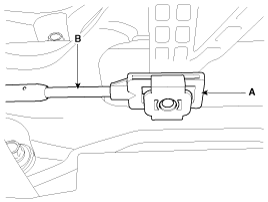
- Adjust the sliding clip (B) so that it aligns with the shift lever pin (A), then install the lock pin (C).
Insert the sliding clip in the direction shown in the illustration.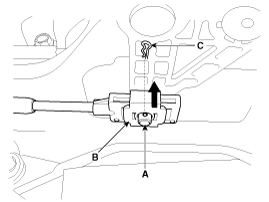
Test yourself
A quick Hyundai Tucson LM quiz: every answer comes with an explanation and a link to the manual page.
Was this page helpful?