Body (Interior and Exterior)
Crash Pad Repair Procedures
Done 0 of 70
Replacement
Cluster Replacement
- Using a flat-tip screwdriver, wrap protective tape around the tip and apply protective tape around the relevant parts to prevent damage.
- Wear gloves to protect your hands.
|
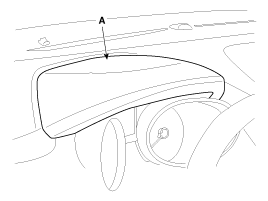
Using a screwdriver or remover, remove the cluster fascia panel (A).
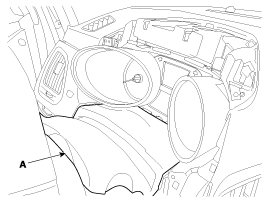
Using a screwdriver or pry tool, remove the instrument panel lower panel (A).
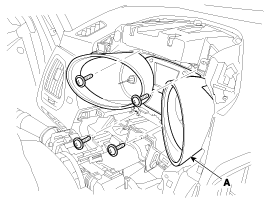
Loosen the mounting screws, then remove the cluster (A).
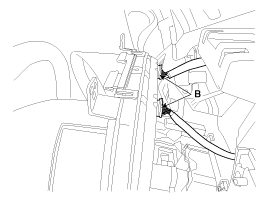
Disconnect the connectors (B).
Install in the reverse order of removal.
- Make sure the connector is properly connected.
- Replace any damaged clips.
|
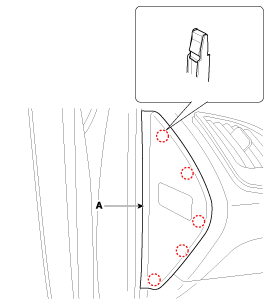
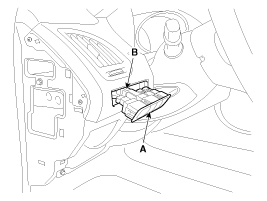
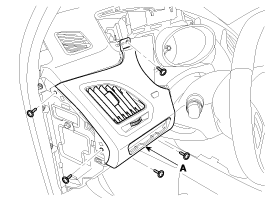
Using a screwdriver or pry tool, remove the crash pad side cover (A).
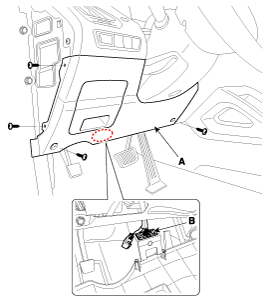
Loosen the airbag lower panel mounting screws, then remove the airbag lower panel (A).
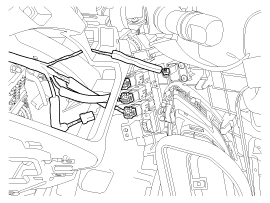
Disconnect the diagnostic connector (B).
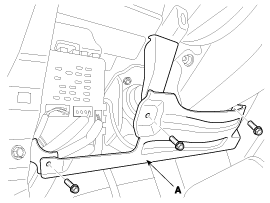
Loosen the mounting bolts, then remove the reinforcement panel (A).
Install in the reverse order of removal.
Crash Pad Lower Panel Replacement / Audio Replacement
- Using a flat-tip screwdriver, wrap protective tape around the tip and apply protective tape around the relevant parts to prevent damage.
- Wear gloves to protect your hands.
|
Remove the center panel (A).
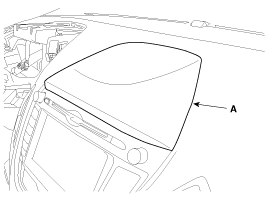
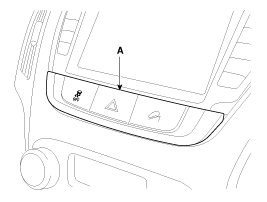
Using a screwdriver or pry tool, remove the hazard switch assembly (A).
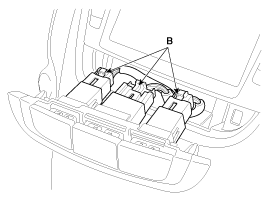
Disconnect the connectors (B).
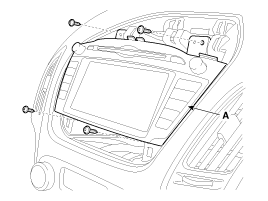
Loosen the mounting screws, then remove the audio system (A).
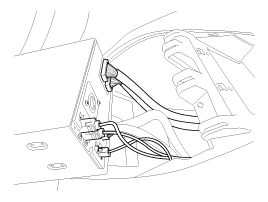
Disconnect the connectors.
Install in the reverse order of removal.
- Make sure the connectors are connected correctly.
|
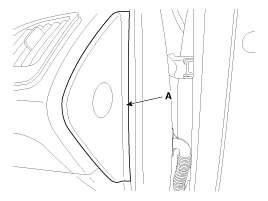
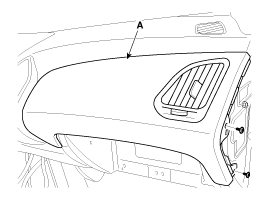
Using a screwdriver or pry tool, remove the crash pad side cover (A).
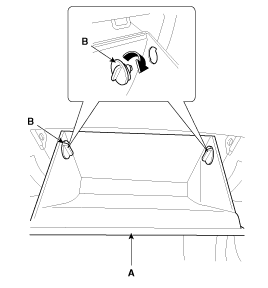
Disconnect the guide (B) from the glove box (A).
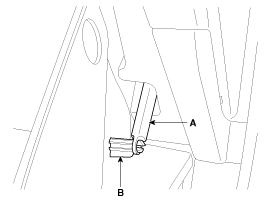
Disconnect the lift (A) from the glove box (B).
Disconnect the pin (A), then remove the glove box (B).
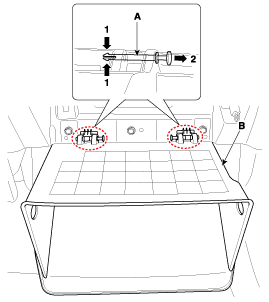
Loosen the mounting screws, then remove the passenger front panel (A).
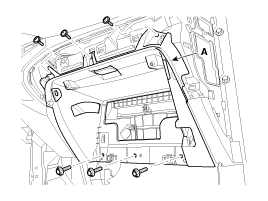
Loosen the mounting screws and bolts, then remove the glove box housing (A).
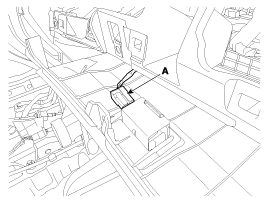
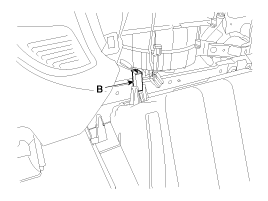
Disconnect the glove box lamp connector (A) and the glove box lamp switch connector (B).
Install in the reverse order of removal.
Glove Box Replacement / Heater Control Unit Replacement
- Using a flat-tip screwdriver, wrap protective tape around the tip and apply protective tape around the relevant parts to prevent damage.
- Wear gloves to protect your hands.
|
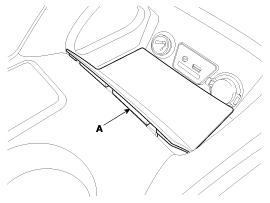
Using a screwdriver or pry tool, remove the floor console tray (A).
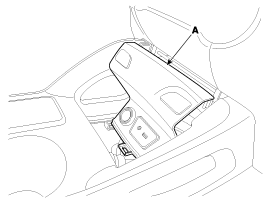
Using a screwdriver or pry tool, remove the console front panel (A).
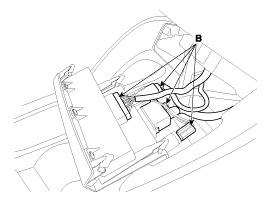
Disconnect the connectors (B).
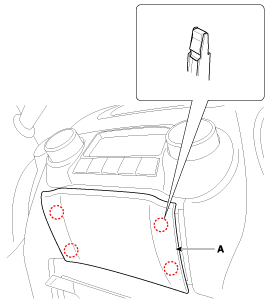
Using a screwdriver or pry tool, remove the airbag center panel (A).
Using a screwdriver or pry tool, remove the hazard switch assembly (A).
Disconnect the connectors (B).
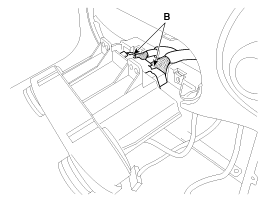
Loosen the mounting screws, then remove the heater control unit (A).
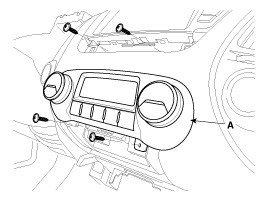
Disconnect the connectors (B).
Install in the reverse order of removal.
- Make sure the connectors are connected correctly.
|
Loosen the mounting screws, then remove the cowl assembly (A).
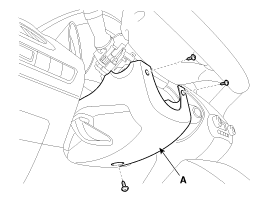
Install in the reverse order of removal.
Remove the airbag side cover.
Loosen the mounting screws, then remove the lower panel (A).
Disconnect the diagnostic connector (B).
Remove the cluster fascia front panel (A).
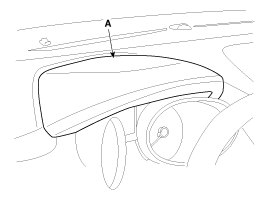
Using a screwdriver, remove the airbag switch assembly (A).
Disconnect the connectors (B).
Loosen the mounting screws, then remove the airbag driver panel (A).
Disconnect the connectors (B).
Install in the reverse order of removal.
Cowl Side Panel Replacement / Crash Pad Driver Panel (LH) Replacement / Crash Pad Side Cover Replacement
- Using a flat-tip screwdriver, wrap protective tape around the tip and apply protective tape around the relevant parts to prevent damage.
- Wear gloves to protect your hands.
|
Using a screwdriver, remove the airbag side cover (A). [Driver]
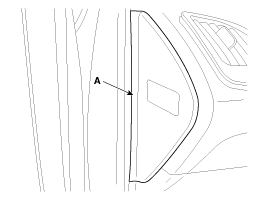
[Passenger]
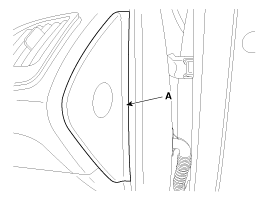
Install in the reverse order of removal.
Main Airbag Replacement
- Using a flat-tip screwdriver, wrap protective tape around the tip and apply protective tape around the relevant parts to prevent damage.
- Wear gloves to protect your hands.
|
Remove the following items.
| A. |
Front seat. (Refer to Seat and Power Seat - "Front Seat") |
| B. |
Floor console (Refer to Interior - "Console") |
| D. |
Crash pad lower panel and reinforcement panel. |
| G. |
Side ventilation outlet on the crash pad. |
| H. |
Glove box and glove box housing. |
| I. |
Side cover of emergency access panel. |
| J. |
Front pillar trim. (Refer to Interior - "Interior Trim") |
| K. |
Steering column (Refer to Steering System - "Steering Column and Shaft") |
Using a screwdriver or trim remover, remove the center ventilation grille (A).
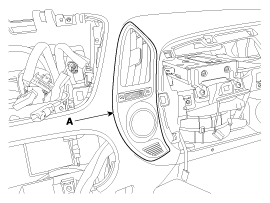
Disconnect the connector (A).
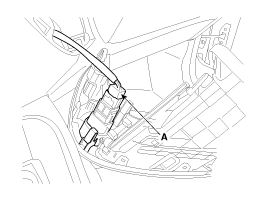
Disconnect the stopper pin, then disconnect the passenger airbag connector (A).
Loosen the mounting bolts.
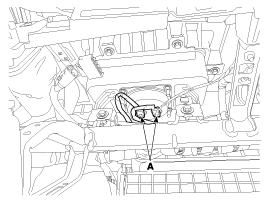
Using a screwdriver or trim remover, remove the photo sensor (A).
Disconnect the photo sensor connector (B).
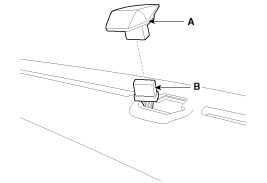
Loosen the mounting bolts and nuts, then remove the protector assembly (A).
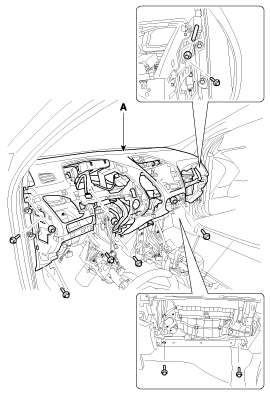
Install in the reverse order of removal.
- Make sure the crash pad cover is correctly installed on the guide pins.
- Before tightening the bolts, make sure the airbag wire harness is not pinched.
- Make sure the connectors are connected correctly and the antenna wire is connected properly.
- Enter the radio anti-theft code, then enter the customer's preset radio stations.
|
Cowl Cross Bar Assembly Replacement
- Wear gloves to protect your hands.
|
- Using a flat-tip screwdriver, wrap protective tape around the tip and apply protective tape around the relevant parts to prevent damage.
- Use a plastic panel removal tool to remove the interior trim parts so as not to damage the surface.
- Be careful not to bend or scratch the trim and panels.
|
Remove the following items.
| C. |
Crash Pad Main Assembly |
Disconnect the steering column connectors. (Refer to Steering System - "Steering Column and Shaft")
Lower the steering column after loosening the mounting bolts. (Refer to Steering System - "Steering Column and Shaft")
Disconnect the blower unit connectors (A).
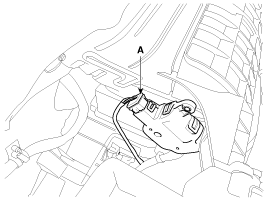
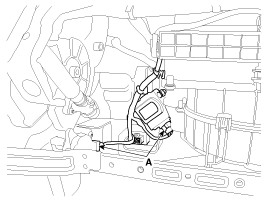
Disconnect the cabin junction box connectors.
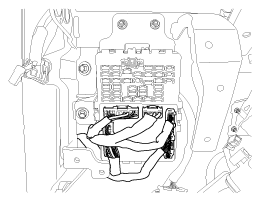
Disconnect the airbag connector (A) and antenna connector (B).
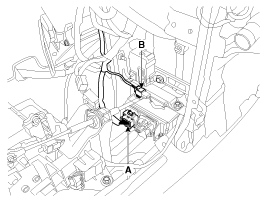
Press the stopper pin, then disconnect the driver side wiring connectors.
Using a screwdriver, remove the wiring cover (A).
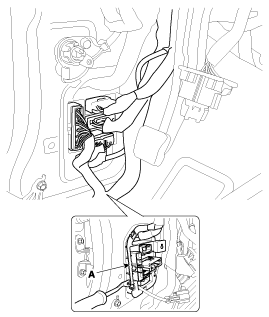
Press the stopper pin, then disconnect the passenger side wiring connectors.
Using a screwdriver, remove the wiring cover (A).
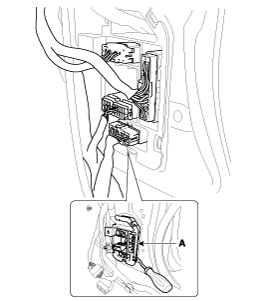
Disconnect the connector retaining clip (A). [Driver]
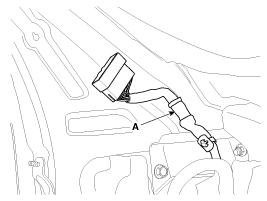
[Passenger]
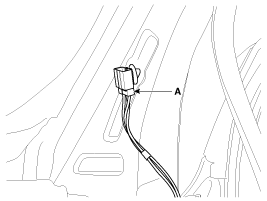
Remove the upper hood cover. (Refer to Exterior - "Upper Hood Cover")
Loosen the mounting bolts.
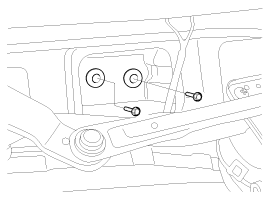
Loosen the mounting bolts and nuts, then remove the hood cross member (A).
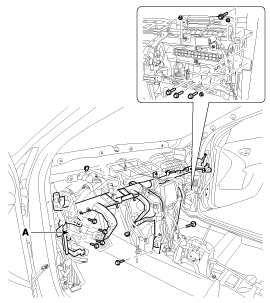
Install in the reverse order of removal.
- Wear gloves to protect your hands.
- Make sure the connectors are connected correctly.
|
?
Test yourself
A quick Hyundai Tucson LM quiz: every answer comes with an explanation and a link to the manual page.
Was this page helpful?

