Drive Chain Removal/Installation
NOTE
Since the drive chain is installed through the swingarm, The chain can not be removed other than by cutting it.
Prepare the new link pin, link plate, grease seals, and tools for rejoining the chain.
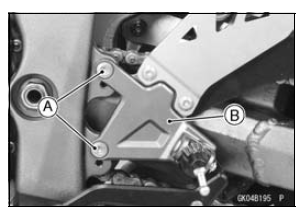
Remove: Bolts [A] Front Footpeg Bracket [B]
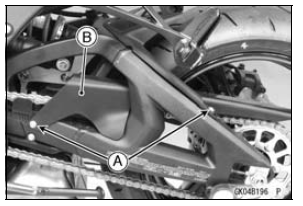
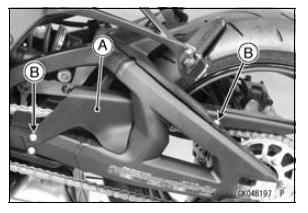
Remove: Bolts [A] Chain Cover [B]
NOTICE
For safety, if the drive chain shall be replaced, replace it using a recommended tool.
Recommended Tool - Type: EK Joint Tool #50 Brand: ENUMA
Body [A] Handlebar [B] Cutting and Riveting Pin [C] For Cutting [D] For Riveting [E] Plate Holder (A) [F] Plate Holder (B) [G] Gauge [H]

- Grind [A] the pin head to make it flat.
- Set the cutting and riveting pin [B] as shown in the figure.

- Screw the pin holder until it touches the link pin.
- Be sure that the cutting pin hits center of the link pin.
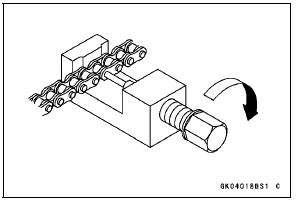
- Screw the handlebar [A] into the body.
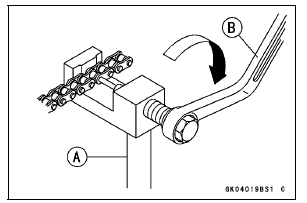
- Turn the pin holder with the wrench [B] clockwise to extract the link pin.
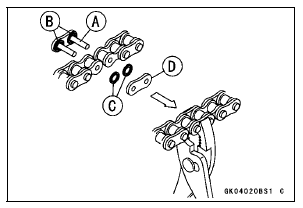
- Replace the link pin, link plate and grease seals.
- Apply grease to the link pins [A] and grease seals [B] [C].
- Engage the drive chain on the engine and rear sprockets.
- Insert the link pins in the drive chain ends.
- Install the grease seals.
- Install the link plate so that the mark [D] faces out.
- Push the link plate by hand or plier to fix it.
- Be sure to set the grease seals correctly.
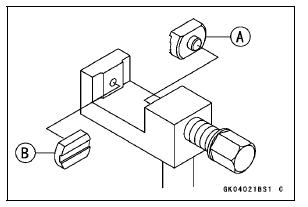
- Set the plate holder (A) [A] and plate holder (B) [B] on the body.
- Fit the plate holder (A) to the link plate.
- Turn the pin holder by hand until the plate holder (B) touches the other link plate.
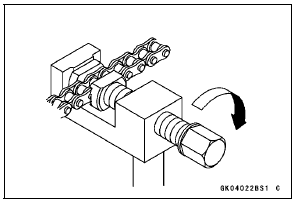
- Turn the pin holder by a wrench clockwise until two pins of link come into groove of the plate holder (A).
- Take off the plate holder.
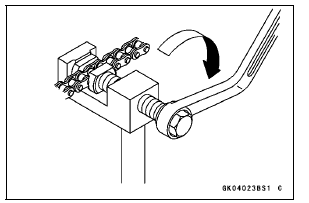
- Set the plate holder (B) [A] and cutting and riveting pin [B] as shown in the figure.
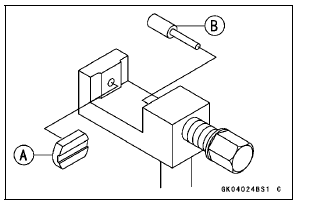
- Turn the pin holder until the riveting pin touches the link pin.

- Turn the wrench clockwise until the tip of riveting pin hits of the link pin.
- Rivet it.
- Same work for the other link pin.
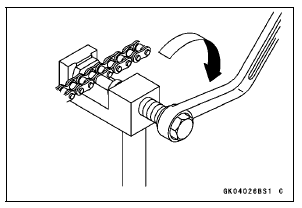
- After staking, check the staked area of the link pin for cracks.
- Measure the outside diameter [A] of the link pin and link plates width [B].
Link Pin Outside Diameter Standard: 5.6  6.0 mm (0.22
 0.24 in.)
Link Plates Outside Width Standard: (ZX1000JD/KD) 19.15  19.30
mm (0.754 
0.760 in.) ( ZX1000JC/KC) 19.35
 19.55 mm (0.762

0.770 in.)

If the reading exceeds the specified length, cut and rejoin the chain again.
- Check: Movement of the Rollers
- Adjust the drive chain slack after installing the chain (see Drive Chain Slack Adjustment in the Periodic Maintenance chapter).
- Install the chain cover [A].
Apply a non-permanent locking agent to the bolts [B] and tighten them.
- Install the front footpeg bracket.
- Tighten:
Torque - Front Footpeg Bracket Bolts: 25 NВ·m (2.5 kgfВ·m, 18 ftВ·lb)
Test yourself
A quick Kawasaki Ninja ZX-10R quiz: every answer comes with an explanation and a link to the manual page.