Electrical System
Tail/Brake Light (LED) Removal/Installation
In this manual: Electrical System
~1min read
- Remove: Upper Seat Cover (see Seat Cover Removal in the Frame chapter)
- Disconnect the tail/brake light connector [A].
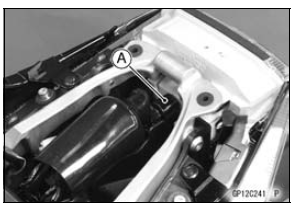
- Remove: Tail/Brake Light Mounting Screws [A] Bolts [B] and Brackets [C] Bolt [D]
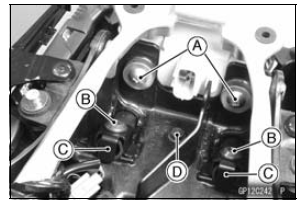
- Remove the tail/brake light [A].
Bring down the rear fender rear [B] lightly to clear the hook [C] from the tail/brake light.

- Installation is the reverse of removal. Note the following.
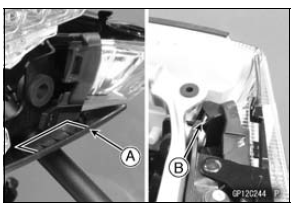
Fit the hook [A] to the tail/bake light.
Fit the tab [B] of the tail/brake light as shown in the figure (both sides).
Tighten: Torque - Tail/Brake Light Mounting Screws: 1.2 NВ·m (0.12 kgfВ·m, 11 inВ·lb)
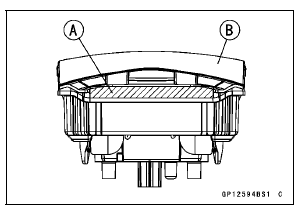
- When installing the damper [A] on the clear lens of the tail/brake light [B] so that the damper positions between corner and corner of the lens as shown in the figure.
Test yourself
A quick Kawasaki Ninja ZX-10R quiz: every answer comes with an explanation and a link to the manual page.
Was this page helpful?