Maintenance and adjustment
Wear Inspection
In this manual: Maintenance and adjustment
~1min read
- Remove the left front footpeg bracket bolts.
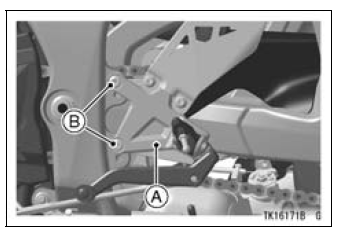
A. Front Footpeg Bracket
B. Bolts
- Remove the bolts and chain cover.
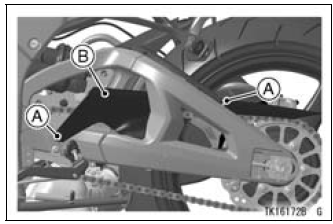
A. Bolts
B. Chain Cover
- Stretch the chain taut either by using the chain adjusters, or by hanging a 10 kg (22 lb) weight on the chain.
- Measure the length of 20 links on the straight part of the chain from the pin center of the 1st pin to the pin center of the 21st pin. Since the chain may wear unevenly, take measurements at several places.
- If the length exceeds the service limit, the chain should be replaced.

A. Measure
B. Weight
Drive Chain 20-Link Length 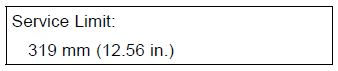
NOTE
- Install the chain cover and front footpeg bracket in the reverse order of removal.
- Reinstall the left footpeg bracket so that both footpegs are same position.
- Apply the nonpermanent locking agent to the chain cover front side bolt.
Tightening Torque 
WARNING
For safety, use only the standard chain. It is an endless type and should not be cut for installation; have it installed by an authorized Kawasaki dealer.
- Rotate the rear wheel to inspect the drive chain for damaged rollers, and loose pins and links.
- Also inspect the sprockets for unevenly or excessively worn teeth, and damaged teeth.
NOTE
Sprocket wear is exaggerated for illustration.
See Service Manual for wear limits.
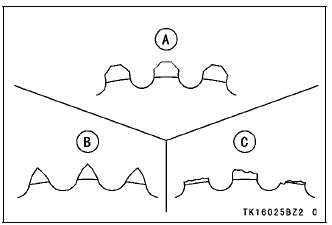
A. Good Teeth
B. Worn Teeth
C. Damaged Teeth
- If there is any irregularity, have the drive chain and/or the sprockets replaced by an authorized Kawasaki dealer.
Test yourself
A quick Kawasaki Ninja ZX-10R quiz: every answer comes with an explanation and a link to the manual page.
Was this page helpful?