Body (Interior and Exterior)
Rear Window Glass Repair Procedures
In this manual: Body (Interior and Exterior)
15steps
~95min
4/5difficulty
1special tools
Done 0 of 15
Removal
|
- Remove the following items.
- Roof Molding (Refer to Group BD - "Panorama")
- Rear Seat (Refer to Group BD - "Rear Seat")
- Rear Pillar Trim (Refer to Group BD - "Interior Trim")
- Package Tray Trim (Refer to Group BD - "Interior Trim")
- High Mounted Stop Lamp Assembly (Refer to Group BE - "High Mounted Stop Lamp")
- Connector for rear window defroster (Refer to Group BE - "Rear Window Defogger")
- Apply WD-40 to the side surface of the rear window glass.
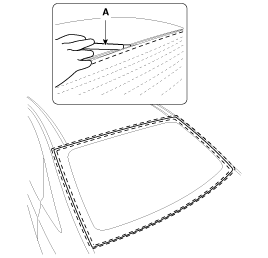
- Cut the adhesive using the cutter (A).

- Use a cutter with a blade length of 8 to 12 inches.
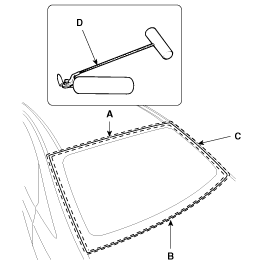
- Remove enough glass from the upper (A) and lower (B) sides of the rear window glass (C). Then cut the adhesive using a cutter (09861-31100) (D).
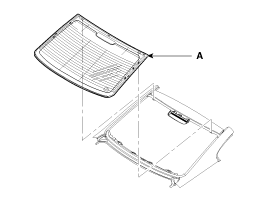
- Remove the rear window glass (A).
- An assistant is required when removing and installing the rear window glass.
Installation
- Using a knife, scrape off the old adhesive to a thickness of about 2 mm (0.08 in) on the mating surface along the entire rear window glass flange.
- Do not scrape down to the painted body surface; damaged paint will interfere with proper bonding.
- Remove the grommet and clips from the body.
- Mask the surrounding surfaces before painting.

- Clean the body bonding surface with a sponge moistened with alcohol. After cleaning, make sure that oil, grease, and water do not contaminate the clean surface.

- Using a sponge, apply a thin coat of body primer to the original adhesive remaining around the windshield opening flange. Allow the body primer to dry for at least 10 minutes.
- Do not apply glass primer to the body. Be careful not to mix up the glass primer and body primer sponges.
- Never touch primed surfaces with your hands.
- Mask the instrument panel before painting the flange.
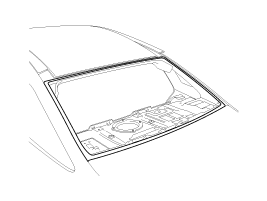
- Apply a thin layer of glass primer to the outer side of the fasteners.
- Never touch the primed surface with your hands. If you do, the adhesive may not bond to the glass properly, causing leaks after the rear window glass is installed.
- Do not apply body primer to the glass.
- Keep water, dust, and abrasive materials off the primer.
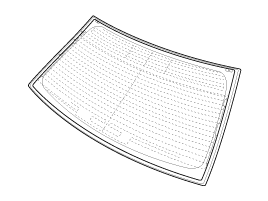
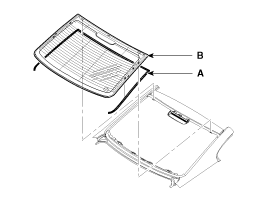
- Bond the rear window glass moulding (A) and install the rear window glass (B).
- Pack the adhesive into the cartridge without air pockets to ensure continuous delivery. Place the cartridge in the sealant gun and apply a sealant bead (B) along the edge of the rear window glass (A), as shown. Apply the adhesive within 30 minutes after priming. Make the bead slightly thicker at each corner.

- Using the suction cups (A), hold the rear window glass (B) over the opening, align it with the installation marks (C) made in step 15, and set it onto the adhesive. Lightly press the glass until all edges are fully seated in the adhesive around the entire perimeter. Do not open or close the doors until the adhesive has cured.
- When installing the rear window glass (B), accurately align the rear window service hole (D) with the frame.

- Allow the adhesive to cure for at least 3-4 hours, then spray water on the glass and check for leaks.

- Do not spray directly onto the adhesive area. Spray water onto the glass, then pour water around the glass.
- Repair the leaking areas and allow the glass to dry, then seal with adhesive.
- Let the vehicle stand for at least four hours after installation. If the vehicle must be used during the first eight hours, drive it slowly.
- Keep the glass dry for the first hour after installation.
- Advise the driver not to drive on rough unpaved roads or make sudden maneuvers.
- Install all remaining removed parts.
- Connector for rear window defroster (Refer to Group BE - "Rear Window Defogger")
- High Mounted Stop Lamp Assembly (Refer to Group BE - "High Mounted Stop Lamp")
- Package Tray Trim (Refer to Group BD - "Interior Trim")
- Rear Pillar Trim (Refer to Group BD - "Interior Trim")
- Rear Seat (Refer to Group BD - "Rear Seat")
- Roof Molding (Refer to Group BD - "Panorama")
Test yourself
A quick Kia Cadenza VG Owner's Manual quiz: every answer comes with an explanation and a link to the manual page.
Was this page helpful?