Body Electrical System
Smart Key Unit Repair Procedures
In this manual: Body Electrical System
65steps
~390min
4/5difficulty
Done 0 of 65
Inspection
Smart Key Unit- Refer to the BE group - Inspection/Self-Diagnosis using GDS.
- Refer to the BE group - Inspection/Self-Diagnosis using GDS.
- Refer to the BE group - Inspection/Self-Diagnosis using GDS.
- Check the circuit continuity between the terminals of the trunk lid open switch.
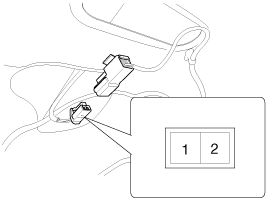
- If continuity is not as specified, inspect the switch.

Removal
Smart Key Unit- Disconnect the negative (-) battery terminal.
- Remove the glove box housing. (Refer to Body - Crash Pad)
- Disconnect the connector (A) after loosening the mounting screws and bolt. Then remove the SMK unit (B).

- Disconnect the negative (-) battery terminal.
- Remove the rear seat. (Refer to Body - "Rear Seat")
- Remove the rear package tray. (Refer to Body - Rear Package Tray)
- Disconnect the RF receiver connector (A).
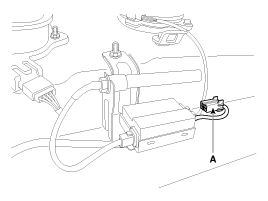
- Remove the radio receiver (A) after loosening the nut (1EA).
- Disconnect the negative (-) battery terminal.
- Remove the center console. (Refer to Body - Console)
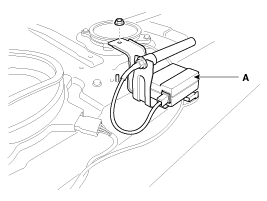
- Remove the interior antenna 1 (A) by disconnecting the connector and loosening the mounting nuts (2EA).
- Disconnect the negative (-) battery terminal.
- Remove the center console. (Refer to Body - Console)
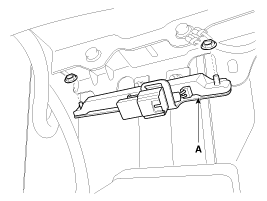
- Disconnect the interior antenna 2 connector (A).
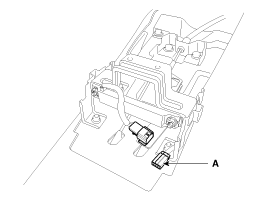
- Remove the interior antenna 1 (A) after loosening the mounting nuts (2EA).
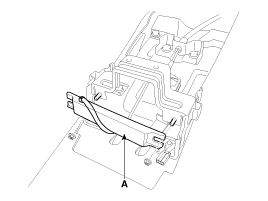
- Disconnect the negative (-) battery terminal.
- Remove the luggage side trim. (Refer to Body - Interior Trim)
- Disconnect the main antenna connector (A) and remove the main antenna (B) after loosening the nut (2EA).
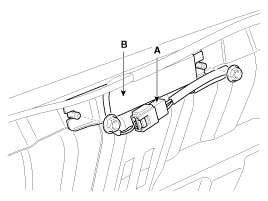
- Disconnect the negative (-) battery terminal.
- Remove the rear bumper. (Refer to Body - "Rear Bumper")
- Disconnect the bumper outside antenna connector at the center of the rear bumper.
- Disconnect the antenna connector and remove the bumper outside antenna (A) after loosening the screws (2EA).
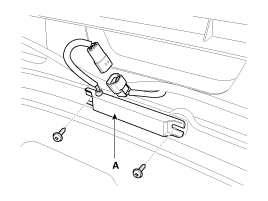
- Disconnect the negative (-) battery terminal.
- Remove the left side wheel guard.
- Remove the external buzzer (A) after disconnecting the connector.
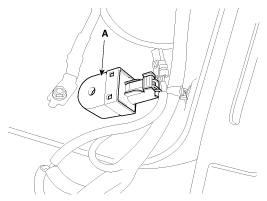
- Disconnect the negative (-) battery terminal.
- Disconnect the connector after removing the door trim. (Refer to Group BD - "Front Door")
- Loosen the mounting bolt, then remove the door handle cover and door lock (A).
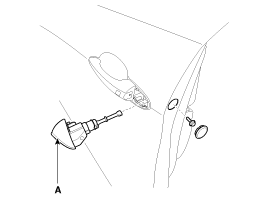
- Remove the outside handle (A) by sliding it rearward.

- Disconnect the outside door handle connector (A).
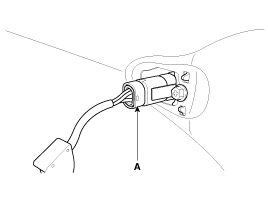
- Disconnect the negative (-) battery terminal.
- Remove the trunk lid trim. (Refer to Body - Trunk)
- Disconnect the trunk lid open switch connector (A).
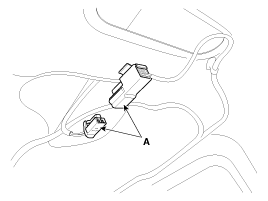
- Remove the outside handle (A) after releasing the fixing hooks.

Installation
Smart Key Unit- Install the smart key unit.
- Install the smart key unit and connectors.
- Install the glove box housing.
- Connect the negative (-) battery terminal and check the smart key system.
- Install the radio frequency receiver.
- Install the rear package tray.
- Install the rear seat.
- Connect the negative (-) battery terminal and check the smart key system.
- Install the interior 1 antenna.
- Install the center console.
- Connect the negative (-) battery terminal and check the smart key system.
- Install the interior 2 antenna.
- Install the center console.
- Connect the negative (-) battery terminal and check the smart key system.
- Install the main antenna.
- Install the luggage side trim.
- Connect the negative (-) battery terminal and check the smart key system.
- Install the bumper exterior antenna.
- Install the rear bumper.
- Connect the negative (-) battery terminal and check the smart key system.
- Install the buzzer.
- Install the left side wheel guard.
- Connect the negative (-) battery terminal and check the smart key system.
- Install the trunk lid open switch.
- Install the trunk lid open trim.
- Connect the negative (-) battery terminal and check the smart key system.
- Install the outside handle.
- Install the door trim panel.
- Connect the negative (-) battery terminal and check the smart key system.
Test yourself
A quick Kia Cadenza VG Owner's Manual quiz: every answer comes with an explanation and a link to the manual page.
Was this page helpful?