In this manual: Kia Sorento XM 2011-2023 Repair Manual
12steps
~72min
3/5difficulty
Tightening torque found on this page
Done 0 of 12
Disconnect the negative battery cable.
Remove the air cleaner assembly. (Refer to Air Intake and Exhaust System - "Air Cleaner").
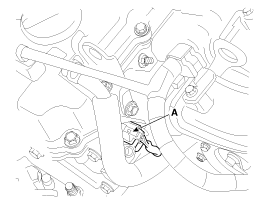
Disconnect the OCV (Oil Control Valve) connector (A).
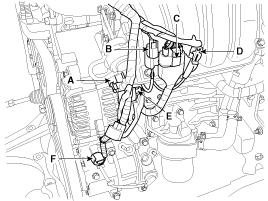
Disconnect the VIS (Variable Intake System) connector (A), OPS (Oil Pressure Switch) connector (B), injector extension connector (C), knock sensor connector (D), generator connector (E), and air compressor connector (F).
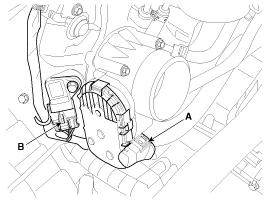
Disconnect the ETC (Electronic Throttle Control) connector (A), and the MAPS (Manifold Absolute Pressure Sensor) and IATS (Intake Air Temperature Sensor) connector (B).
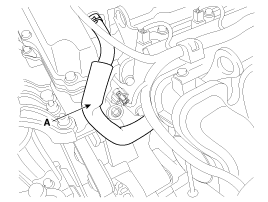
Disconnect the PCV (Positive Crankcase Ventilation) hose (A).
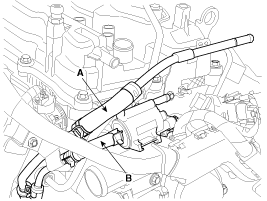
Disconnect the vacuum hose (A) and the PCSV (Purge Control Solenoid Valve) hose (B).
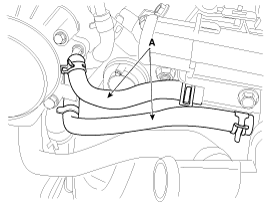
Disconnect the throttle body coolant hoses (A).
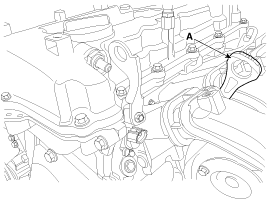
Remove the oil level gauge (A).
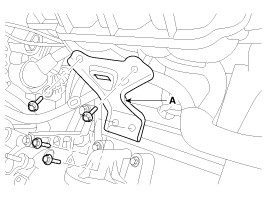
Remove the intake manifold support (A).
Tightening torque: 18.6 ~ 24 N·m
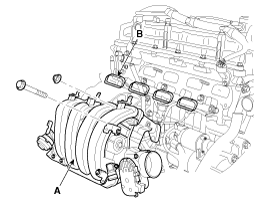
Remove the intake manifold (A) and gasket (B).
Tightening torque: 18.6 ~ 24 N·m
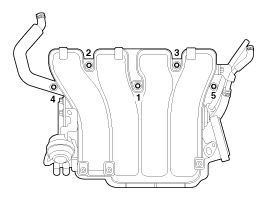
When installing the intake manifold, tighten the bolts and nuts to the preliminary torque first, then tighten the bolts and nuts to the specified torque in the sequence shown.
Install in the reverse order of removal.
?
Test yourself
A quick Kia Sorento Owner's Manual quiz: every answer comes with an explanation and a link to the manual page.