Heating, Ventilation, and Air Conditioning
Refrigerant Temperature Sensor Repair Procedures
In this manual: Heating, Ventilation, and Air Conditioning
10steps
~60min
4/5difficulty
Done 0 of 10
Inspection
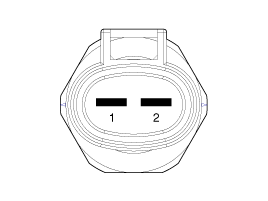
| 1. IG | 2. Ground |
Check the voltage between terminals 6 and 7.
- Using a tester, check the resistance between terminals 1 and 2.
Temperature Resistance °C °F Specification [K?] Tolerance [%] -40 -40 225,1 ± 3,06 -30 -22 129,3 ± 2,49 -20 -4 76,96 ± 1,95 -10 14 47,34 ± 1,46 0 32 30 ± 1,00 10 50 19.53 ± 1,43 20 68 13.03 ± 1,82 30 86 8.896 ± 2,19 40 104 6.201 ± 2,54 50 122 4.406 ± 2,86 60 140 3.186 ± 3,16 70 158 2,343 ± 3,44 80 176 1,749 ± 3,71 90 194 1,325 ± 3,96 100 212 1,017 ± 4,20 110 230 0,789 ± 4,42 120 248 0,62 ± 4,63
Replacement
[Refrigerant Temperature Sensor No. 1]- Charge the refrigerant using the refrigerant recovery/recycling/charging station.
- Detach the liftgate handle (A).
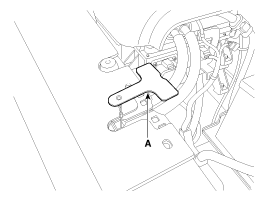
- Loosen the clips and bolts on the front bumper upper cover.
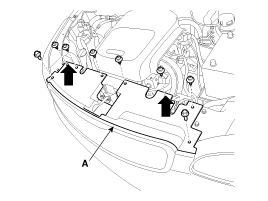
- Slightly lift the front bumper upper cover (A).
- Remove the front bumper upper cover (A) after loosening the mounting screw (B) on the side.
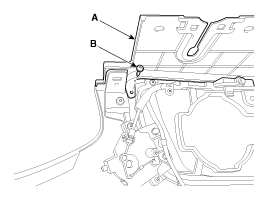
- Remove the refrigerant temperature sensor No. 1 (B) after disconnecting the refrigerant temperature sensor No. 1 connector (A).
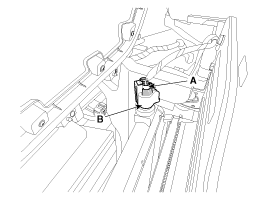
- Install in the reverse order of removal.
- Charge the refrigerant using the refrigerant recovery/recycling/charging station.
- Remove the refrigerant temperature sensor No. 2 (B) after disconnecting the refrigerant temperature sensor No. 2 connector (A).
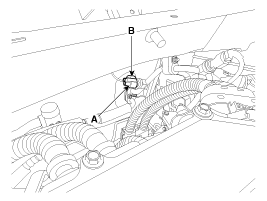
- Install in the reverse order of removal.
Test yourself
A quick Kia Soul EV Owner's Manual quiz: every answer comes with an explanation and a link to the manual page.
Was this page helpful?