Rear Coil Spring Removal/Installation
1. Disconnect the auto leveling sensor lower side. (Vehicles with AFS).
2. Remove in the order indicated in the table.
3. Install in the reverse order of removal.
4. Inspect the wheel alignment and adjust it if necessary..
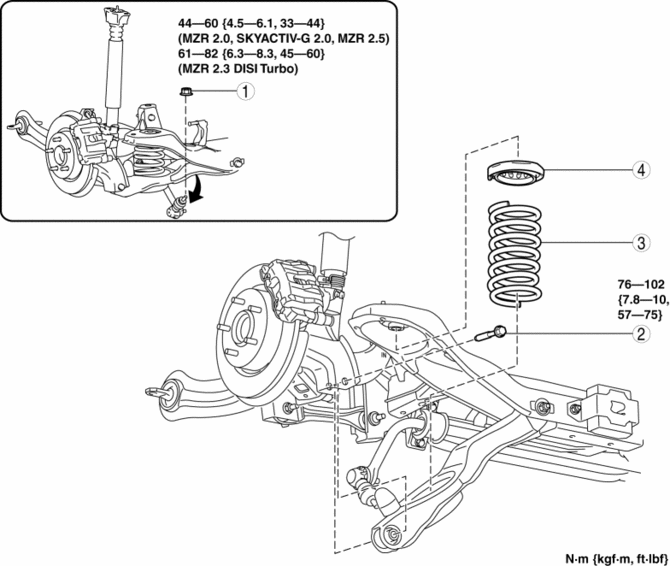
Rear stabilizer control link upper nut
Rear lower arm outer bolt
.
Rear coil spring
.
Upper spring seat rubber
Rear Lower Arm Outer Bolt Removal Note
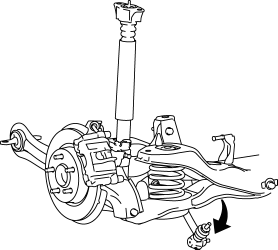
1. Rotate the rear stabilizer component downwards as shown in the figure.
2. Support the rear lower arm using a jack.
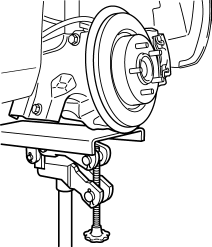
3. Loosen the rear lower arm inner bolt.
4. Remove the rear lower arm outer bolt.
Rear Coil Spring Installation Note1. Position the jack under the rear lower arm and jack up slowly.
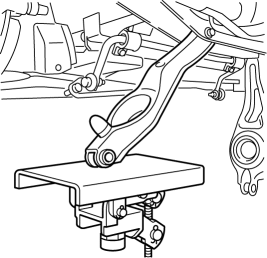
WARNING:
Installing the coil spring is dangerous. The coil spring could fly off and cause serious injure or death, and damage the vehicle.
2. Align the upper end of the rear coil spring with the step of the upper spring seat rubber.
3. Align the lower end of the rear coil spring with the step of the lower spring seat rubber.
4. Install the lower arm outer bolt.
Test yourself
A quick Mazda 3 quiz: every answer comes with an explanation and a link to the manual page.