Rear Lateral Link Removal/Installation
1. Remove in the order indicated in the table.
2. Install in the reverse order of removal.
3. Inspect the wheel alignment and adjust it if necessary..
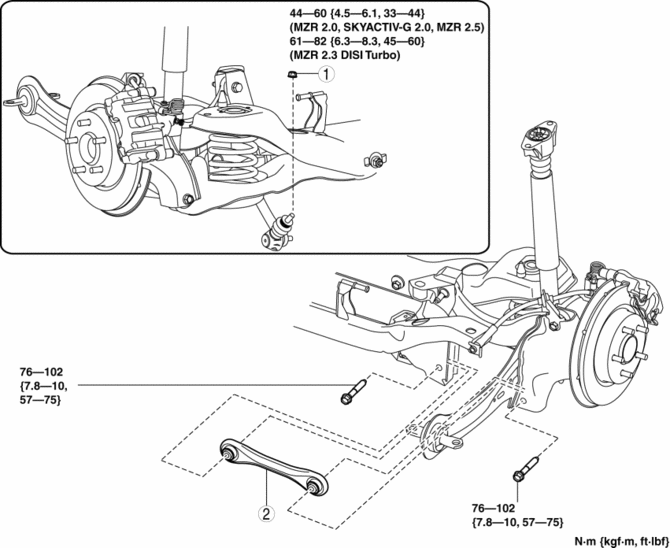
Rear stabilizer control link upper nut
Rear lateral link
(See Rear Lateral Link Removal Note.)
(See Rear Lateral Link Installation Note.)
Rear Lateral Link Removal Note
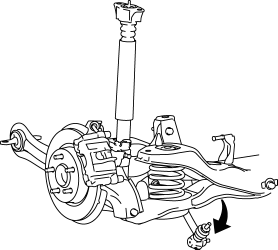
1. Rotate the rear stabilizer component downwards as shown in the figure.
2. Jack up the vehicle to the unloaded condition, and support the trailing link using a jack.
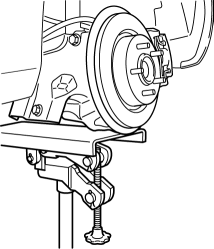
3. Remove the rear lateral link.
Rear Lateral Link Installation Note1. Jack up the vehicle to the unloaded condition, and support the trailing link using a jack.
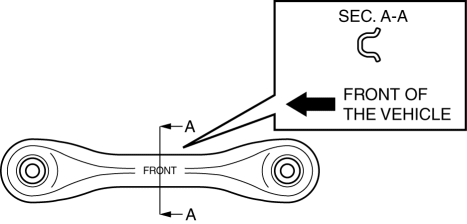
2. Install the rear lateral link so that the rib is facing toward the front of the vehicle.
Test yourself
A quick Mazda 3 quiz: every answer comes with an explanation and a link to the manual page.