Rear Lower Arm Removal/Installation
1. Disconnect the auto leveling sensor link lower side. (Vehicles with AFS).
2. Remove in the order indicated in the table.
3. Install in the reverse order of removal.
4. Inspect the wheel alignment and adjust it if necessary..
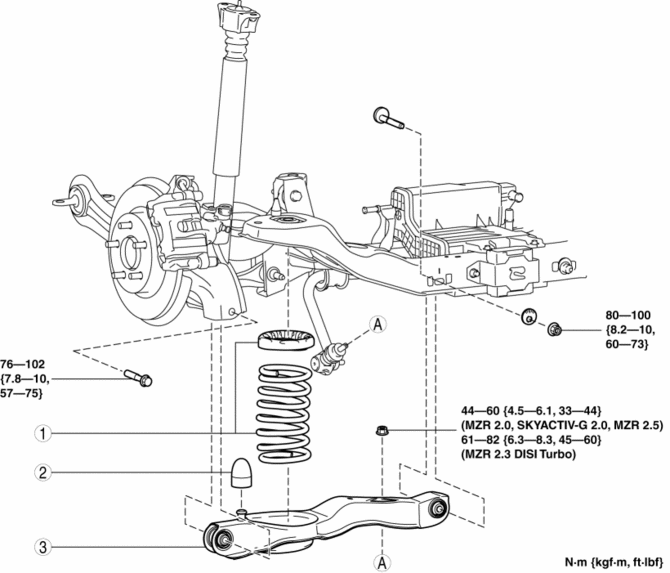
Rear coil spring component
.
Bound stopper
Rear lower arm
(See Rear Lower Arm Removal Note (RH) (MZR 2.0 (Except Mexico), SKYACTIV-G 2.0, MZR 2.3 DISI Turbo, MZR 2.5 (Except Mexico)).)
(See Rear Lower Arm Installation Note (RH) (MZR 2.0 (Except Mexico), SKYACTIV-G 2.0, MZR 2.3 DISI Turbo, MZR 2.5 (Except Mexico)).)
Rear Lower Arm Removal Note (RH) (MZR 2.0 (Except Mexico), SKYACTIV-G 2.0, MZR 2.3 DISI Turbo, MZR 2.5 (Except Mexico))
1. Remove the charcoal canister installation bolts (rear side), and push the charcoal canister up slightly.
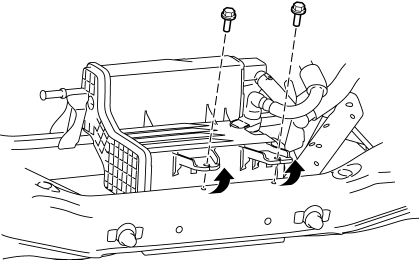
2. Remove the rear lower arm inner bolt.
3. Remove the rear lower arm.
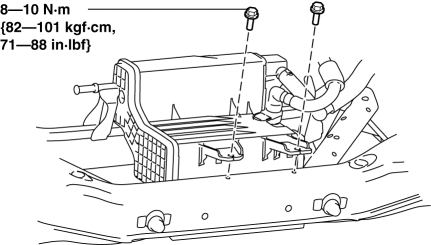
Rear Lower Arm Installation Note (RH) (MZR 2.0 (Except Mexico), SKYACTIV-G 2.0, MZR 2.3 DISI Turbo, MZR 2.5 (Except Mexico))1. Push the charcoal canister up slightly.
2. Install the rear lower arm inner bolt.
3. Tighten the charcoal canister installation bolts (rear side).
Test yourself
A quick Mazda 3 quiz: every answer comes with an explanation and a link to the manual page.