Magnetic clutch disassembly/assembly
1. Disassemble in the order indicated in the table.
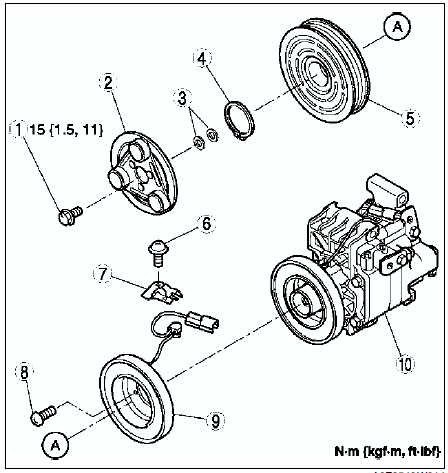
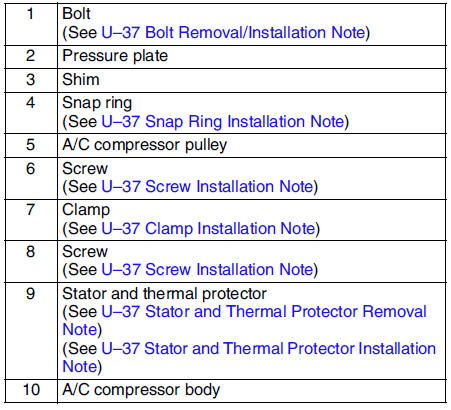
2. Assemble in the reverse order of disassembly.
3. Adjust the magnetic clutch clearance. (See MAGNETIC CLUTCH ADJUSTMENT.)
Bolt Removal/Installation Note1. When removing or installing the bolt, hold the pressure plate in place as shown in the figure.
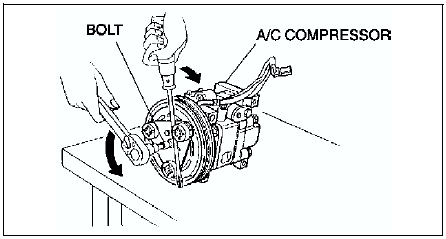
2. When installing a new A/C compressor body, replace the bolt.
Stator and Thermal Protector Removal NoteAfter removing the stator and thermal protector, completely remove the silicone adhering to the A/C compressor side.
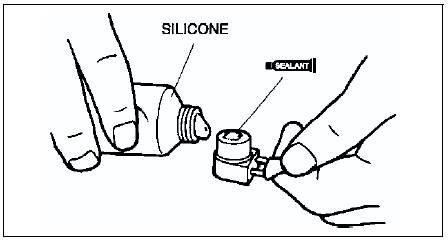
Stator and Thermal Protector Installation NoteApply approximately 1 g {0.04 oz} of silicone (Shin-Etsu Silicone KE-347W or similar) to the contact surface of the thermal protector, then thoroughly install it onto the A/C compressor, leaving no gaps.
Screw Installation Note
When installing a new stator and thermal protector, replace the screw.
Clamp Installation NoteWhen installing a new stator and thermal protector, replace the clamp.
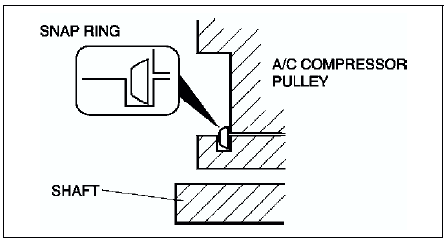
Snap Ring Installation NoteWhen installing a new pressure plate, A/C compressor pulley, stator, or A/C compressor body, replace the snap ring.
Test yourself
A quick Mazda 6 quiz: every answer comes with an explanation and a link to the manual page.