Front Wiper
Exploded View
REMOVAL
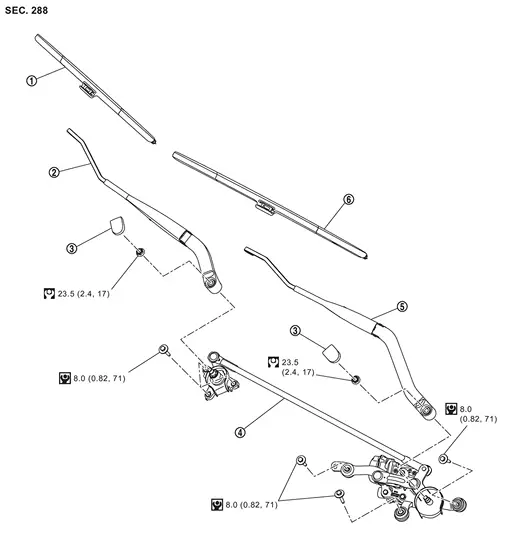
 |
Front wiper blade RH |  |
Front wiper arm RH |  |
Front wiper arm cap |
 |
Front wiper drive assembly |  |
Front wiper arm LH |  |
Front wiper blade LH |
 |
: N·m (kg-m, in-lb) | ||||
 |
: N·m (kg-m, ft-lb) | ||||
DISASSEMBLY
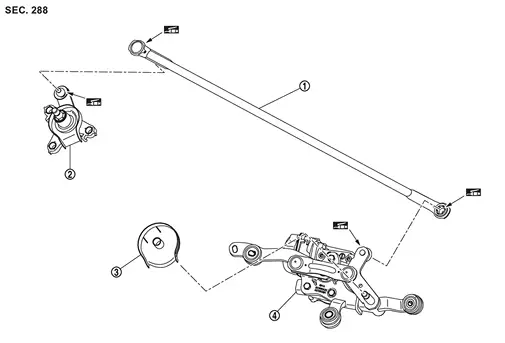
|
Front wiper linkage | |
Front wiper pivot assembly | |
Pivot cover |
|
Front wiper motor assembly | ||||
 |
: Body grease | ||||
Front Wiper Arm
Removal and Installation
REMOVAL
Operate front wiper to the auto stop position. Refer to System Description.
Fully open hood assembly.
Remove front wiper arm cap.
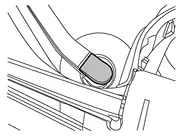
Remove front wiper arm mounting nut.

Remove front wiper arm.
INSTALLATION
Note the following items, and then install in the reverse order of removal.
Adjustment
WIPER BLADE POSITION ADJUSTMENT
Adjust clearance between the end of cowl top cover/front fender cover RH and the top of front wiper blade center.
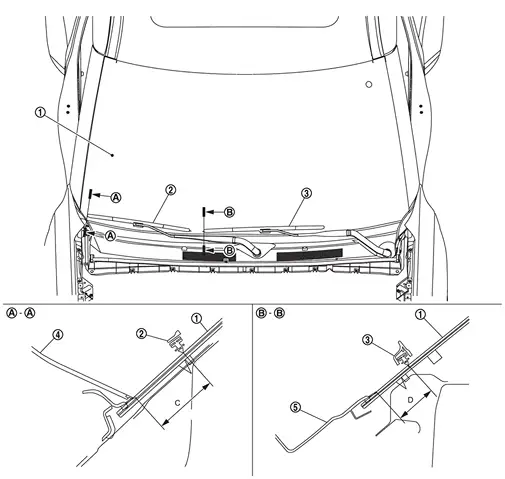
|
Windshield glass | |
Front wiper blade RH | |
Front wiper blade LH |
|
Front fender cover RH | |
Cowl top cover |
| C | : 20.8 ± 7.5 mm (0.82 ± 0.30 in) |
| D | : 13.0 ± 7.5 mm (0.51 ± 0.30 in) |
Front Wiper Blade
Removal and Installation
REMOVAL
Operate front wiper to the auto stop position. Refer to System Description.
Lift up front wiper arm, and then lock back front wiper arm.
Slide to remove front wiper blade while pressing lever  according to the numerical order 1→2 indicated by arrows as shown in the figure.

INSTALLATION
Install in the reverse order of removal.
Front Wiper Drive Assembly
Removal and Installation
REMOVAL
Remove cowl top cover. Refer to Removal and Installation.
Remove front wiper drive assembly mounting bolts .
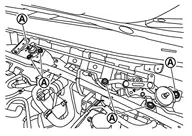
Disconnect front wiper drive assembly harness connector and remove harness clip, and then remove front wiper drive assembly.
INSTALLATION
Note the following items, and then install in the reverse order of removal.
Disassembly and Assembly
DISASSEMBLY
Remove front wiper drive assembly. Refer to Removal and Installation.
Remove front wiper linkage from front wiper motor assembly and front wiper pivot assembly.
ASSEMBLY
Note the following item, and then assemble in the reverse order of disassembly.