Drive Belt

| 1. | Drive belt auto-tensioner | 2. | Generator | 3. | A/C compressor |
| 4. | Drive belt | 5. | Crankshaft pulley | A. | Indicator |
| B. | Range when new drive belt is installed | C. | Possible use range | D. | View D |
 |
Engine front |
Inspect drive belt for cracks, wear, fraying, or oil adhesion. If necessary, replace with a new one.
Rotate the crankshaft pulley two times, then ensure the drive belt auto-tensioner is within the possible use range.
Visually check entire drive belt for wear, damage or cracks.
Check that the drive belt auto-tensioner indicator is within the possible use range.
If the drive belt auto-tensioner indicator is out of the possible use range or belt is damaged, replace drive belt.
Drive belt tension is automatically adjusted by the drive belt auto-tensioner.
Drive belt tension is not manually adjustable.
REMOVAL
Remove the front wheel and tire (RH) using a power tool. Refer to Removal and Installation.
Remove the fender protector side cover (RH). Refer to Exploded View.
While securely holding the hexagonal part in pulley center of drive belt auto-tensioner, move in the direction of arrow (loosening direction of drive belt auto-tensioner) using suitable tool.
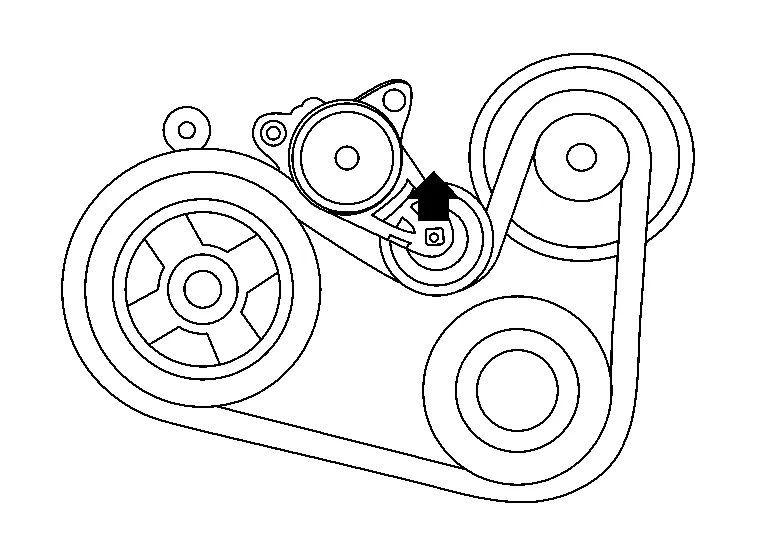
Insert a rod approximately 6 mm (0.24 in) in diameter through the rear of drive belt auto-tensioner into retaining boss to lock drive belt auto-tensioner pulley.
Remove drive belt from crankshaft pulley and then remove it from the other pulleys.
INSTALLATION
Install the drive belt onto all of the pulleys.
Release drive belt auto-tensioner, and apply tension to drive belt.
Turn crankshaft pulley clockwise several times to equalize tension between each pulley.
Confirm drive belt auto-tensioner indicator is within the possible use range. Refer to Checking Drive Belt.
Install the fender protector side cover (RH). Refer to Exploded View.
Install the front wheel and tire (RH). Refer to Removal and Installation.
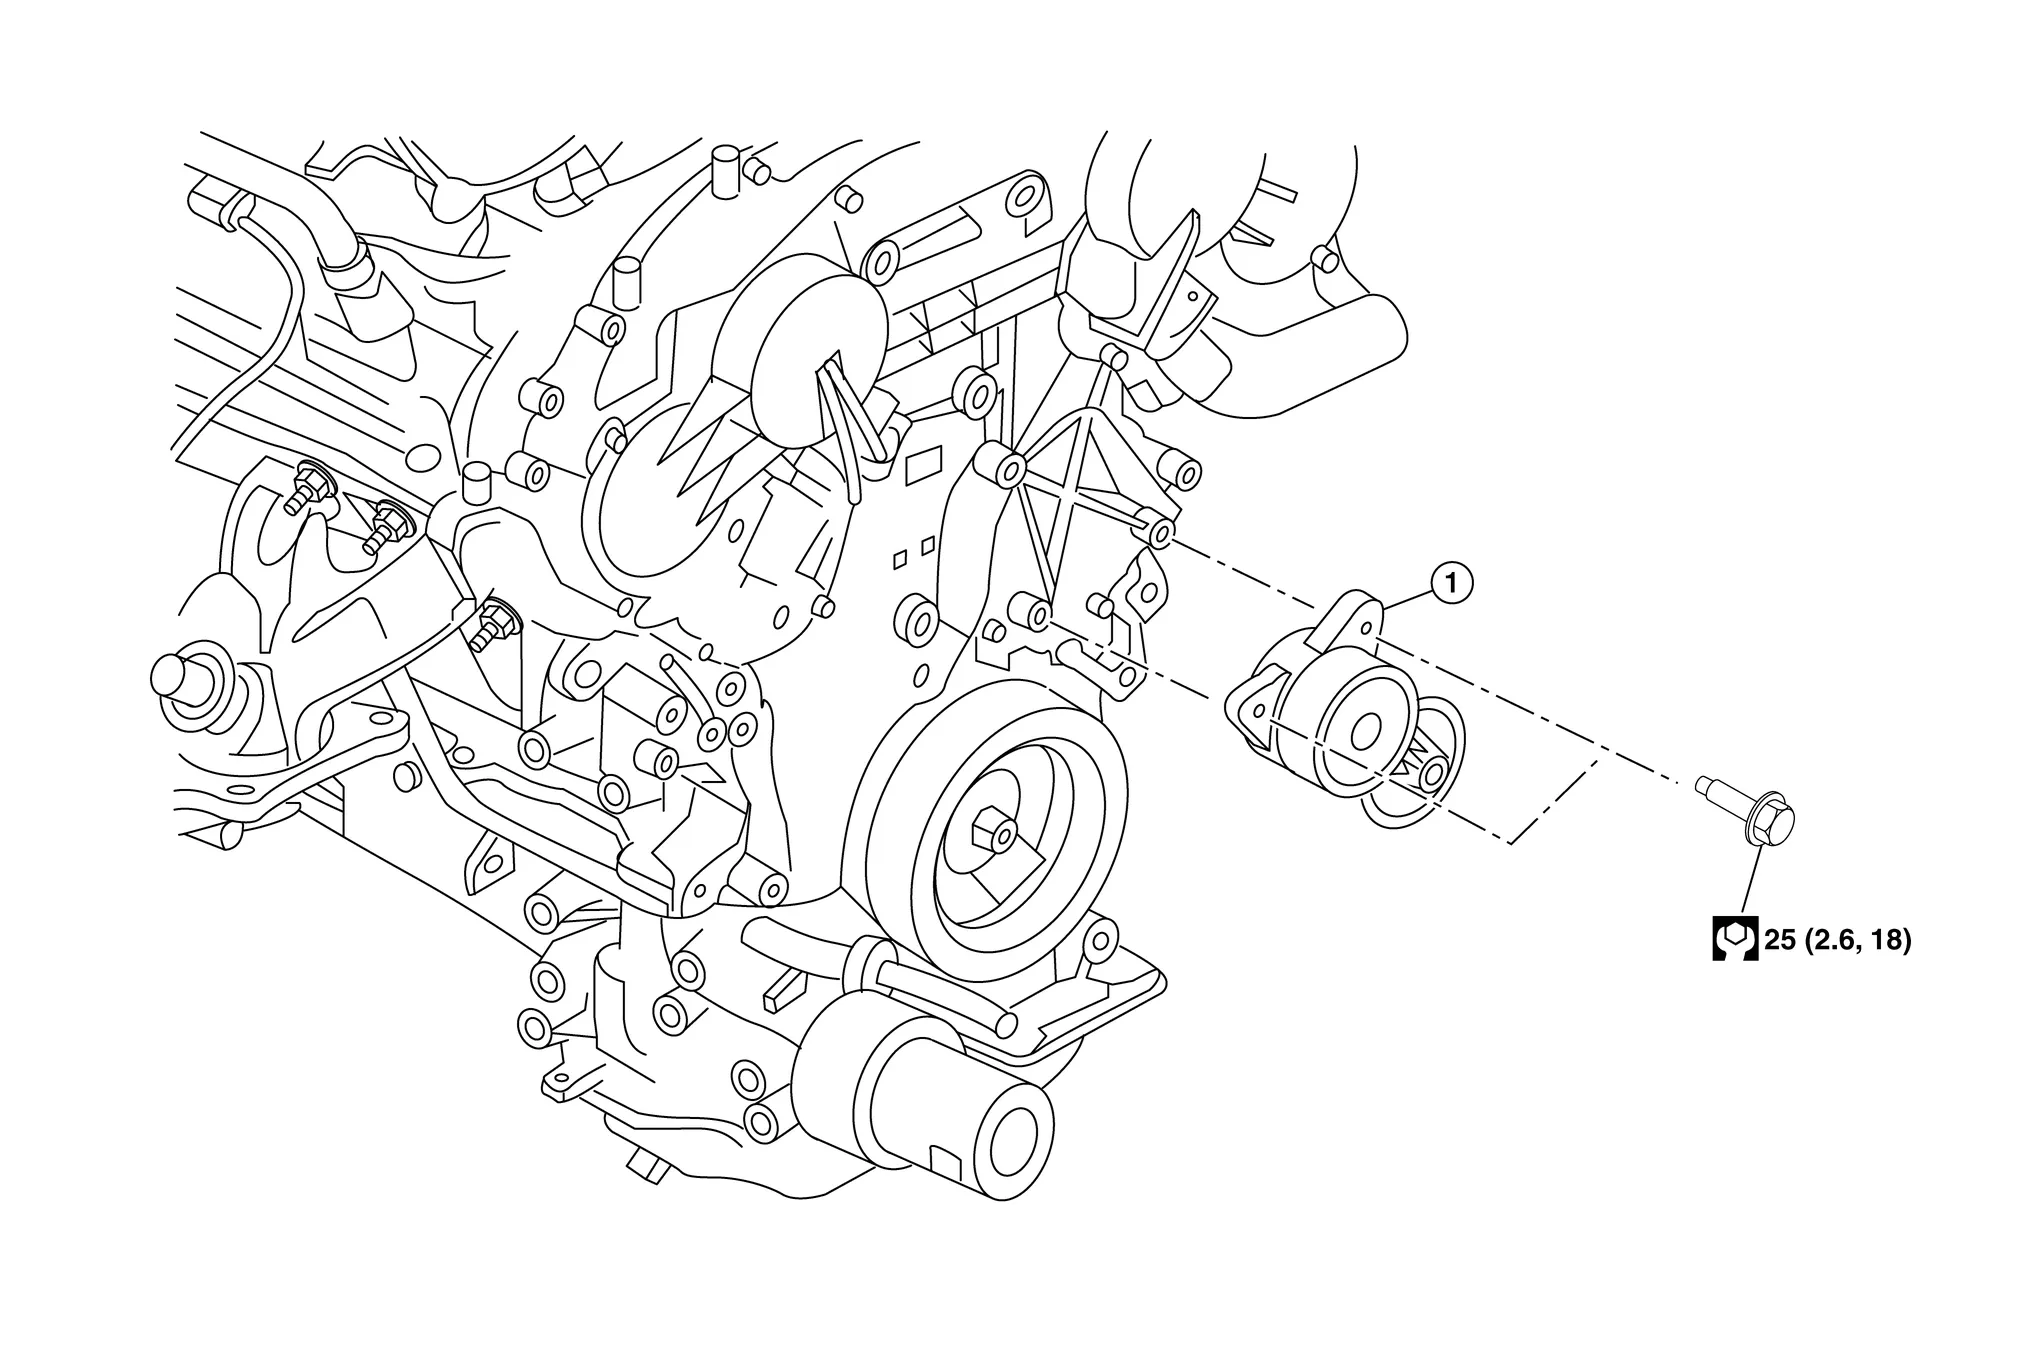
| 1. | Drive belt auto-tensioner |
REMOVAL
Remove the drive belt. Refer to Removal and Installation.
Remove the drive belt auto-tensioner.
INSTALLATION
Installation is in the reverse order of removal.