Fault location tree
| ALP 6 | No heating or insufficient heating |
INSTRUCTIONS
Only consult this customer complaint after a complete check with the diagnostic tool (reading of faults and verification of configurations).
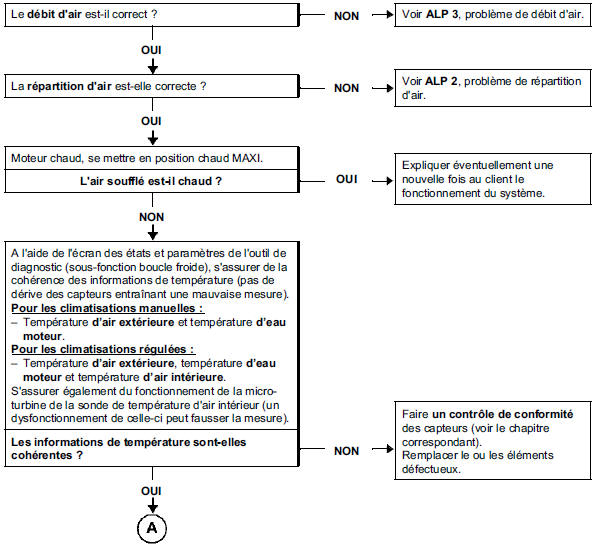
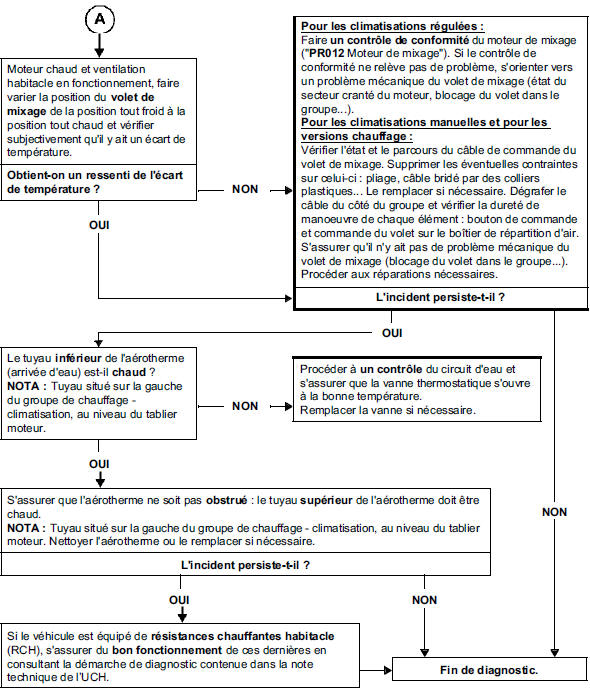
AFTER REPAIR
Carry out a full check with the diagnostic tool.
| ALP 7 | Too much heating |
INSTRUCTIONS
Only consult this customer complaint after a complete check with the diagnostic tool (reading of faults and verification of configurations).
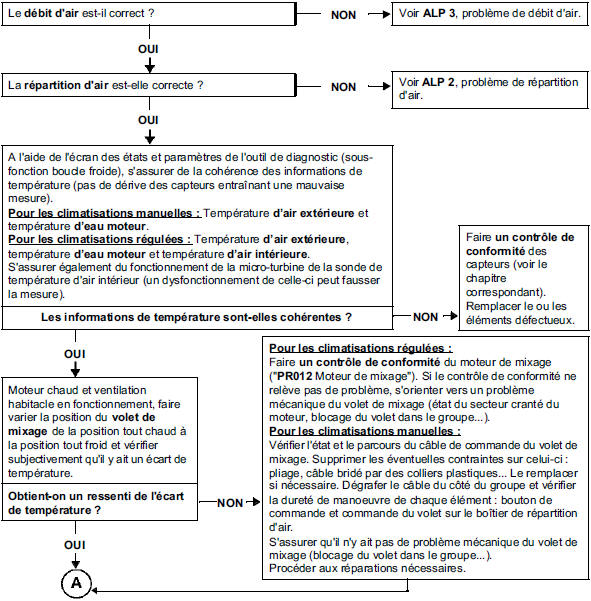
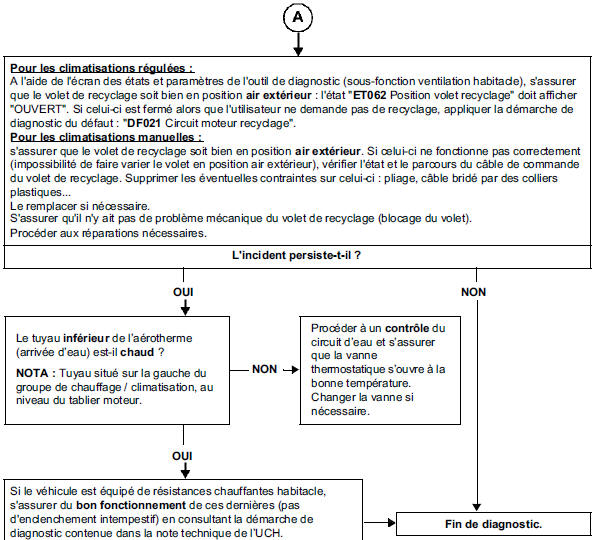
AFTER REPAIR
Carry out a full check with the diagnostic tool.
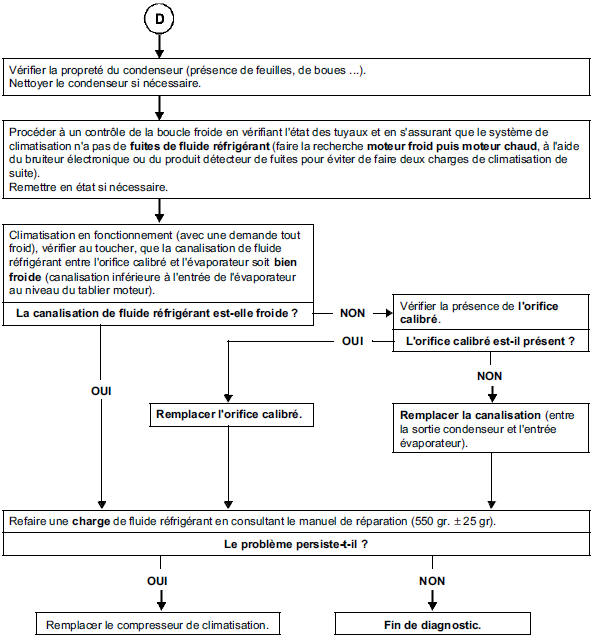
| ALP 8 | No cooling |
INSTRUCTIONS
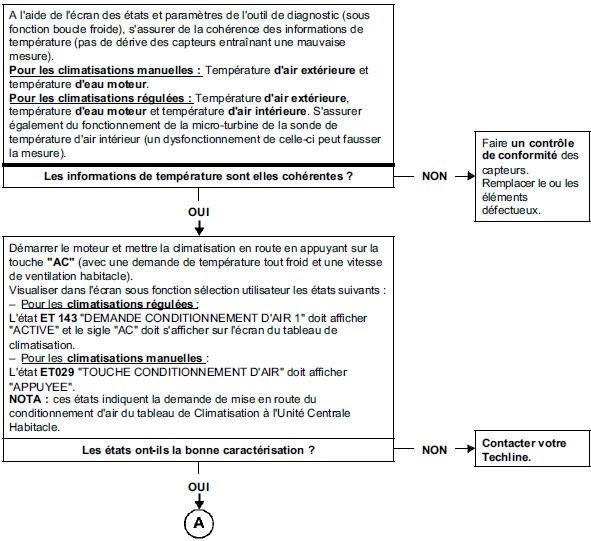
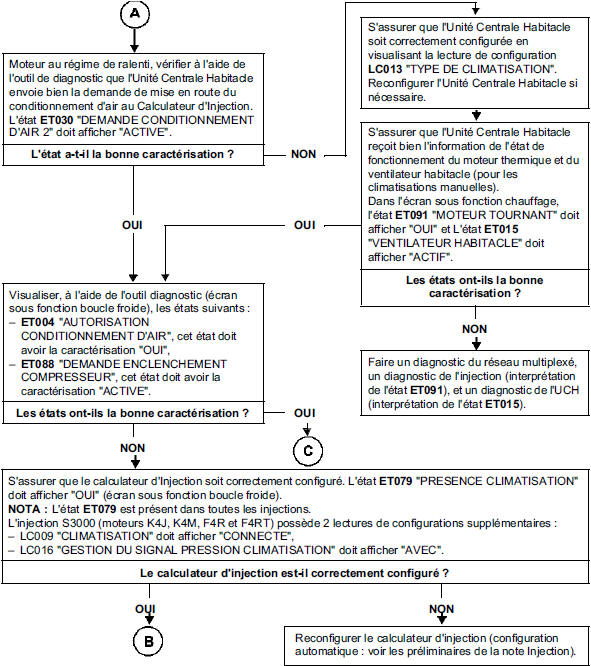
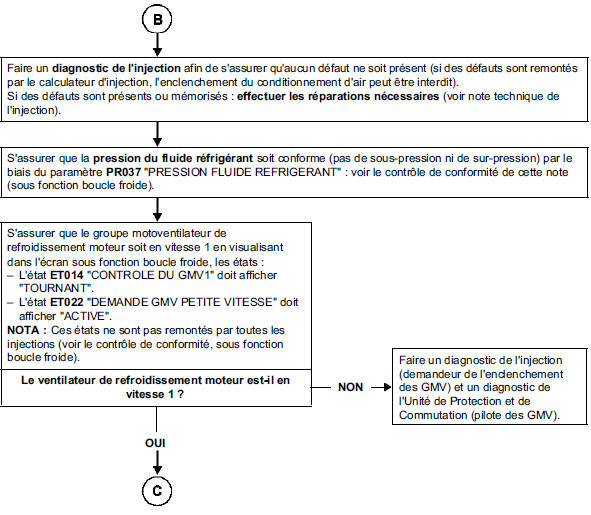
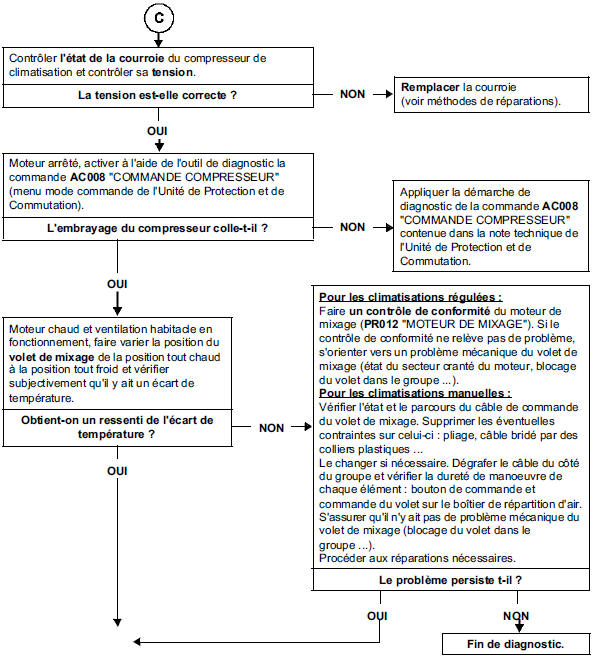
Only carry out this conformity check after a complete check with the diagnostic tool (reading of faults and verification of configurations).
AFTER REPAIR
Carry out a full check with the diagnostic tool.
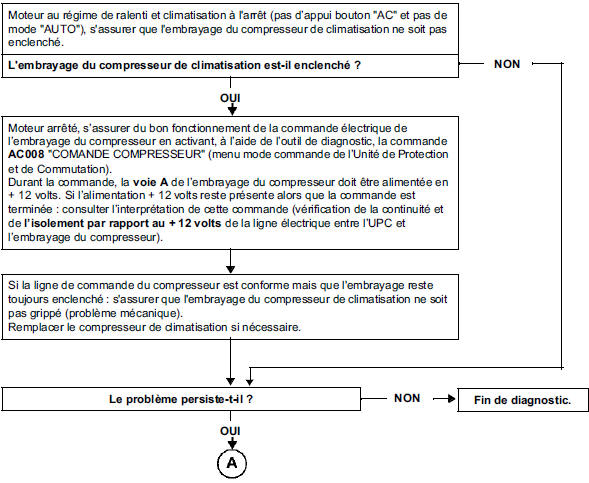
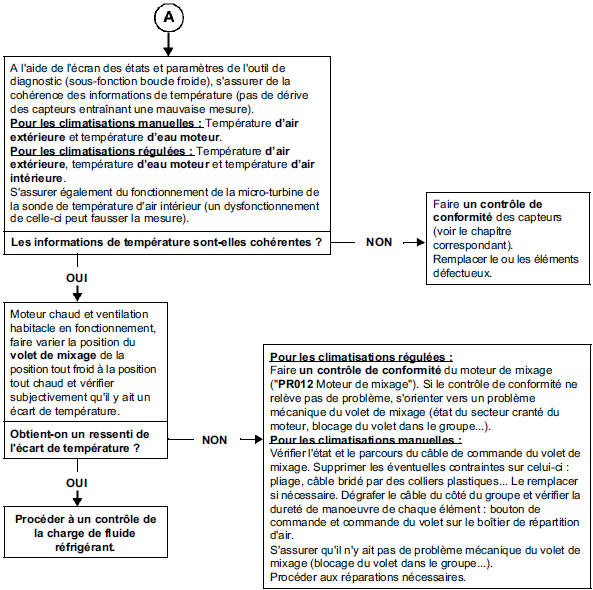
| ALP 9 | Too much cooling |
INSTRUCTIONS
Only consult this customer complaint after a complete check with the diagnostic tool (reading of faults and verification of configurations).
AFTER REPAIR
Carry out a full check with the diagnostic tool.
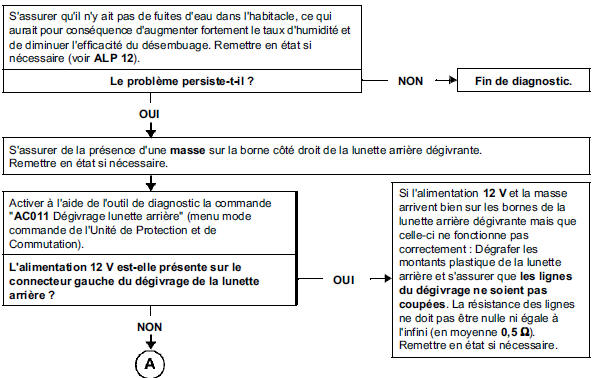
| ALP 10 | Insufficient rear window defrosting or demisting |
INSTRUCTIONS
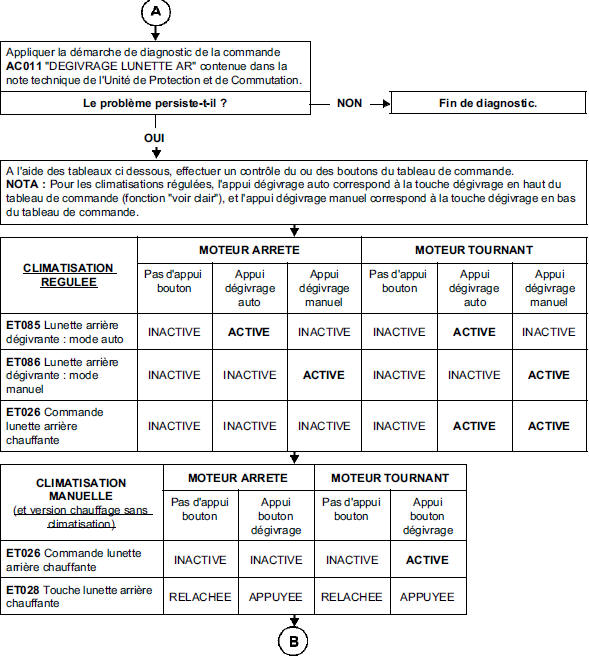
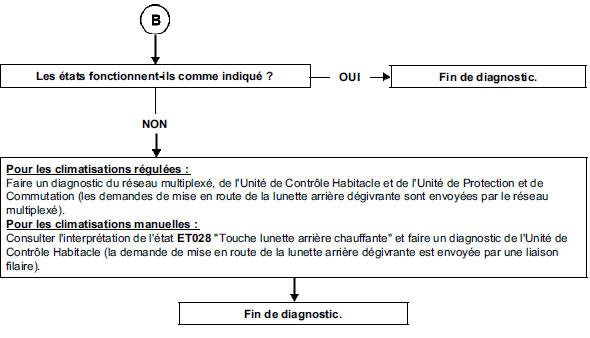
Only consult this customer complaint after a complete check with the diagnostic tool (reading of faults, in particular of the protection and switching unit, and verification of configurations).
Special features:
- Check that the windows are not greasy on the inside, as this would reduce the defrosting efficiency.
NOTE: For reasons of electrical consumption, the defrost control is only enabled with the engine running.
The rear window defrost control operates in two ways:
- A single press of the defrost button (at the bottom of the control panel) activates the rear window defroster in manual mode (with timer) and the mirror defrosting.
- A single press of the defrost button at the top of the control panel activates the "Clear view" function: rear window defroster in automatic mode (no timer), mirror defrosting, air conditioning engagement and windscreen ventilation at high speed.
AFTER REPAIR
Carry out a full check with the diagnostic tool.
| ALP 14 | Compressor noises |
INSTRUCTIONS
Only consult this customer complaint after a complete check with the diagnostic tool (reading of faults and verification of configurations).
| Make sure that the ECUs involved in the AIR CONDITIONING function (Injection, Protection and Switching Unit, Passenger Compartment Central Unit and Air Conditioning control panel) are correctly configured. Reconfigure if necessary (see the configurations chapter at the beginning of this manual). |
| Make sure that the compressor fitted to the vehicle matches the engine (see the table in the "Air conditioning function" note). Replace the compressor if necessary. |
| Check that the compressor belt is in good condition and check its tension (for engines without an automatic tensioner). Replace the belt if necessary. |
| Make sure that the compressor is correctly secured. Repair if necessary. |
| Check the refrigerant charge of 550 g ± 25 g and check for leaks, as a significant loss of fluid can cause compressor noise. Recharge if necessary. |
| If the problem persists, replace the air conditioning compressor. |
AFTER REPAIR
Carry out a full check with the diagnostic tool.
Test yourself
A quick Renault Megane quiz: every answer comes with an explanation and a link to the manual page.