Front seat frame
TIGHTENING TORQUES (in N.m) |
|
| M8 bolts | 25 |
| M10 nuts | 66 |
| Seat belt mountings | 21 |
| "Frame - slide" mountings | 21 |
| Anti-slide airbag bolts | 8 |

Before working on the airbag system, lock the electronic control unit using the diagnostic tools (see chapter 8).
WARNING:It is forbidden to handle pyrotechnic systems (pretensioners or airbags) near a heat source or flame, as this risks accidental deployment.
REMOVAL
Remove:
- the seat (see chapter 75A-A),
- the headrest.
TRIM REMOVAL
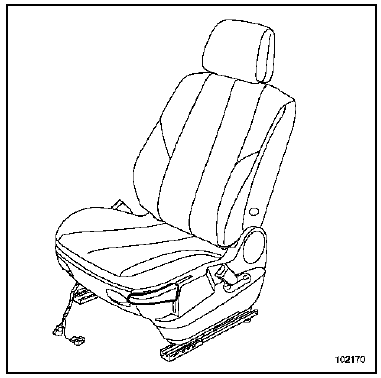
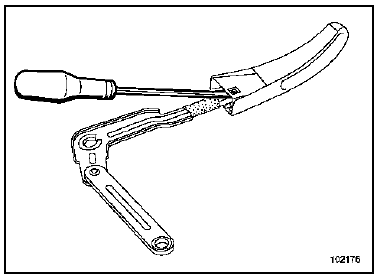
Unclip the seat cushion height adjustment handle using a flat-blade screwdriver.
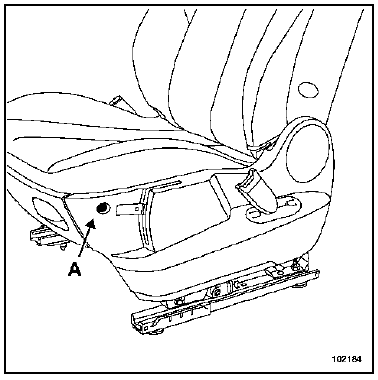
Remove the housing screw (A).
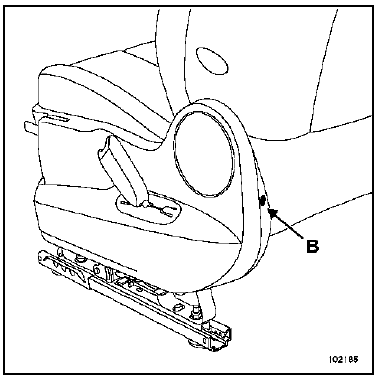
Remove the housing screw (B).
Release the housing.
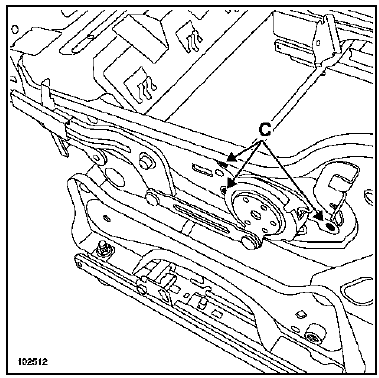
Set the seat cushion to the highest position (spring fully relaxed).
Remove:
- the rivets of the height adjustment mechanism (C),
- the mechanism and the control.
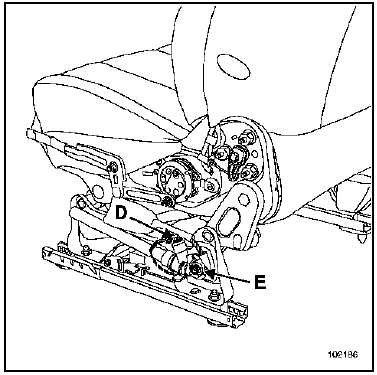
Disconnect the pretensioner connector (D).
Remove the pretensioner bolt (E).
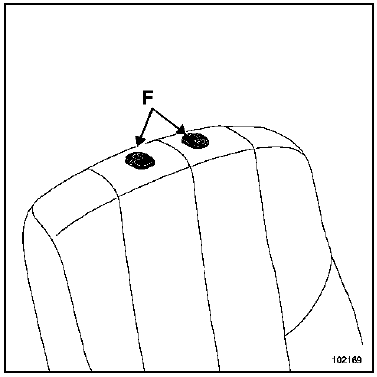
Remove the headrest guide covers (F).
Release the trim at the headrest guides.
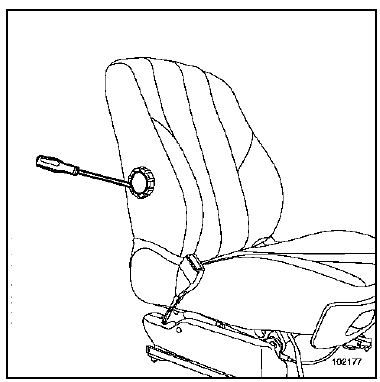
Remove the lumbar adjustment wheel mounting cover, using tool Car. 1597.
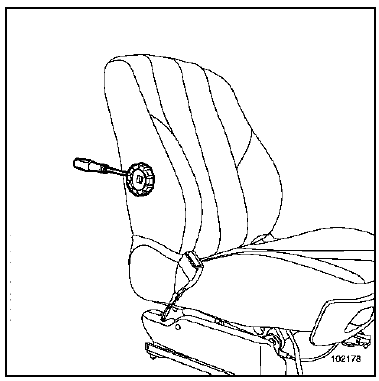
Remove the lumbar adjustment wheel, using a screwdriver.
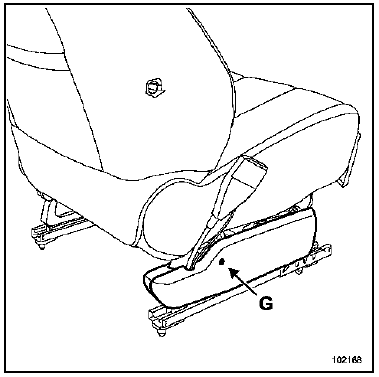
Remove the housing screw (G).
Release the housing.
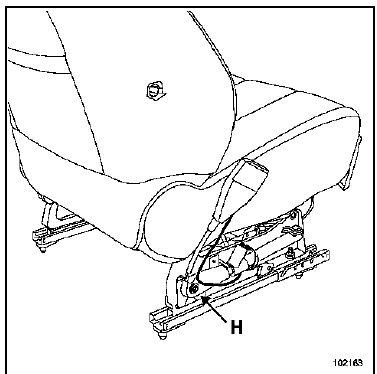
Disconnect the pretensioner connector.
Remove the pretensioner bolt (H).
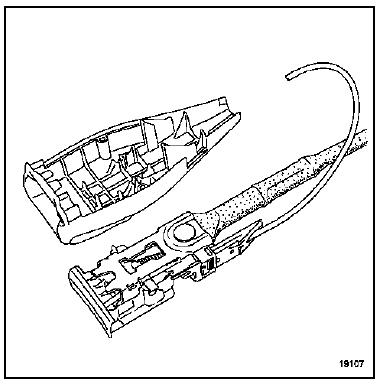
Seat belt connector special feature:
To unclip the connector, remove the mounting screws of the two buckle half-shells.
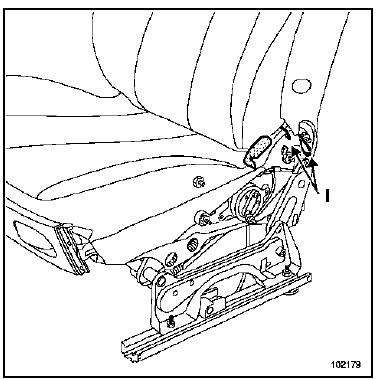
Remove:
- the trim cover elastics (I),
- the cover flap.
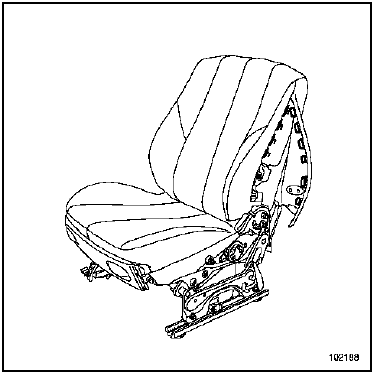
Unclip the cover clips at the airbag.
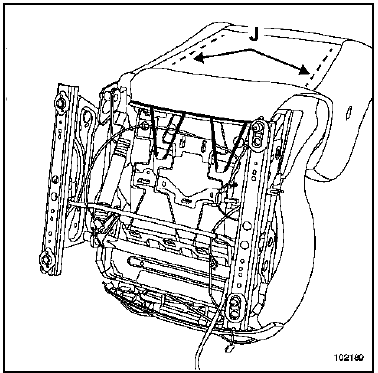
Release the lower retaining elastics of the seatback cover.
Unclip the rear retaining clips of the cover (J).
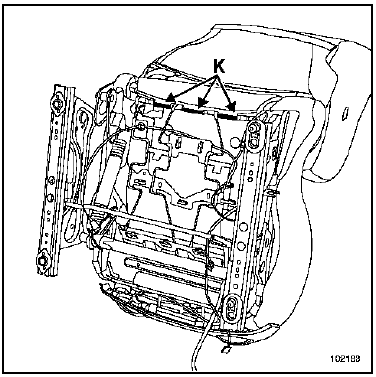
Remove the cover retaining strips (K).
WARNING:Carefully release the cover, holding the foam's velcro strips so as not to damage the seatback foam.
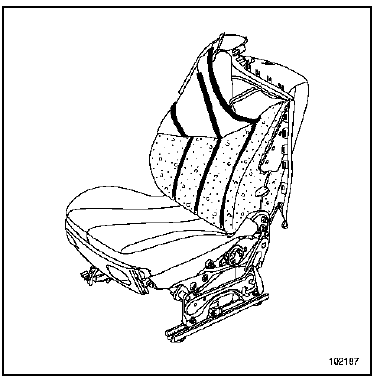
Carefully remove the seatback cover at the headrests.
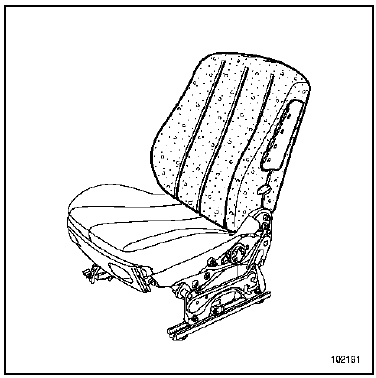
Remove the seatback foam.
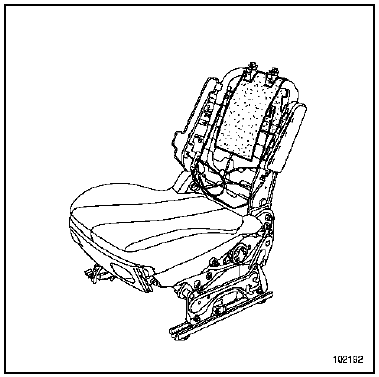
Release the seatback frame felt.
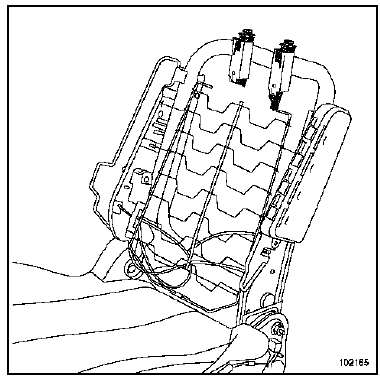
Remove the headrest guides.
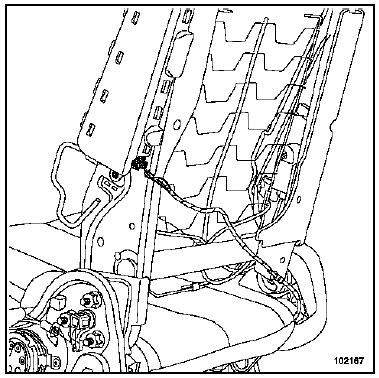
Disconnect:
- the connector,
- the airbag terminal.
Drill out the rivet.
Remove the airbag.
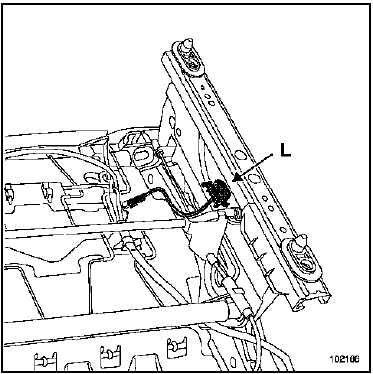
Disconnect the terminal.
Unclip the switch (L).
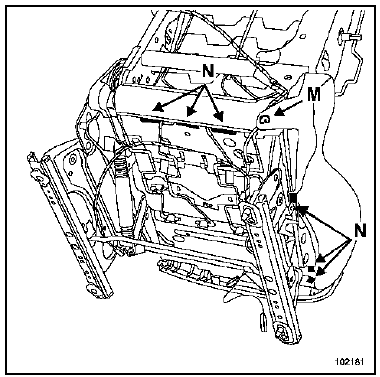
Remove the clip (M).
Release the cover retaining strips (N).
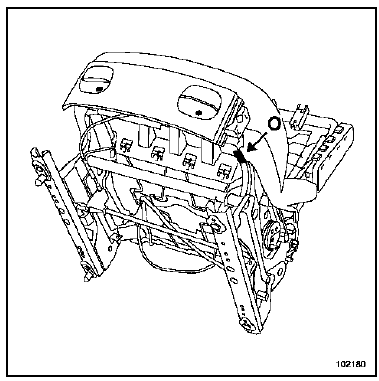
Release the cover retaining strip (O).
Remove the front housing screws.
WARNING:Carefully release the cover, holding the foam's velcro strips so as not to damage the seat cushion foam.
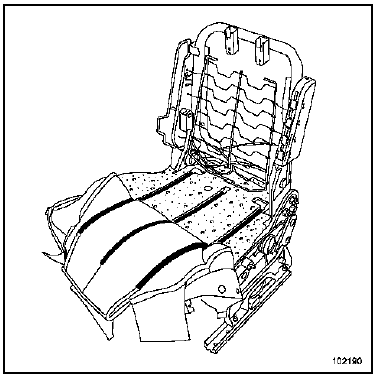
Carefully release the seat cushion cover.
Remove the seat cushion foam.
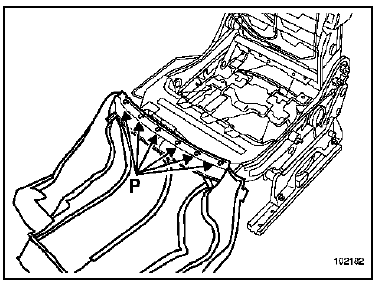
Unclip the cover clips (P).
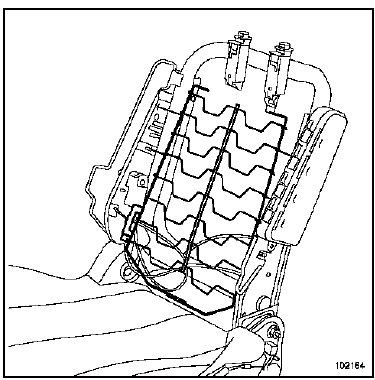
Remove the lumbar adjustment mechanism harness.
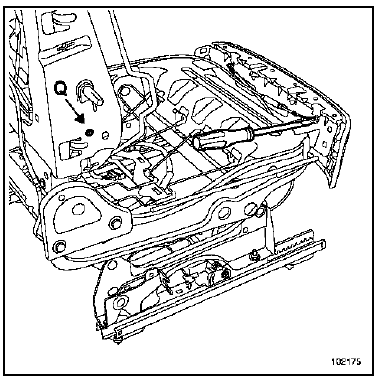
Remove the control cable sheath retainers.
Drill out the lumbar adjustment mechanism rivet (Q).
Remove the mechanism.
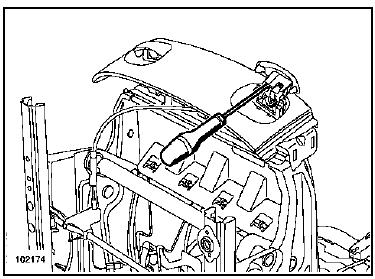
Remove the slide adjustment handle mounting screw.
Remove the handle.
Perform this operation also on the seatback recline handle.
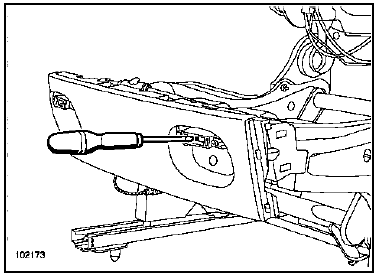
Release the cables from the unlocking controls.
Release the front housing.
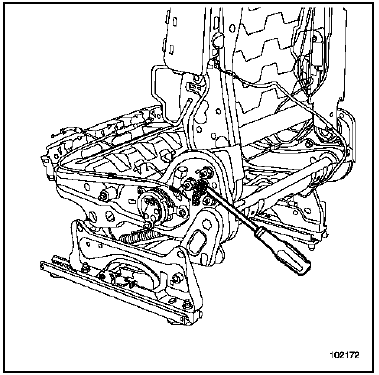
Unclip the seatback unlocking link.
Disengage the cable.
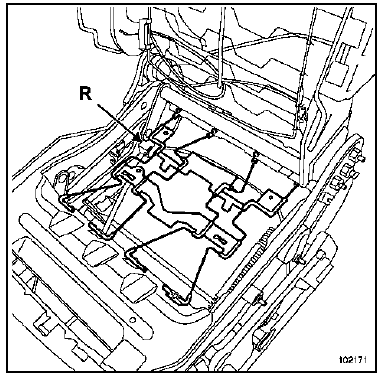
Unclip:
- the trim cover,
- the cable clips (R).
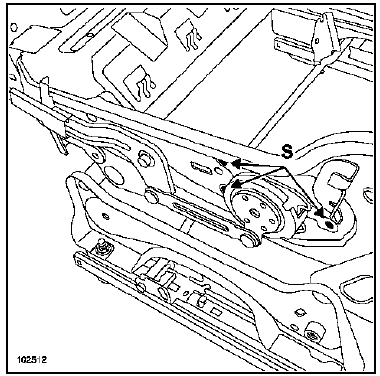
For a seat cushion height-adjustment mechanism replacement: The replacement part consists of the height-adjustment mechanism and the control.
Procedure:
- removal of the return spring is not necessary,
- set the seat cushion to the highest position (spring fully relaxed),
- drill out the three rivets (S),
- remove the mechanism and the control,
- clean the splines of the shaft.
Removing the "backrest-seat cushion" frames
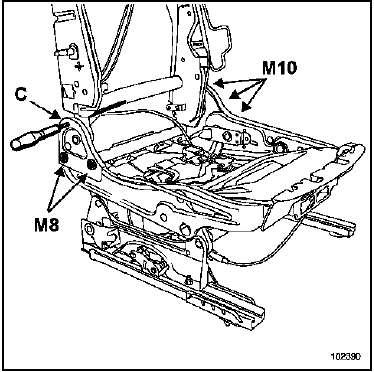
IMPORTANT:Insert a metal pin through the opening (A) on each side of the frame, strap it if necessary.
Check that it is holding before any handling.
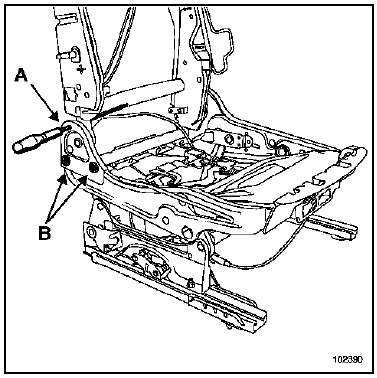
Remove the screws (B).
WARNING: Keep the pin in place during removal.
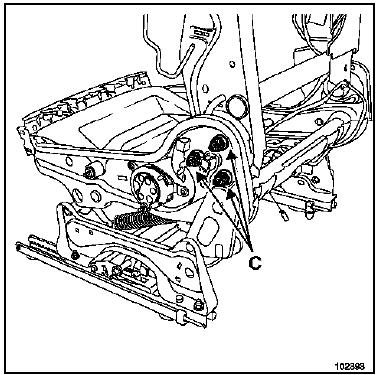
Remove:
- the screws (C),
- the backrest frame.
INSTALLATION
Adapting the replacement part for a backrest frame replacement on a 5-door version seat:
- the replacement backrest frame is a version C frame (3-door),
- a cutting operation is required on the backrest release mechanism support plate (see below).
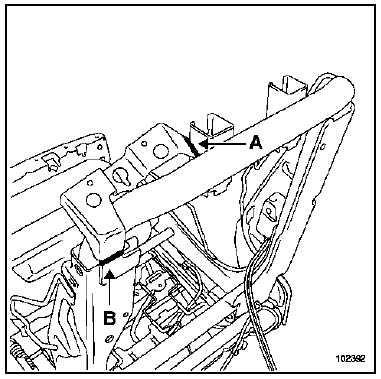
Cut the backrest release mechanism support plate along the markings (A) and (B).
Do not remove the plastic clip at (C).
Check that it is holding before any handling. If in doubt, place a pin on each side of the frames (C).
Pre-tightening and tightening of the frame fasteners:
- pre-tighten the three M10 nuts to 20 N.m,
- pre-tighten the two M8 screws,
- tighten the M10 nuts to 66 N.m,
- tighten the M8 screws to 25 N.m.
Cut the plastic clip at (C).
Refit the seat trim.
Refit in the reverse order of removal.
Tighten to torque.
Specifics for the 3-door version seat
Removal is identical to the 5-door version seat, except for the specifics below:
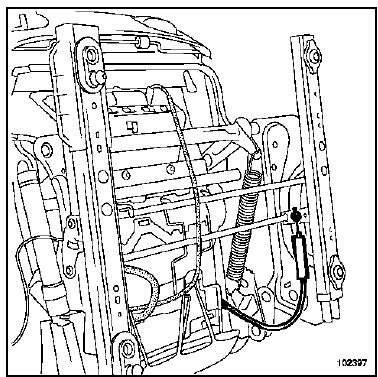
Unclip the cable clip to free the backrest release control.
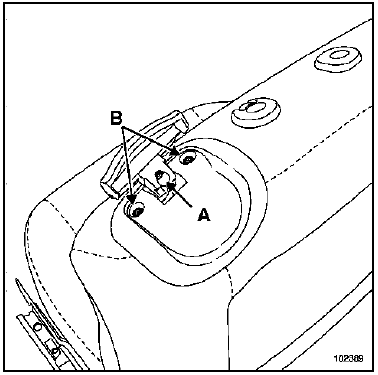
Remove:
- the handle screw (A),
- the handle trim screws (B).
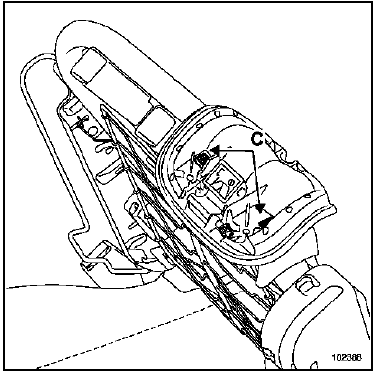
Disengage the cable stop from the backrest release mechanism.
Using a screwdriver, unclip the mechanism bracket (C).
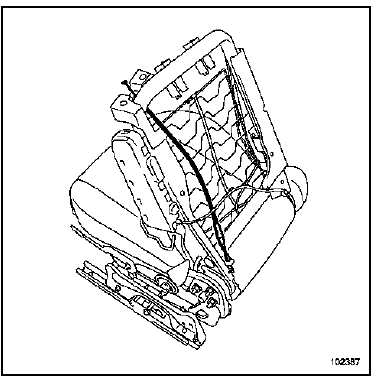
Unclip the cable clips.
Disengage the cable.
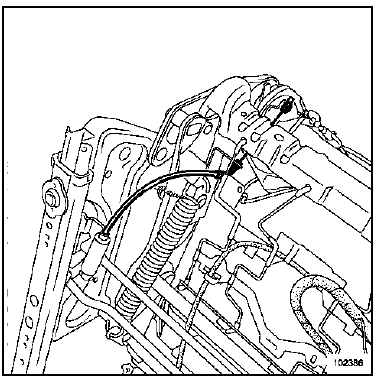
Unclip the cable clips.
Disengage the cable from the seat slide adjustment mechanism.
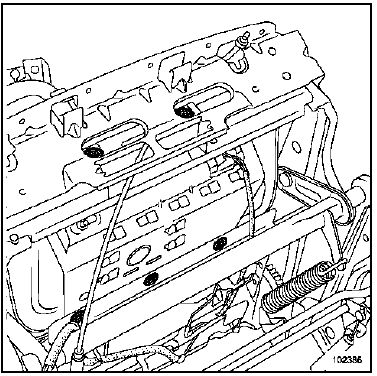
Remove the anti-slide airbag fixing screws.
INSTALLATION
Specific point for refitting the anti-slide airbag:
TIGHTENING TORQUE (in N.m) |
|
| Anti-slide airbag fixing screws | 8 |

Tightening sequence for the screws:
- the front left screw,
- the front right screw,
- the rear centre screw,
- the two rear outer screws.
Refit in the reverse order of removal.
WARNING:Before refitting the backrest cover, check that the Velcro strips are bonded to the backrest foam.
Test yourself
A quick Renault Megane quiz: every answer comes with an explanation and a link to the manual page.