Tailgate
Replacing this part is:
- a basic operation for a rear collision affecting only the tailgate,
- an additional operation when replacing the body or a complete rear wing panel.
The method described below covers the complete replacement, including the removal and refitting operations.
NOTE: It is recommended to also order a set of clips, available from the spare parts store.
This procedure requires two operators.
All gap and flush specifications are given in chapter 40A-E.
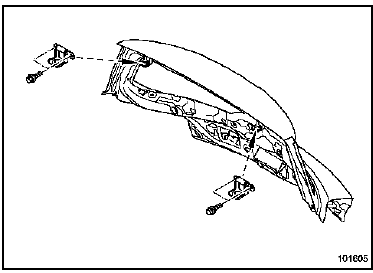
REMINDER: Before final refitting, the seal at the hinge seats must be redone with sealing putty (refer to Technical Note 396A).
REPLACEMENT PART CONTENTS
Part supplied alone.
EMERGENCY OPENING
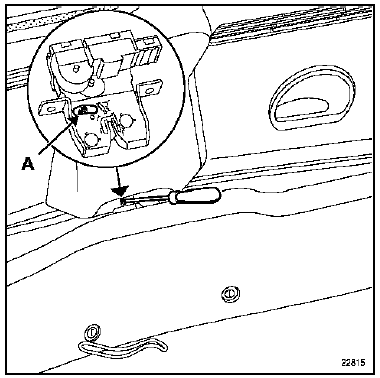
REMINDER: In the event of an electrical failure, the tailgate can be opened manually.
Unlock the tailgate lock using a screwdriver by pushing on the lug (A).
This operation is carried out from inside the vehicle.
1. TAILGATE TRIM REMOVAL AND REFITTING
The order of operations described below is specific to tailgate replacement.
For the specifics of removing each part fixed to the door, refer to the respective sections (example: window regulator mechanism, see section 51A).
REMOVAL
Disconnect the battery.
Carry out the trim removal operations in the following order.
Remove:
- the interior trim panels
- the 3rd brake light
- the wiper mechanism
- the monogram badge
- the lock
- the fuse strip
- the window
1. Removing the interior trim panels
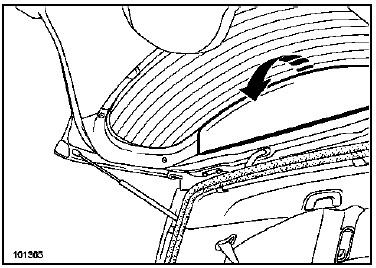
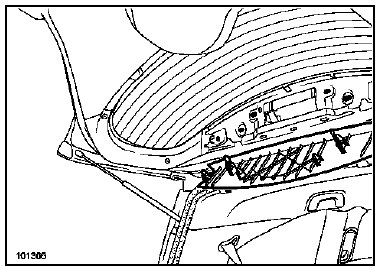
Unclip the upper trim panel by pulling it.
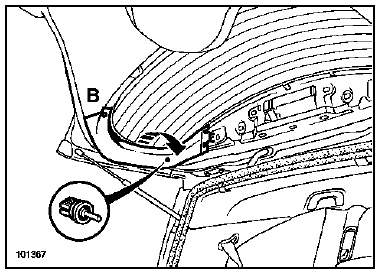
Remove the screw (B).
NOTE: If the rear shelf retaining pin is damaged, it is available separately as a spare part and can be replaced on its own.
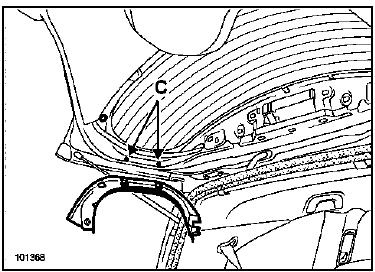
Unclip the two side trim panels at the two lower clips (C).
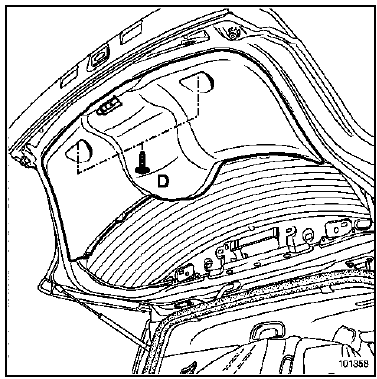
Remove the two screws (D).
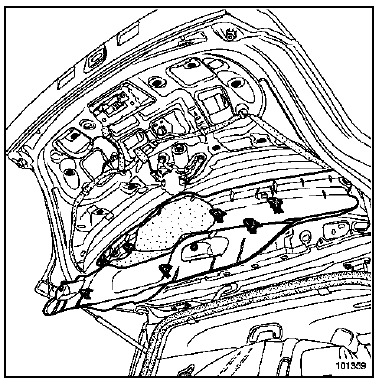
Unclip the lower centre trim panel.
2. Removing the 3rd brake light
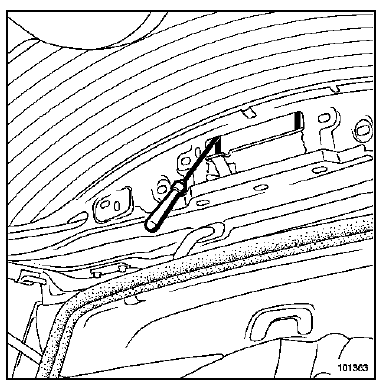
Unclip the light from inside, using a flat-blade screwdriver at the two metal clips.
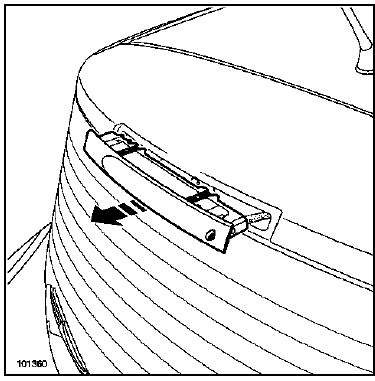
Pull the light out from the outside.
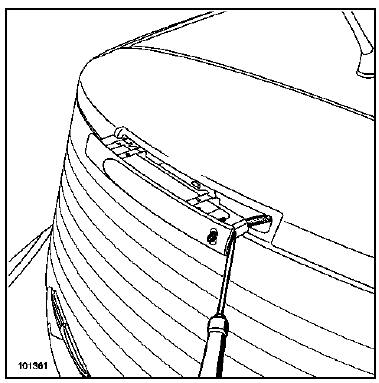
Unclip the washer jet (two clips) using a flat-blade screwdriver.
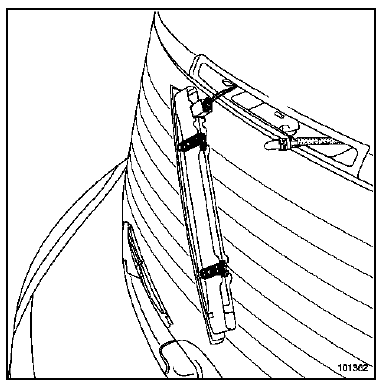
Disconnect the harness.
Remove the light.
3. Removing the wiper motor
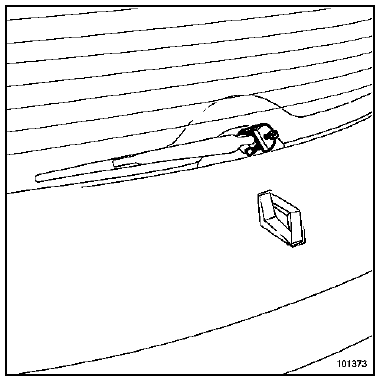
Remove the nut and release the wiper arm using tool Elé. 1294.
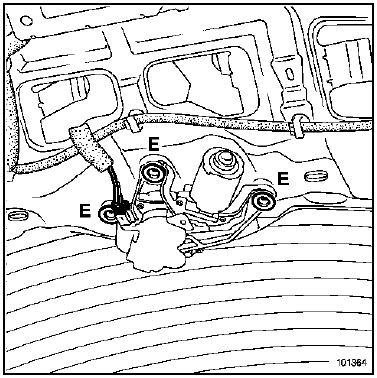
Disconnect the harness.
Drill out the motor mounting rivets (E).
Remove the motor.
WARNING: When refitting, use the specific rivets, part number: 77 03 072 362.
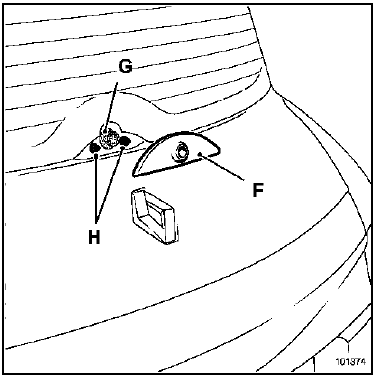
Remove:
- the arm trim cover (F),
- the base rubber seal (G),
- the two arm trim cover fixing clips from inside the body panel (H).
WARNING:
When refitting, replace the base rubber seal (G) with a new one to ensure watertightness.
4. Removing the monogram badge
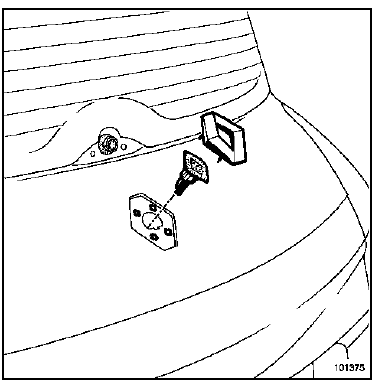
Unclip the monogram badge using tool Car. 1597.
Disconnect the harness from the base.
Remove the fixing clips.
NOTE:
On vehicles fitted with the "hands-free" function, it is preferable to unclip the central switch from inside the tailgate.
WARNING:
When refitting, it is recommended to replace the monogram badge fixing clips.
On vehicles not fitted with the "hands-free" switch, fit the centre cover on the monogram badge before refitting the assembly.
5. Removing the lock
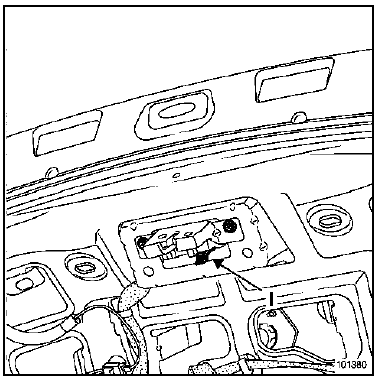
Remove the two fixings.
Release the lock from the lower clip (I).
Disconnect the harness.
6. Removing the fuse strip
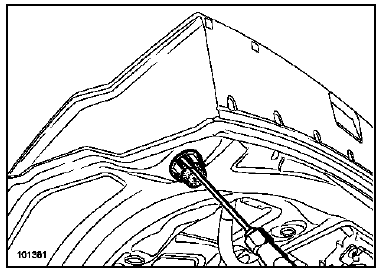
Remove the two side stops using a flat-blade screwdriver.
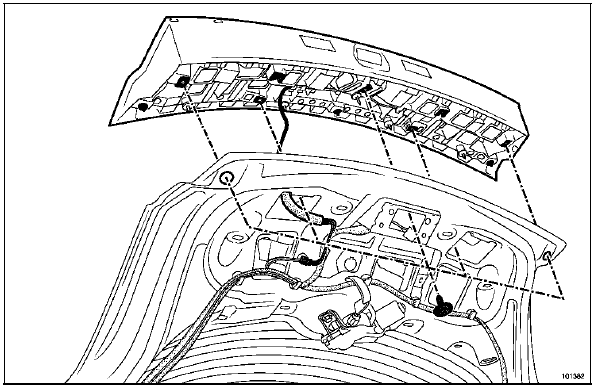
Disconnect the harness.
Remove the five fixing screws.
Unclip the fuse strip.
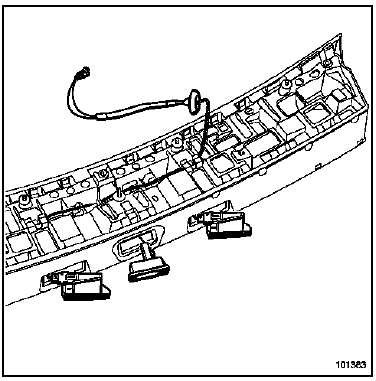
If necessary, remove the number plate lights and the harness.
Remove the opening control.
Disconnect the harness.
7. Removing the window
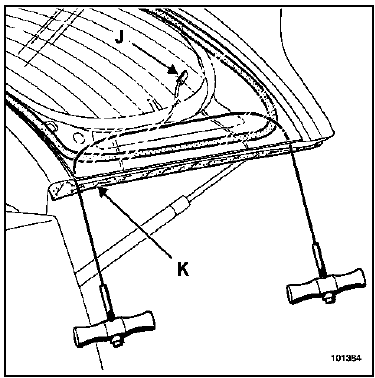
Disconnect the demister connections (J).
Protect the side seals (K) with masking tape.
Remove the window.
WARNING: When cutting, make sure the wire runs under the demister connections (J) so they are not cut.
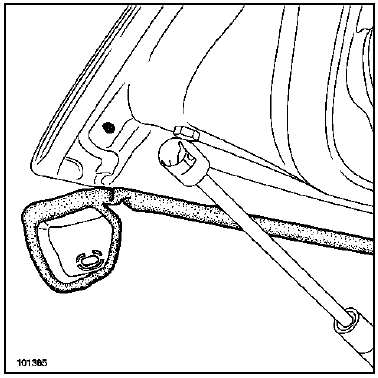
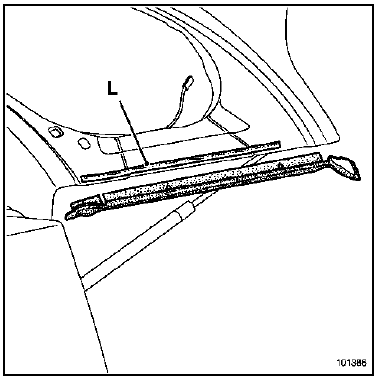
Unclip the lower seal and carefully peel it off.
NOTE: When refitting, replace the adhesive tape (L), or replace the seals if they have been damaged.
8. Removing the tailgate
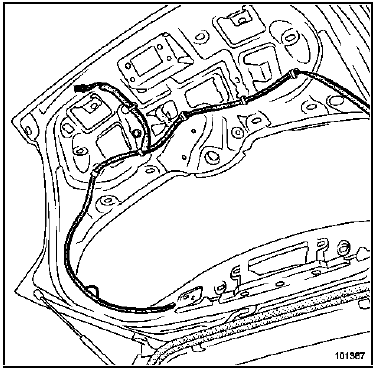
Remove the harness and the washer hose.
Replace the various fixing clips with those supplied in the tailgate clip kit, or reuse the original clips from the body.
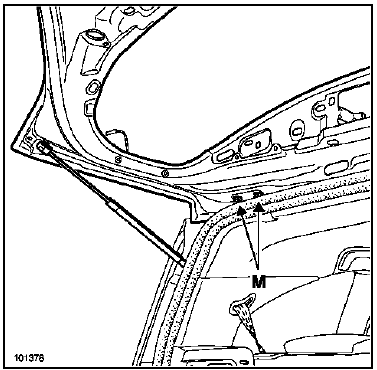
Remove:
- the gas struts,
- the tailgate by the upper hinge fixings (M).
NOTE: The tailgate can also be removed using the lower tailgate fixings.
In this case, partial removal of the roof trim is required.
INSTALLATION
Refit in the reverse order of removal.
Observe the pre-fitting specifics described for the components below. Carry out the adjustment following the instructions at the end of this chapter.
WARNING: Connect the battery; carry out the necessary relearning procedures (see chapter 8).
Refitting the backlight
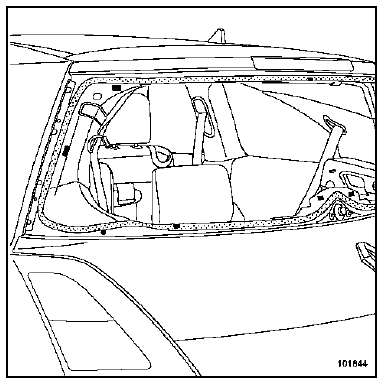
CAUTION: Check the position of the various shims.
These must always be replaced.
REMINDER: For preparation and bonding of the backlight, refer to Technical Note 560A.
Refitting the wiper mechanism
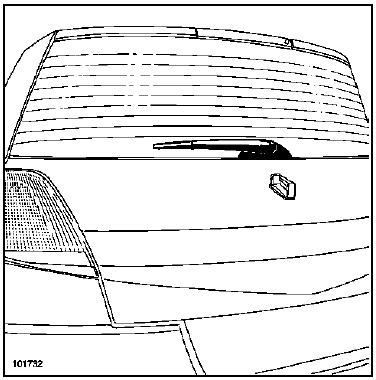
REMINDER:
- Replace the base rubber with a new one to ensure a seal,
- Use the specific rivets, part number: 77 03 072 362.
CAUTION: Before tightening the wiper arm onto its spindle (see position on diagram), make sure the motor is in the "stop-fixed" position.
ADJUSTMENT
Adjustment zones
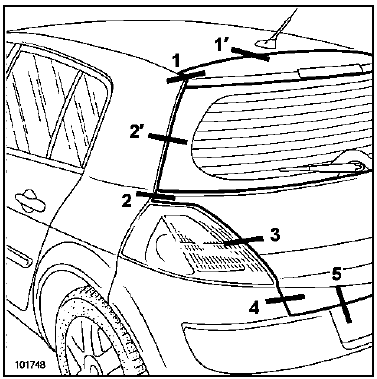
PREPARATION BEFORE REFITTING
On vehicle
Remove:
- the inner sill trim,
- the striker plate.
Refit the rear lights.
On the replacement tailgate, fit:
- the lock,
- the side centring stops,
- the fuse panel.
INSTALLING THE RETURN ELEMENT:
Before final refitting, the seal between the front pillar and the hinges must be remade using filler sealant (see Technical Note 396A).
Bring all fixings close without tightening.
This procedure requires two operators.
Refit the balancers.
Adjustment procedure
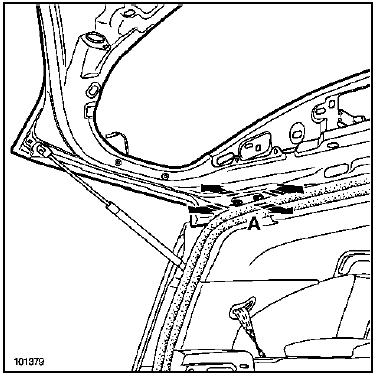
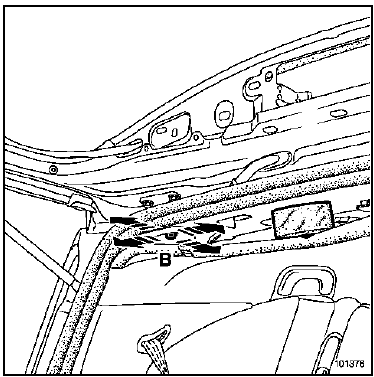
All gap adjustments of the element (zones 1 to 5, see "adjustment zones") are made at the hinge mounting bolts (A) and (B).
Check the adjustments and pre-tighten in position.
Final adjustment
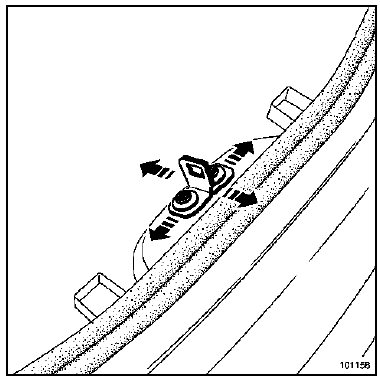
Adjust the tailgate gap and flush fit at the lower part of zones 3, 4 and 5 (see adjustment zone diagram in "adjustment zones") using the striker plate bolts.
CAUTION: There is no adjustment possible on the tailgate lock.
The striker and lock must engage optimally (self-centring) to avoid any bottoming out.
During this operation, if necessary, the light adjustment can be modified.
Check the adjustments and tighten in position.
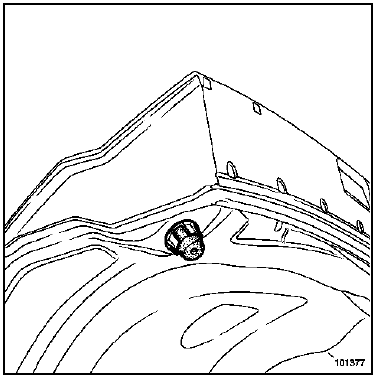
REMINDER: In the closed position, the stops must rest against the body.
Test yourself
A quick Renault Megane quiz: every answer comes with an explanation and a link to the manual page.