Body (Interior and Exterior)
Front Seat Assembly Repair Procedures
In this manual: Body (Interior and Exterior)
4steps
~24min
2/5difficulty
Done 0 of 4
Replacement
|

- Remove the front anchor seat belt. (Refer to Retractor - "EFD (Emergency Fastening Device) System").
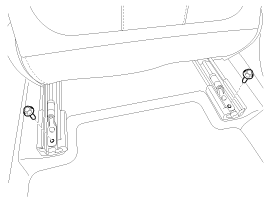
- Loosen the mounting bolts and remove the front seat assembly.
Tightening Torque: 49.0 ~ 64 N·m
[Front]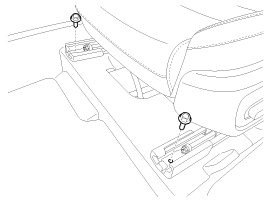
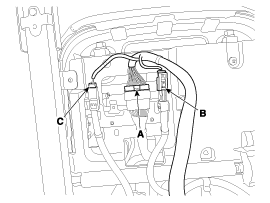
- Disconnect the main connector (A), side airbag connector (B), and front seat belt lock connector (C). [Driver]
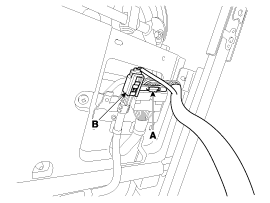
- Install in the reverse order of removal.
SEAT MOUNTING BOLT INSTALLATION PROCEDURE
- Move the seat to the fully rearward position. Make sure each slider is locked, then temporarily tighten the front mounting bolt.
- Move the seat to the most forward position. Make sure all slides are locked, then fully tighten the rear mounting bolt.
- Move the seat to the most rearward position. Fully tighten the front mounting bolt.
- Make sure the seat moves smoothly forward and rearward and that the locking part engages securely.
Test yourself
A quick Hyundai Sonata LF quiz: every answer comes with an explanation and a link to the manual page.
Was this page helpful?