Transmission / transaxle
Clutch lifter pin inspection and adjustment
In this manual: Transmission / transaxle
3steps
~18min
2/5difficulty
Done 0 of 3
Refer to “clutch removal” and “clutch installation” .
Notewhen inspection and adjusting the clutch lifter pin, it is not necessary to install the clutch onto the countershaft.
Inspect and adjust the clutch lifter pin in the following procedures:
- assemble the following parts into the primary driven gear assembly.
- Clutch sleeve hub
- spring washer seat, spring washer
- clutch drive plates, clutch driven plates
- pressure plate
- clutch springs, clutch springs set bolts
Note tighten the clutch spring set bolt little by little and diagonally.
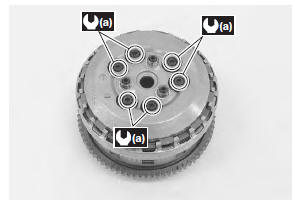
- Remove the clutch assembly from the primary driven gear assembly.
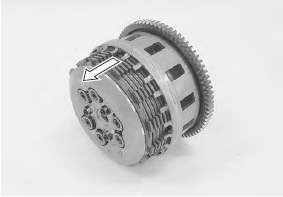
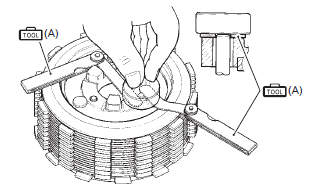
- Inspect the height “a” of clutch lifter pin at three positions using the thickness gauge. If the measurement is out of the specification, adjust the height “a” as shown in the figure.
 : 09900–20803 (thickness gauge)
Clutch lifter pin height “a” standard: 0.2 – 0.4 Mm (0.008 – 0.016 In)

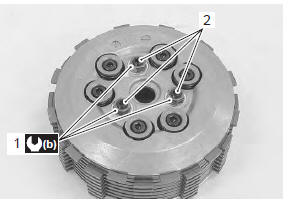
- Loosen the lock-nuts (1) and turn out the clutch lifter pin (2).
Note each clutch lifter pin height should be as closely as possible.

- Set the thickness gauge to 0.3 Mm (0.012 In).
 (a): 09900–20803 (thickness gauge)
- Place a proper flat plate on the thickness gauges and hold them by hand.
- Slowly turn in the clutch lifter pin (2) until resistance is felt.
- Tighten the lock-nut (1).
Test yourself
A quick Suzuki GSX-R 1000 quiz: every answer comes with an explanation and a link to the manual page.
Was this page helpful?